The screenshots were taken from the Hungarian demo interface; button and field names appear according to your own language setting.
1. Viewing the list and the actions available for an RMA
Click Main menu / Sales / RMA / List to see all RMAs created so far. Above the table, on the Actions tab, you will find the buttons to work with the selected RMA (until you select a row, most buttons are grayed out):
- New: create a new RMA on an empty form. If you start it from an existing order or invoice, you can take over the returnable items from the source document.
- Open: open the selected RMA to view or edit the header data and the items. The data can be edited until the Accepted, awaiting parcel status; after that only the internal comment and the inspection can be changed.
- Close: finalize the document — available only for Draft RMAs. From the arrow next to the button you can also choose Close and print or Close and download.
- Delete: delete (cancel) the RMA, or use the Delete and copy option to delete it and create a copy in one step. Draft and Closed documents can be deleted; deletion cannot be undone.
- History: view the documents related to the selected RMA (e.g. source invoice, goods receipt, credit invoice).
- Send email: send the selected RMA by email — available only for closed documents.
- Download: export the list or the selected RMA. The List operation group contains XLSX list and XLSX item list, the Document operation group contains XLSX items and XLSX serial number list; you can also download the PDF, the PDF preview and the Download attachments option. The final PDF is available only for closed documents, the preview for drafts as well.
- Print: use the Document option to print the RMA itself, or the Product label option to print the product labels of the items.
- Rma actions: the steps of the RMA process (Change status, Receive, Inspection, Document management) — described in detail in step 2.
- Transport organization: create a new parcel label for the return or for forwarding the returned goods (New parcel label), or check the labels already recorded (Parcel labels).
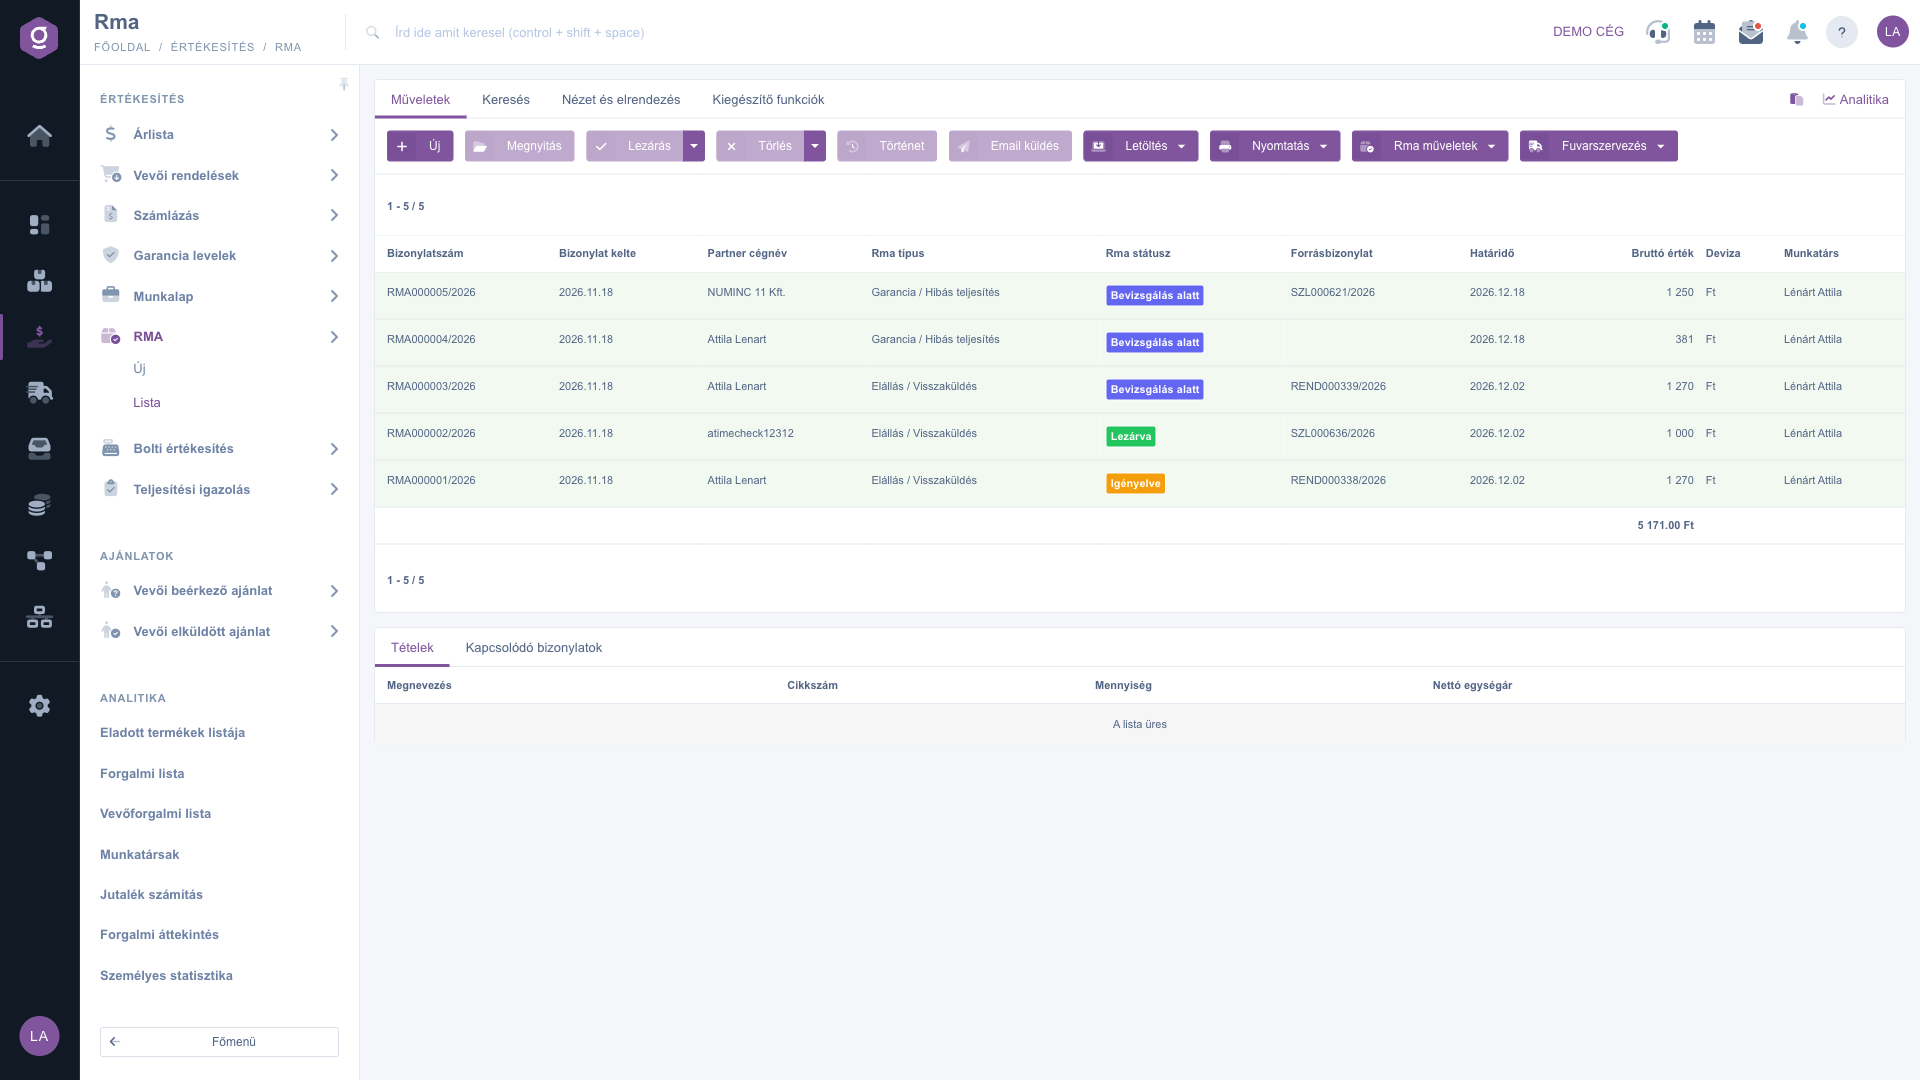
RMA list – Actions tab and the table of RMAs
2. Taking an RMA through the process
A typical RMA goes through: Requested → Accepted, awaiting parcel → Received → Under inspection → Inspected → Closed. Rejected and Withdrawn end the case early. An RMA of type Undelivered parcel starts in the Received status (the parcel has already come back), so it has no request and no receiving step. Select a row in the table, then open the Rma actions button:
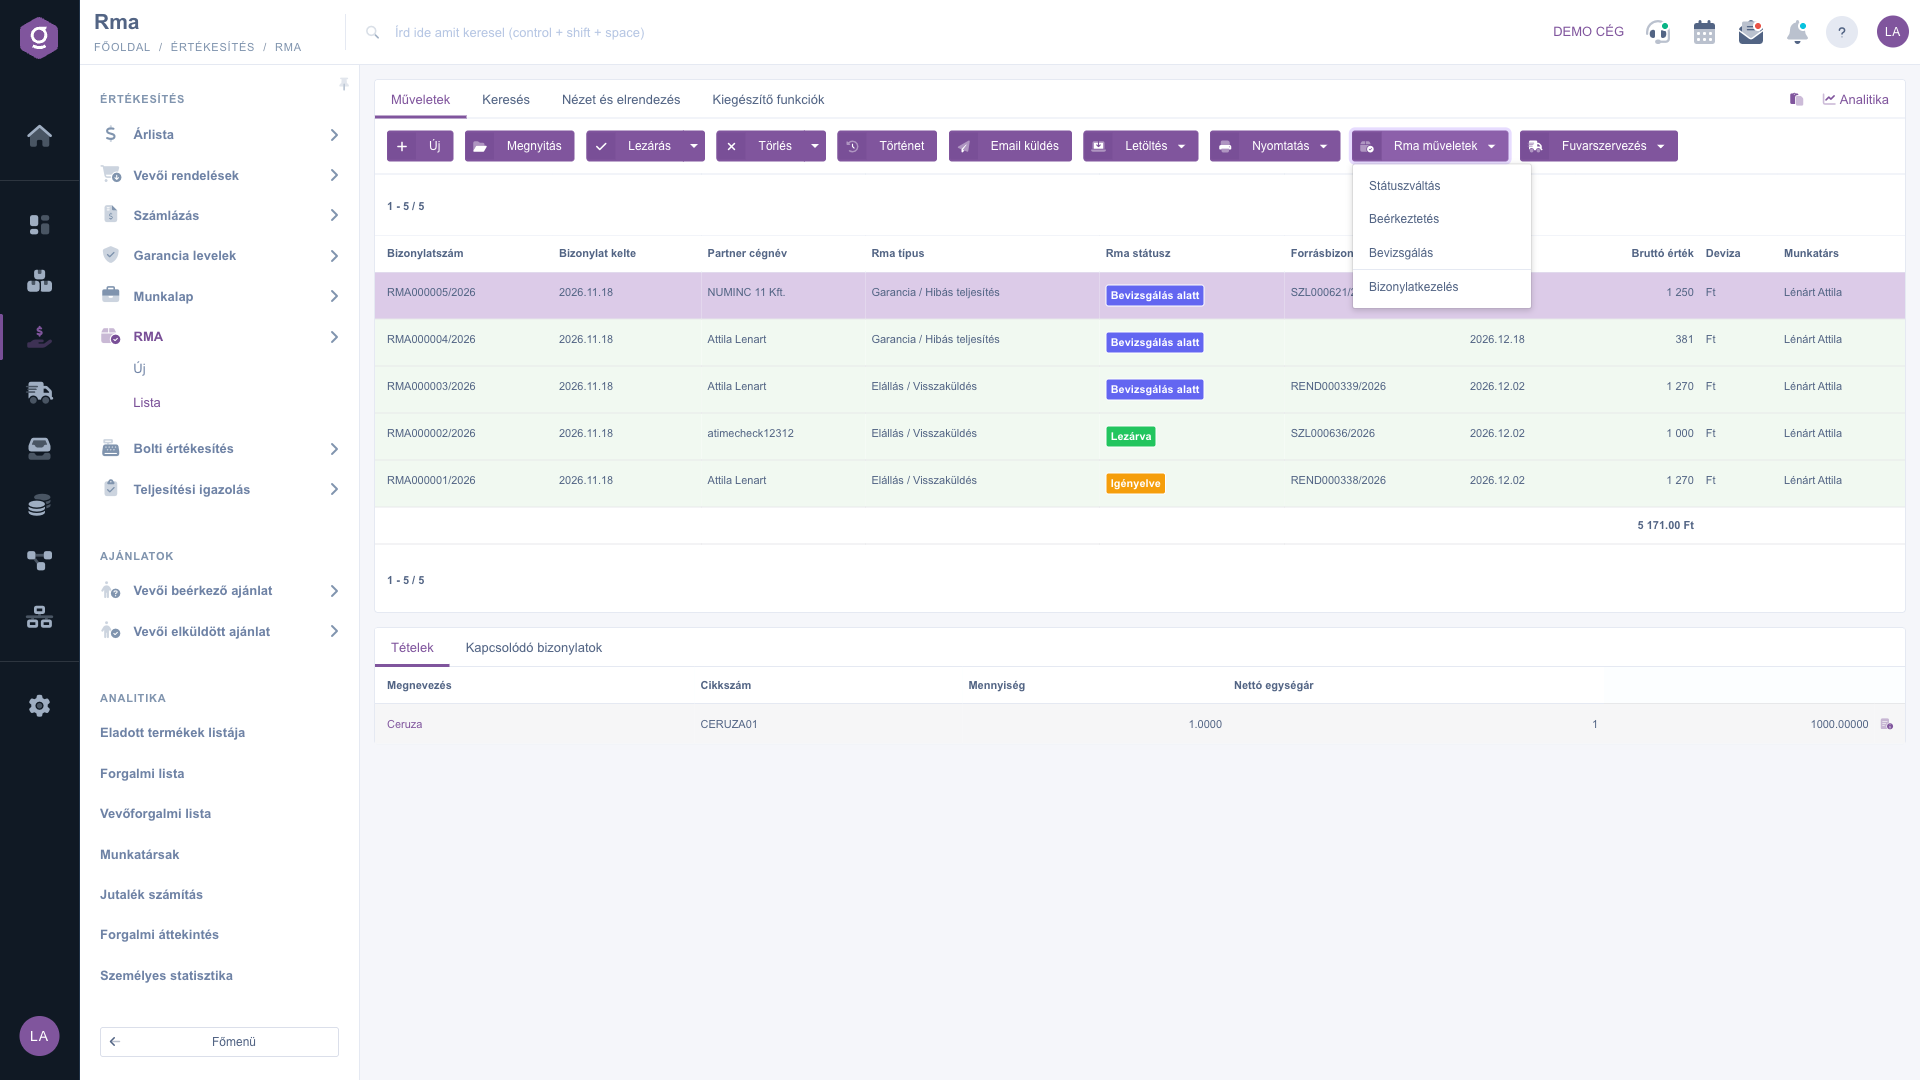
RMA list – the Rma actions menu for the selected RMA
Change status
Change status shows which statuses the RMA can move to from its current status and type — only these are offered, so you cannot proceed in the wrong order. Choose the desired status, optionally write a Comment in the window that appears, then click Save; the change is recorded in the status history of the RMA. For the Rejected status the Rejection reason field is mandatory. You can move to Inspected only after the inspection has been completed for every item (see below). If you choose Received, the system opens the Receive window.
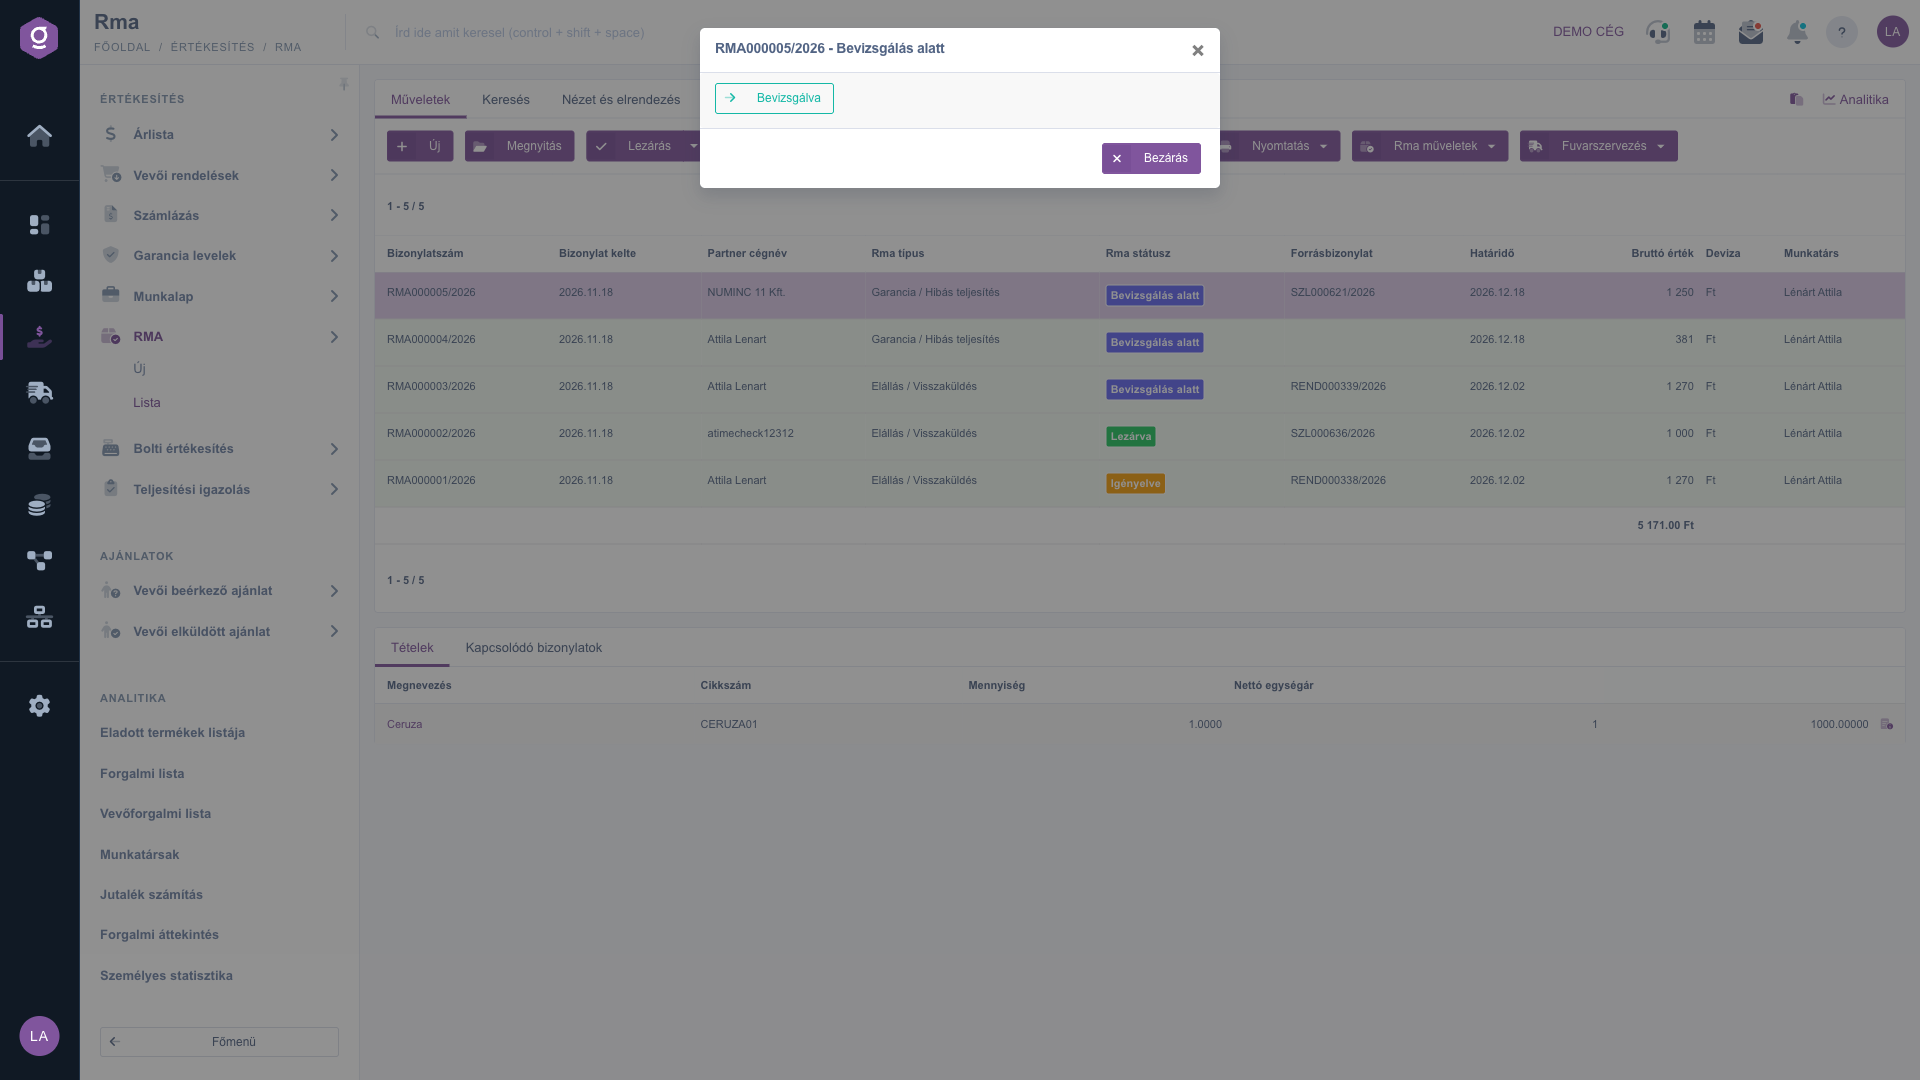
RMA list – Change status: the next selectable statuses
Receive
Use it when the returned parcel has arrived at the warehouse. In the Receive window you can enter the quantity actually Received for each item (the Requested quantity is pre-filled — change it if less or more arrived) and write a Comment. When you save, the system books the received quantity into stock at the return goods location (with a closed goods receipt document) and the RMA moves to the Received status. Only an RMA in the Accepted, awaiting parcel status can be received.
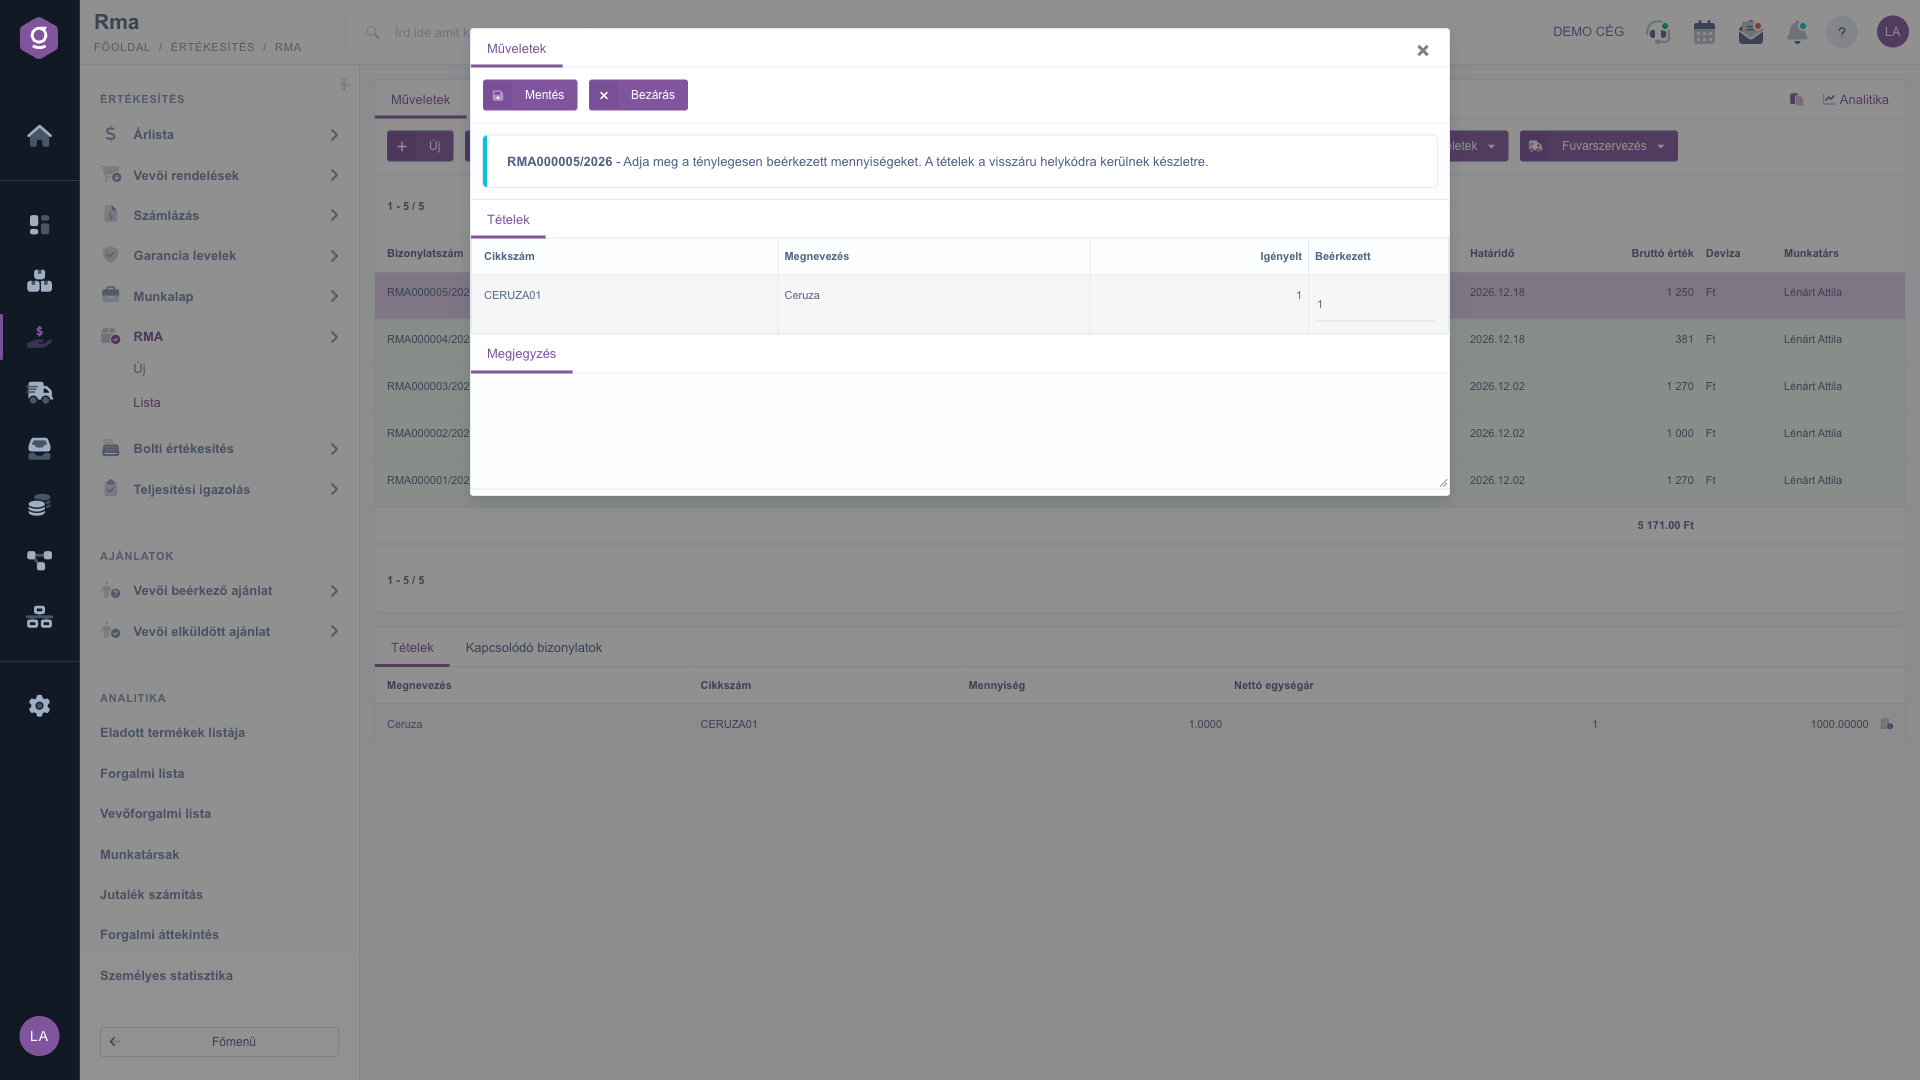
RMA list – Receive window: requested and received quantity
Inspection
In the Inspection window you record, item by item, what was found on the returned product. On the first save a Received RMA automatically moves to Under inspection; you can continue and modify the inspection later. The fields available for each item:
- Received and Accepted: the quantity actually received and the quantity accepted in favor of the customer. The accepted quantity cannot exceed the received quantity.
- Condition: the condition of the product (e.g. Unopened, new, Used, Damaged).
- Real cause of the fault: Genuine defect, Customer damage, No fault found or Other — this decides whether the claim is justified.
- Resolution: what the customer gets: Refund, Replacement, Repair, Store credit, Price reduction or Rejection.
- Disposition: what happens to the returned product: Back to stock, Outlet, Scrap, Return to supplier or Return to customer.
- Comment: a free-text note for the item.
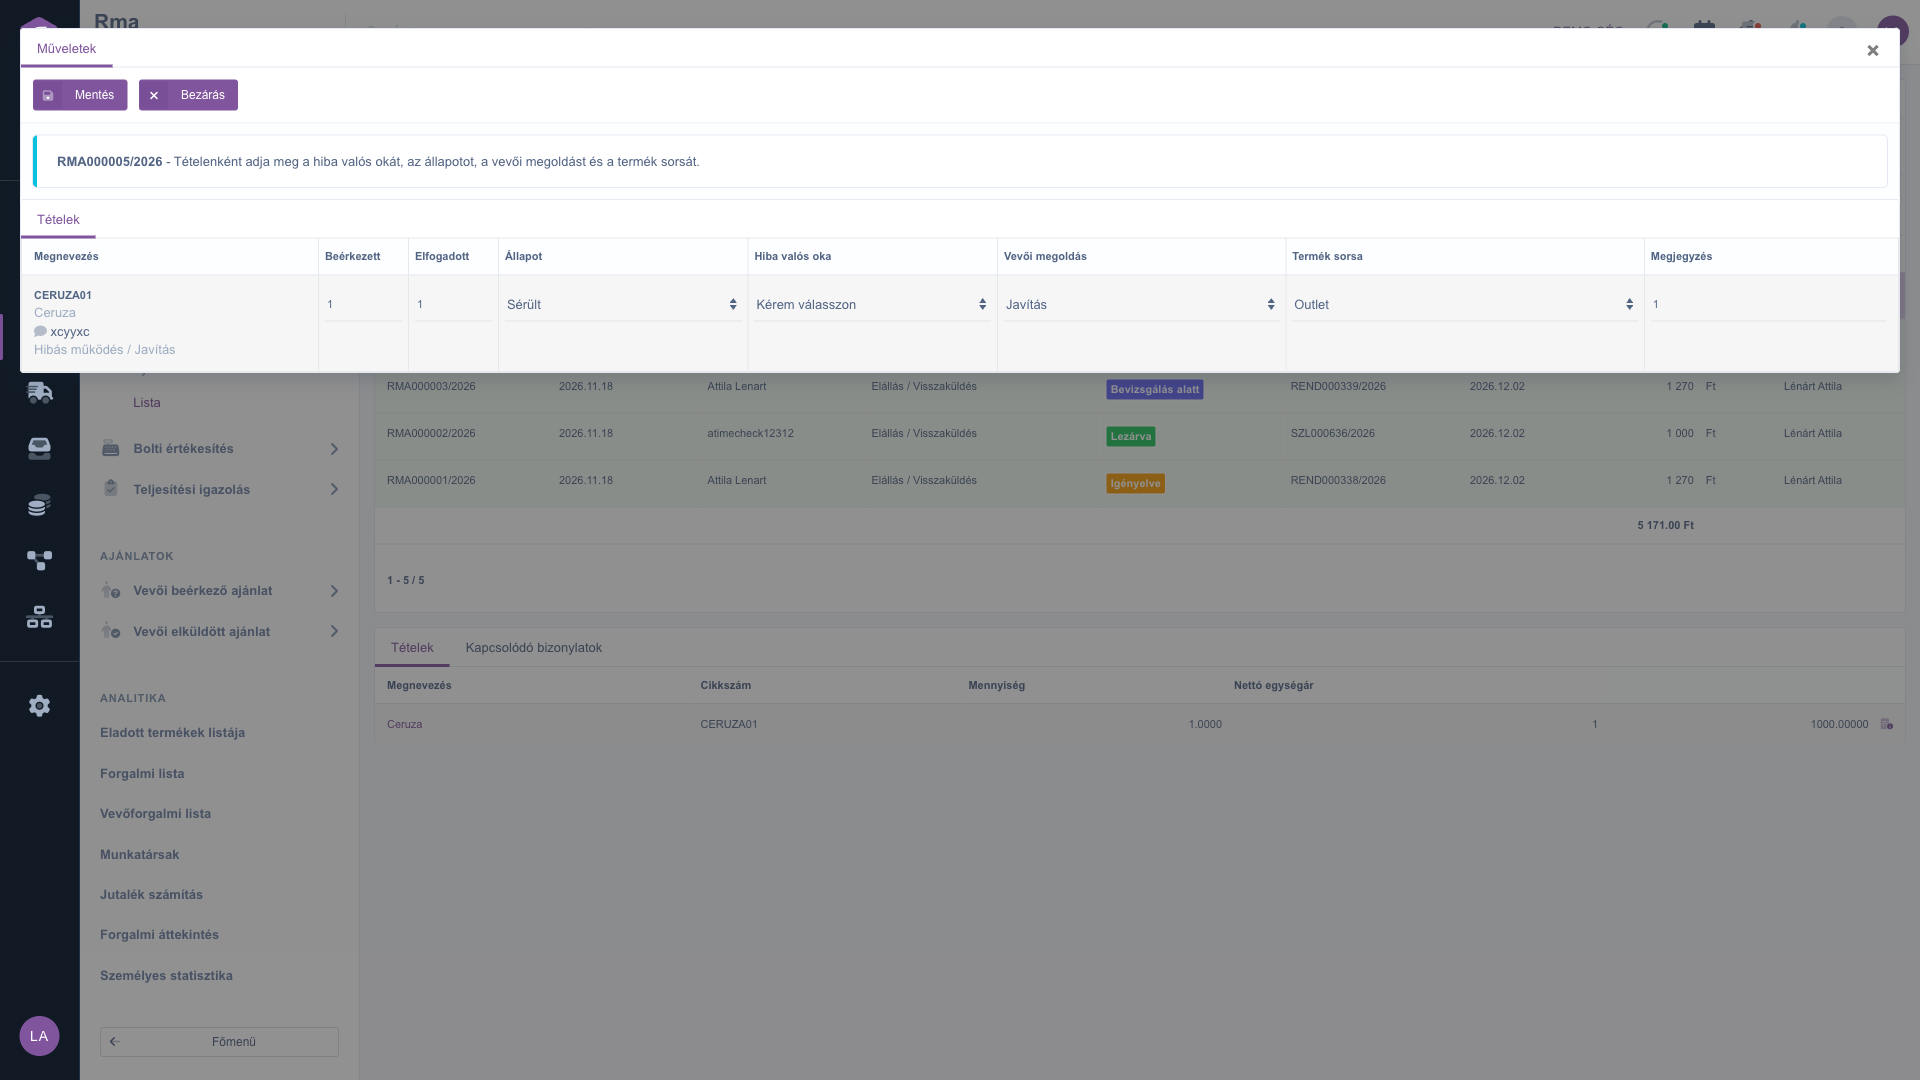
RMA list – Inspection window with item-level decisions
Document management
Based on the inspection decisions, you can start the related documents from here. It is available only for RMAs in the Inspected or Closed status. The window lists the items with the accepted quantity, the Resolution and the Disposition, and the buttons let you start the following:
- Credit (correcting) invoice: creates a credit invoice based on the original invoice from the items with a Refund or Price reduction decision. The RMA must have a related invoice.
- Finance task (pay out refund): creates a task with the amount to be refunded and the customer bank account number, if the money has to be returned by transfer.
- Replacement order (0): opens a new customer order at 0 value from the items with a Replacement decision.
- Worksheet (repair): opens a worksheet from the items with a Repair decision.
- Supplier order (return to supplier): opens a supplier order from the items with a Return to supplier disposition.
- Stock issue (scrap): issues the items with a Scrap disposition from stock.
Financial documents open as drafts and can be finalized after approval — so you can still check them before they go out.
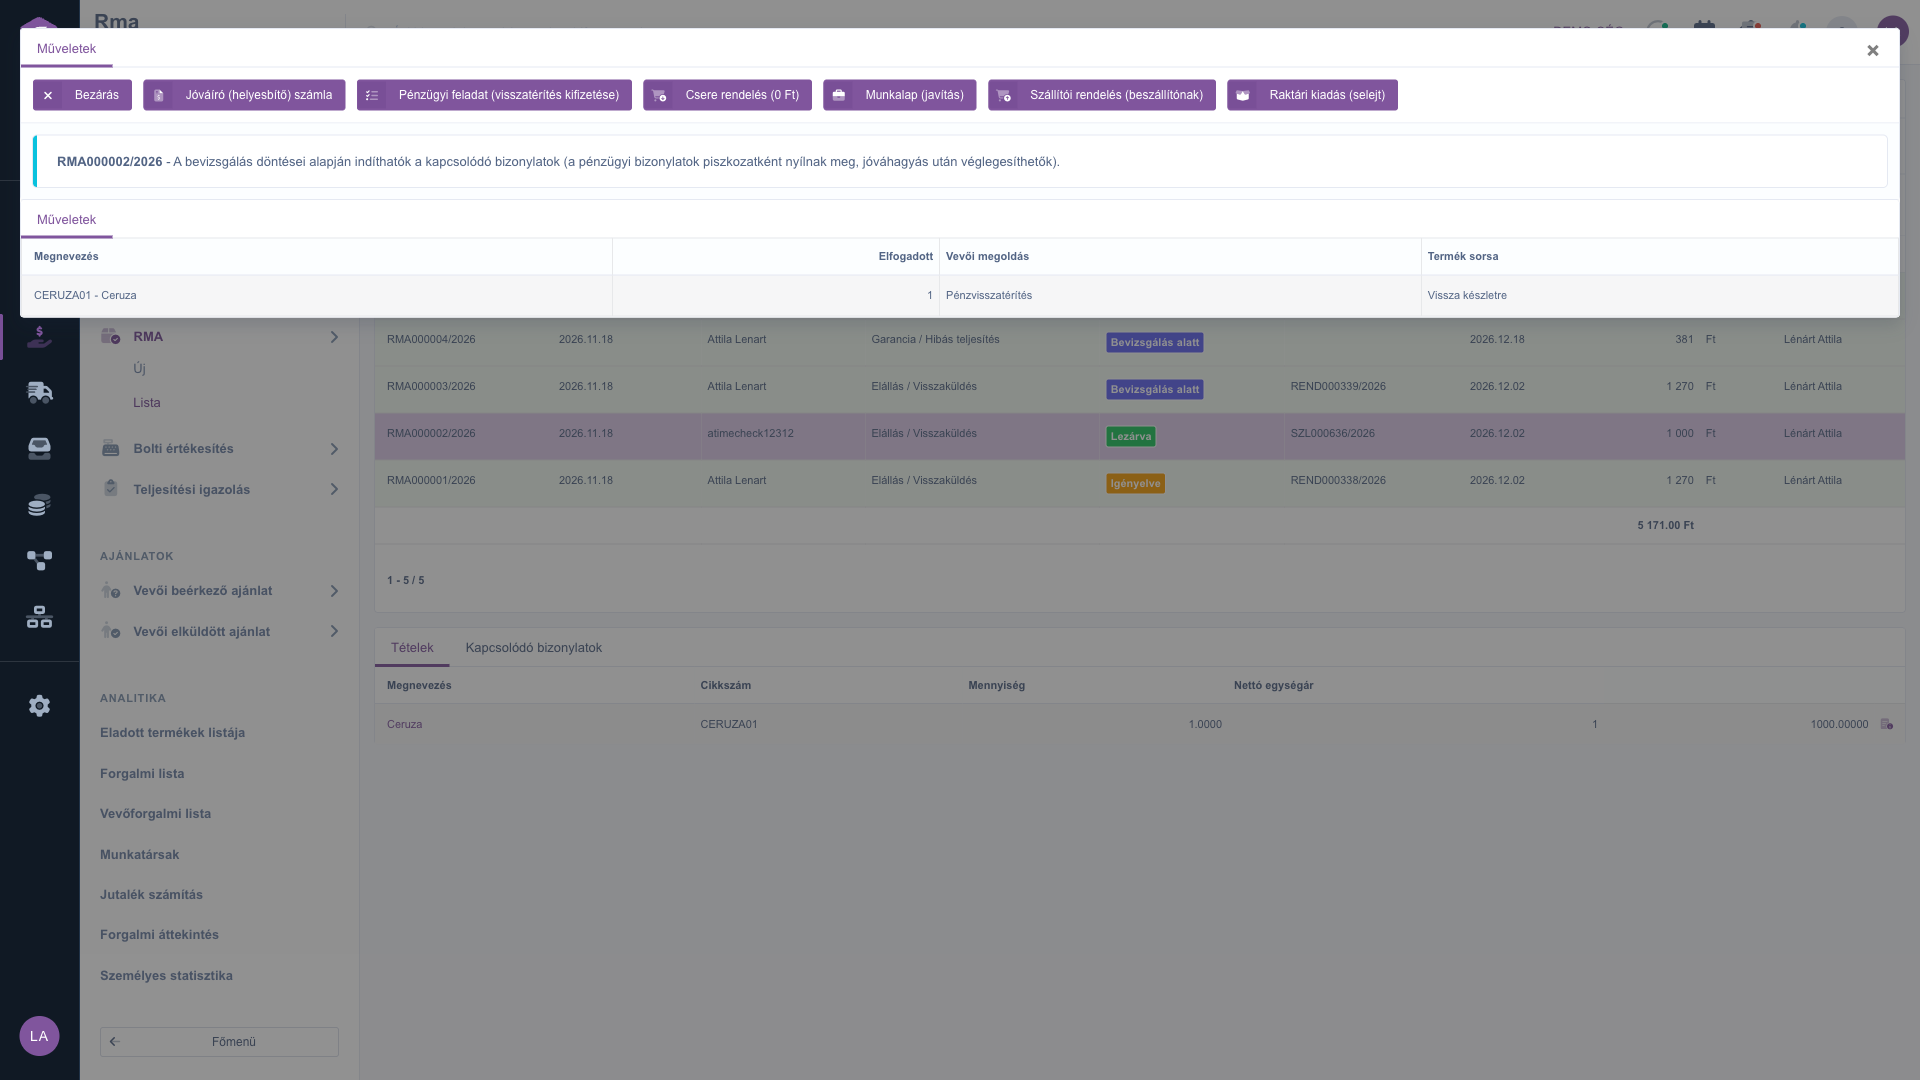
RMA list – Document management window for starting related documents
3. Searching among RMAs
Click the Search tab above the table to see the filter options. Immediately visible are Partner company name, Document number, Currency, Status, Rma type, Rma status (you can select several of these at once), Source document, Parcel label and Overdue (with Yes only RMAs with an expired deadline that are still open are listed). The "Expand" button opens further filters: Document date and Performance date (for a period), Employee, Item number, Project, Job number, Department number, Customer comment and Internal comment. Use the Search button to filter by the conditions you set.
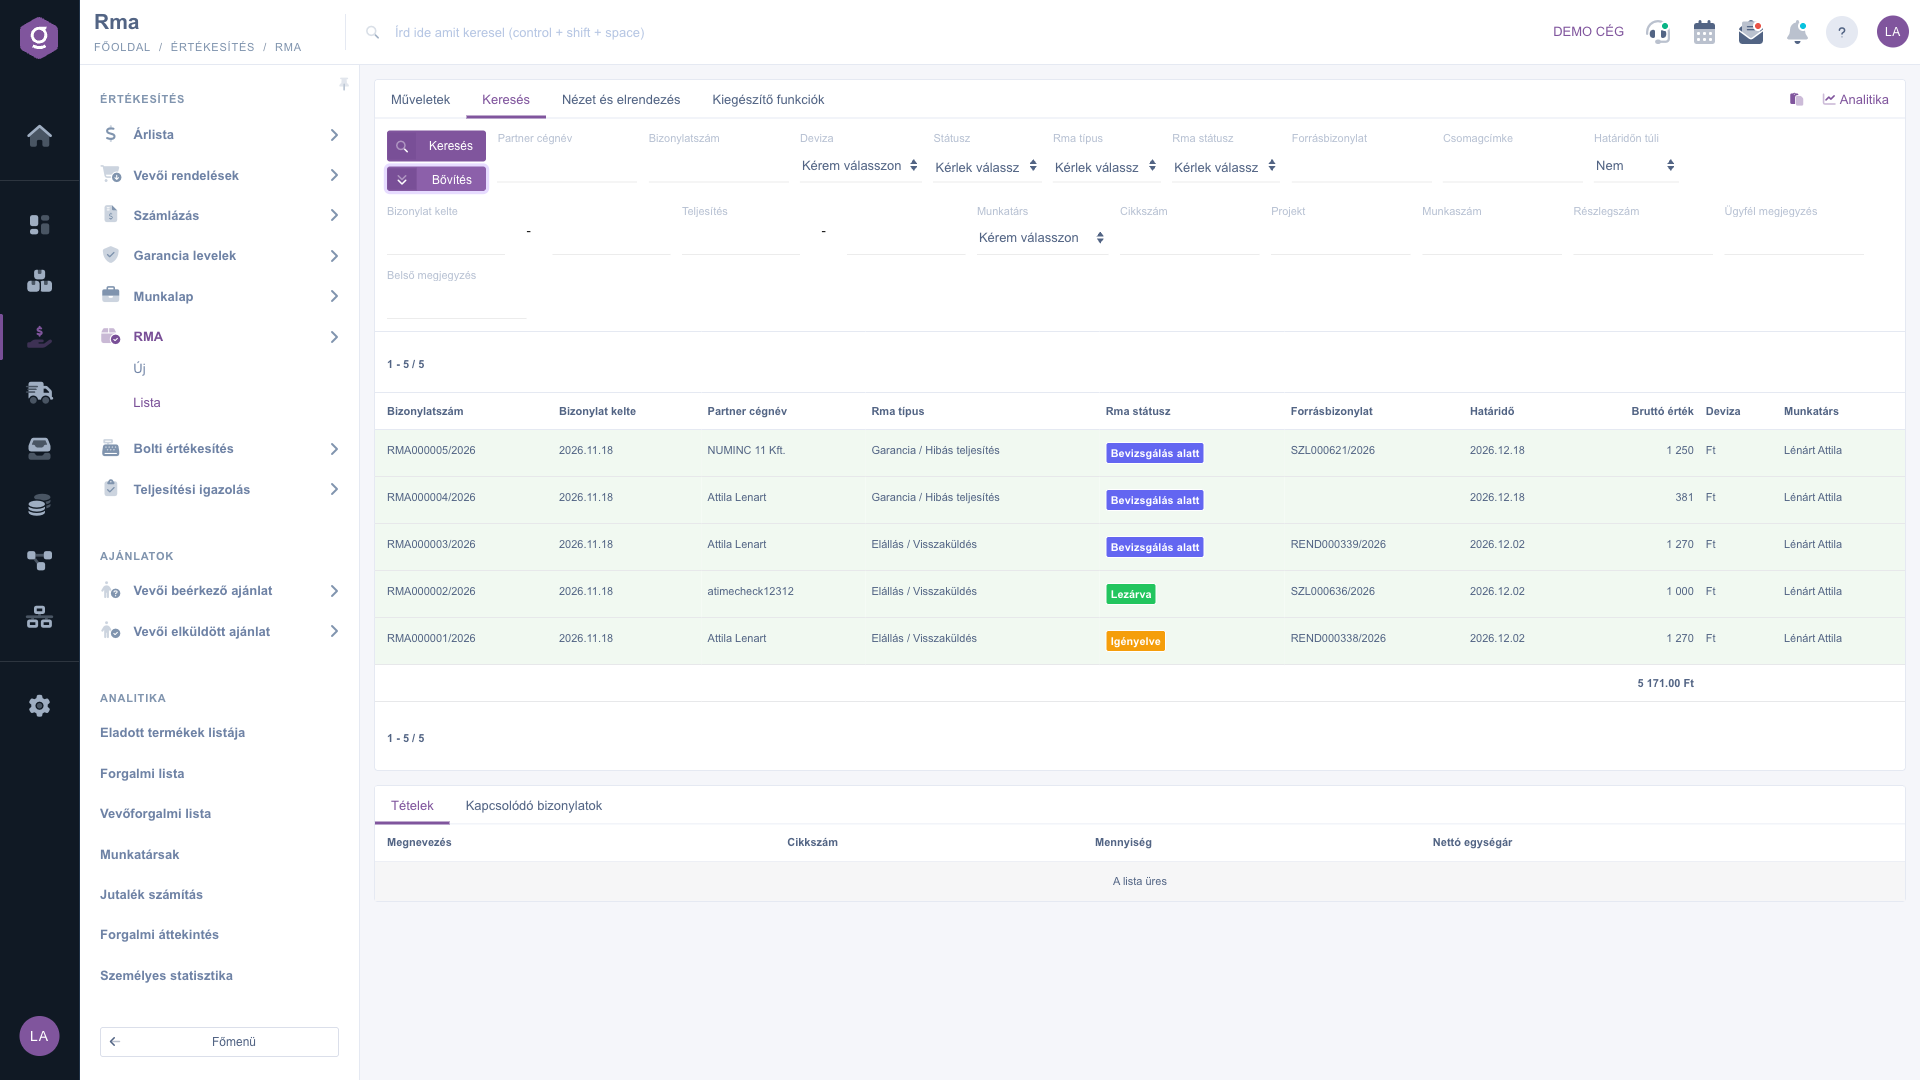
RMA list – Search tab with expanded filters
4. Customizing the view
On the View and layout tab you can set how the list appears for you:
- Columns: choose which fields appear in the table and in what order. Besides the default columns you can add, for example, Channel, Pickup address, Performance date, Net value or Customer comment.
- Rows: set how many RMAs appear on one page.
- Sorting: choose by which column and in which direction the list is sorted by default.
- Preview window: turn the preview panel below the list on or off, or pin it (see below).
- Interface and behavior: other display-related settings of the list interface.
These settings are saved personally, tied to your user, so they stay in place the next time you log in.
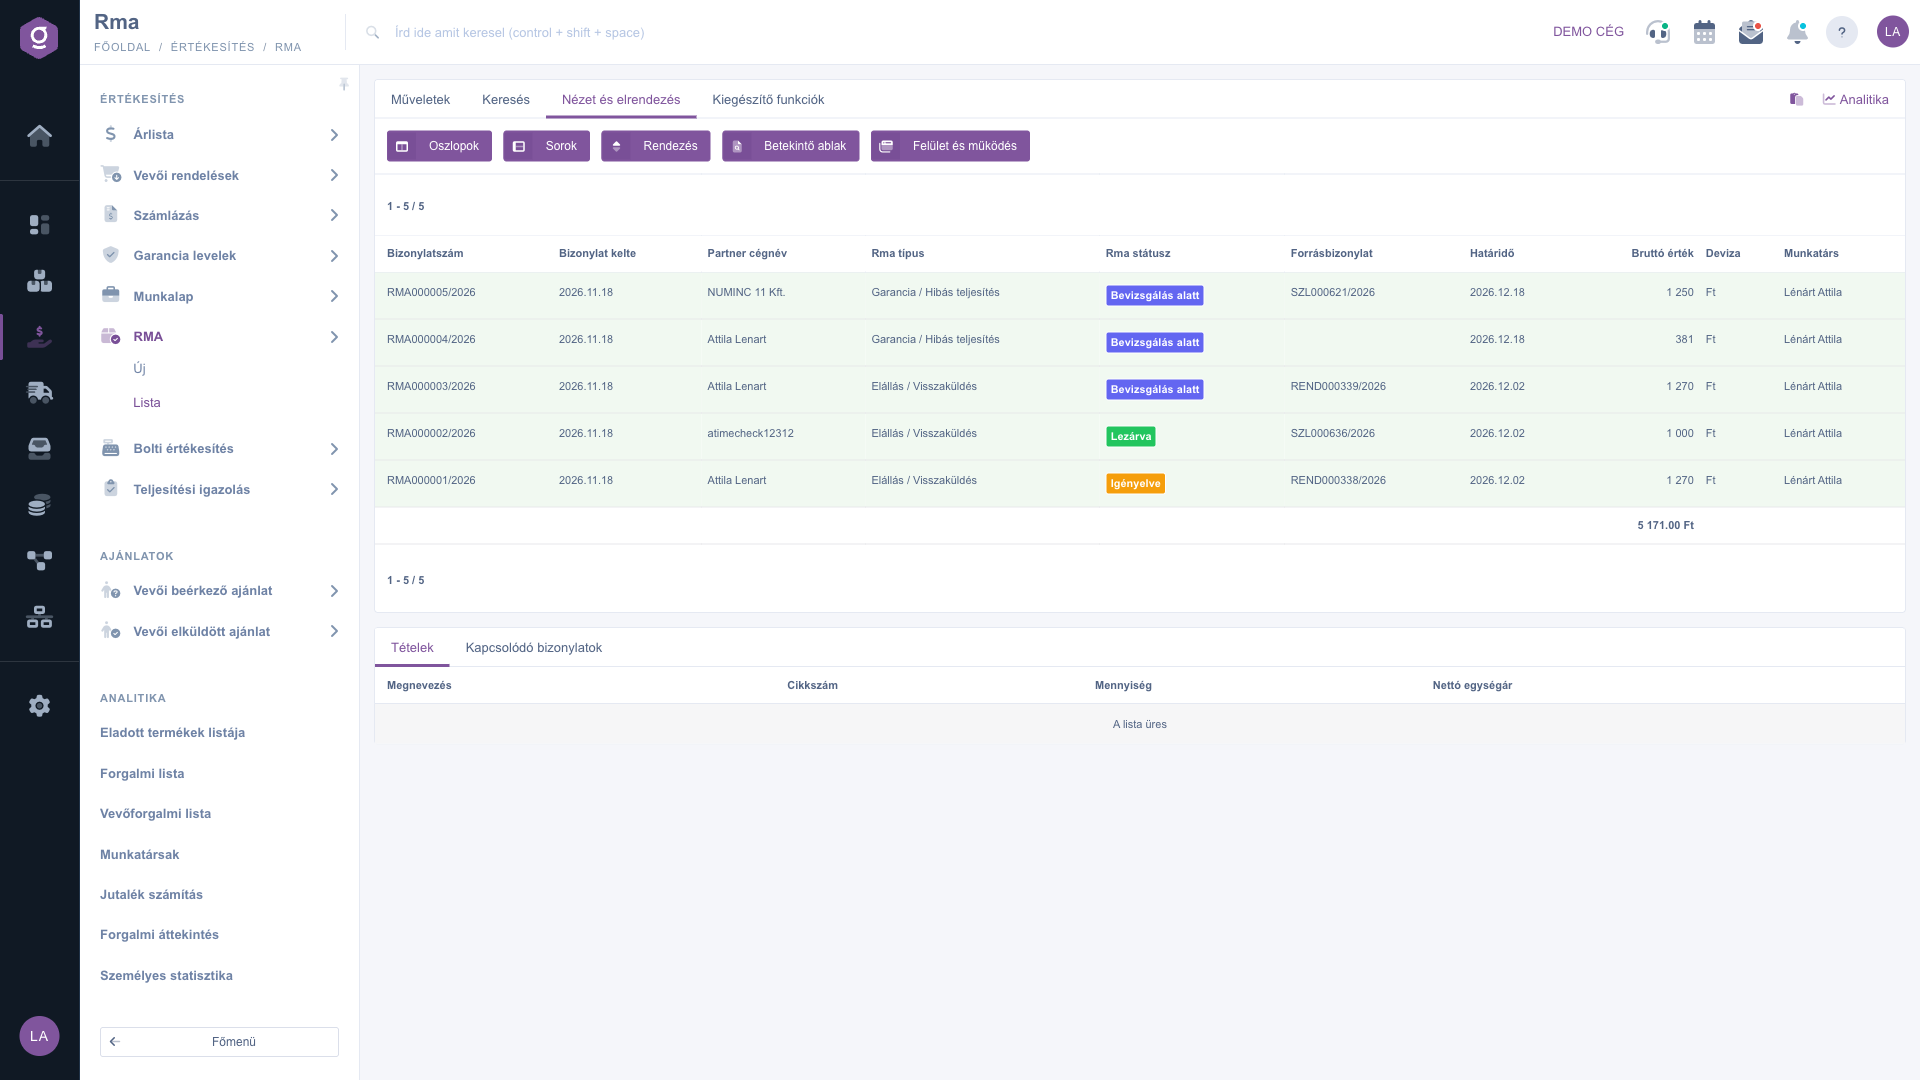
RMA list – View and layout tab
5. The preview window
In the panel below the list you can quickly check the details of a selected RMA without opening the document itself. The tabs of the panel:
- Items: the Name, Item number, Quantity and Net unit price of the products on the RMA.
- Related documents: other documents linked to the RMA (e.g. source invoice, the goods receipt created at receiving, credit invoice).
The panel can be pinned with the icon in its top right corner, and its size can be changed by dragging the divider line at the top of the panel.
6. Additional functions
On the Additional functions tab you will find extra options related to the selected RMA:
- Sent items: view the emails previously sent for the RMA.
- New email: write a new email related to the RMA, using the External mail client or the Internal mail client.
- New task: create a task related to the RMA.
- Partner card: open the detailed record of the partner on the RMA.
- CRM: view the CRM notes of the partner.
With the Analytics link in the top right corner of the table you can reach the RMA statistics, and the icon next to it copies the content of the table to the clipboard. If you right-click an RMA row, the most common actions (New, Open, Close, Delete, Cloning, History, Printing, Attached files, Partner card, CRM) are also available from a context menu.
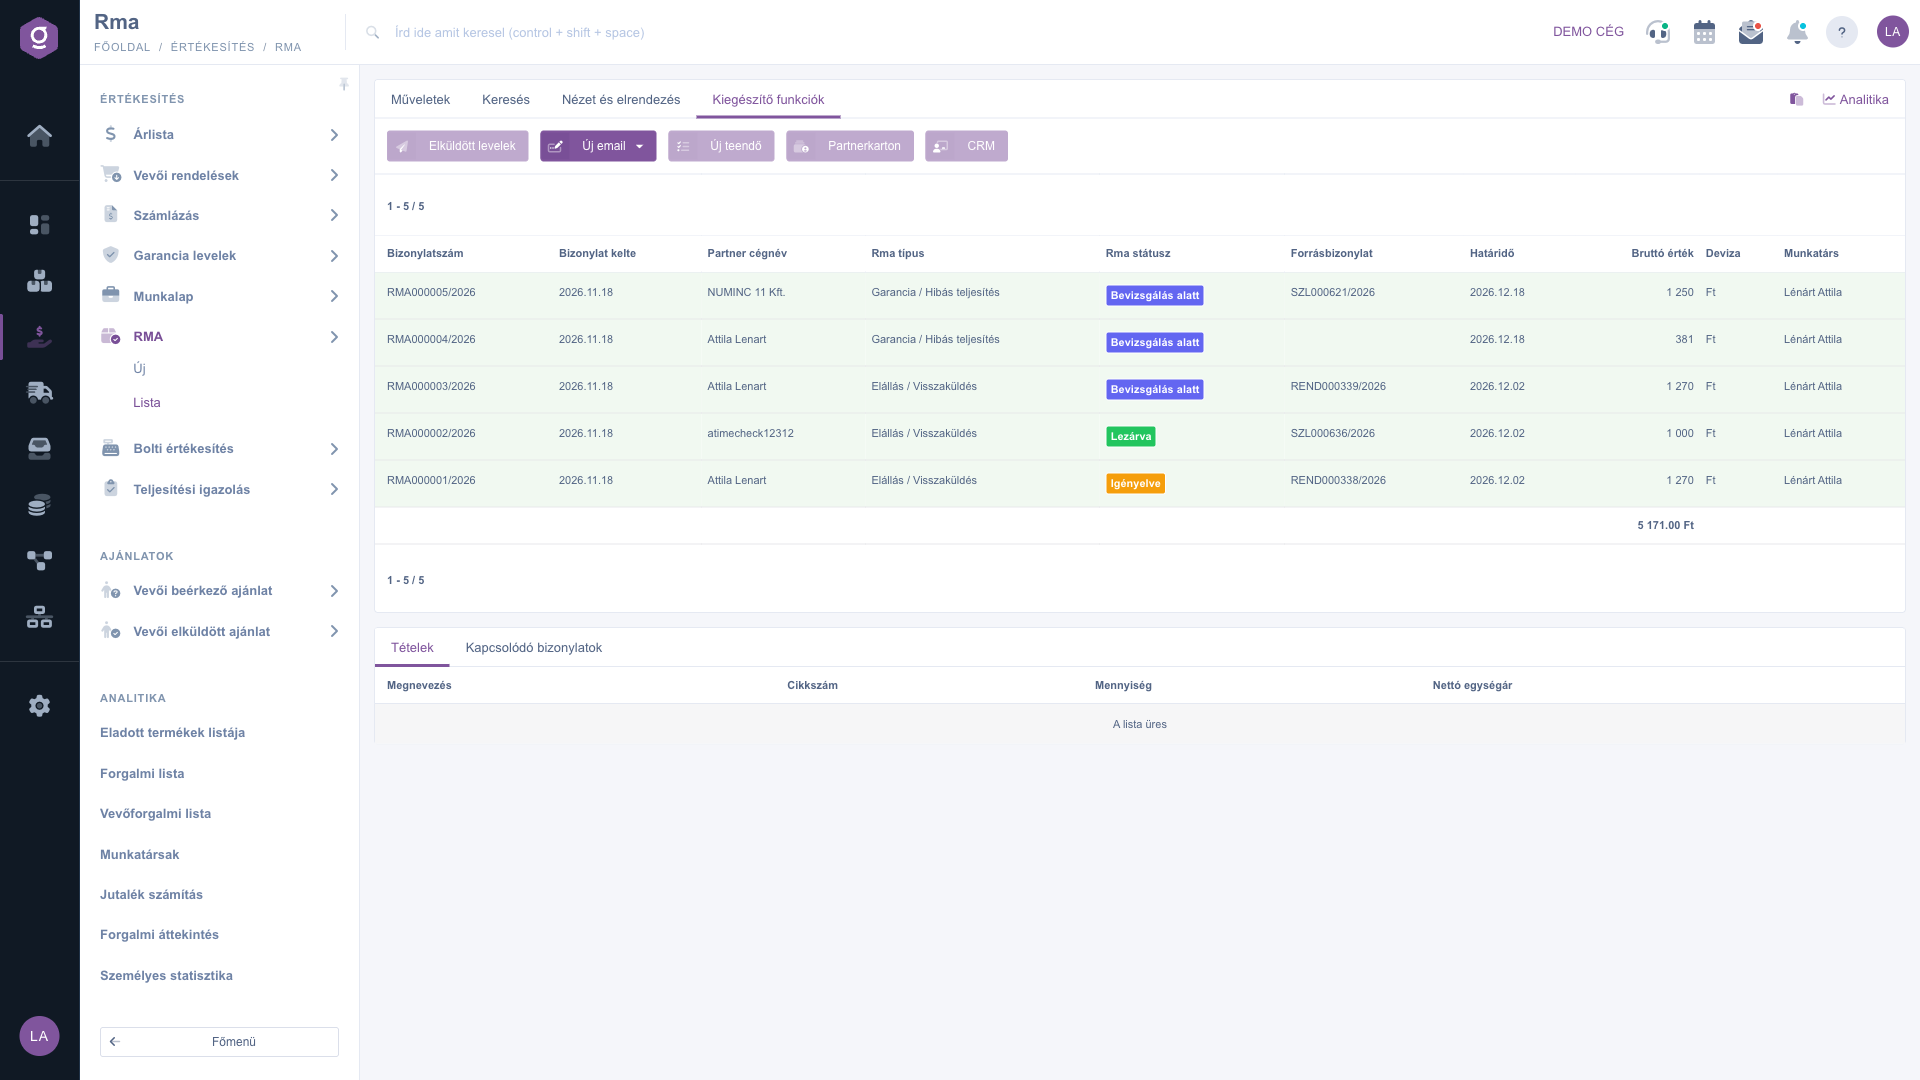
RMA list – Additional functions tab
Tip
Start your day with the overdue cases: on the Search tab set the Overdue field to Yes and click Search — you immediately see which RMAs you are behind with. During inspection, always fill in the Real cause of the fault and the Resolution for every item first, because without them the RMA cannot move to the Inspected status and Document management cannot be started.