1. Viewing the list and the actions available for sales
Clicking the Main menu / Sales / In-store sale / List menu item shows all in-store sales. Above the table, the Actions tab gives you the buttons for working with the selected sale (some of them are only active for a document in the appropriate status):
- New: starts a new in-store sale — opens the sales screen where you can put products in the basket.
- Open: opens the selected sale.
- Close: closes the document — only available for a sale in Draft status. Clicking the arrow lets you combine closing with printing (Close and print) or downloading (Close and download).
- Delete: deletes the selected sale. The arrow also offers Delete and copy: the document is deleted and a new sale is created from its content.
- Send email: sends the document by email.
- Settlement: from the drop-down menu a Cash register document or a Bank document can be created for the selected sale.
- Download: in the List operation block you can download the entire list (XLSX list, XLSX item list), and in the Document operation block the data of the selected sale (XLSX items, XLSX serial number list, QR code (Sam4s), PDF).
- Printing: prints the Product label or the Document.
- Document management: creates another document from the selected sale (invoicing, delivery note, worksheets).
At the right end of the tab row, the Analytics link takes you to the statistics page of in-store sales, and the clipboard icon copies the contents of the table to the clipboard. A summary row at the bottom of the table shows the totals of the list, and below it you see the pagination (for example 1 - 10 / 856).
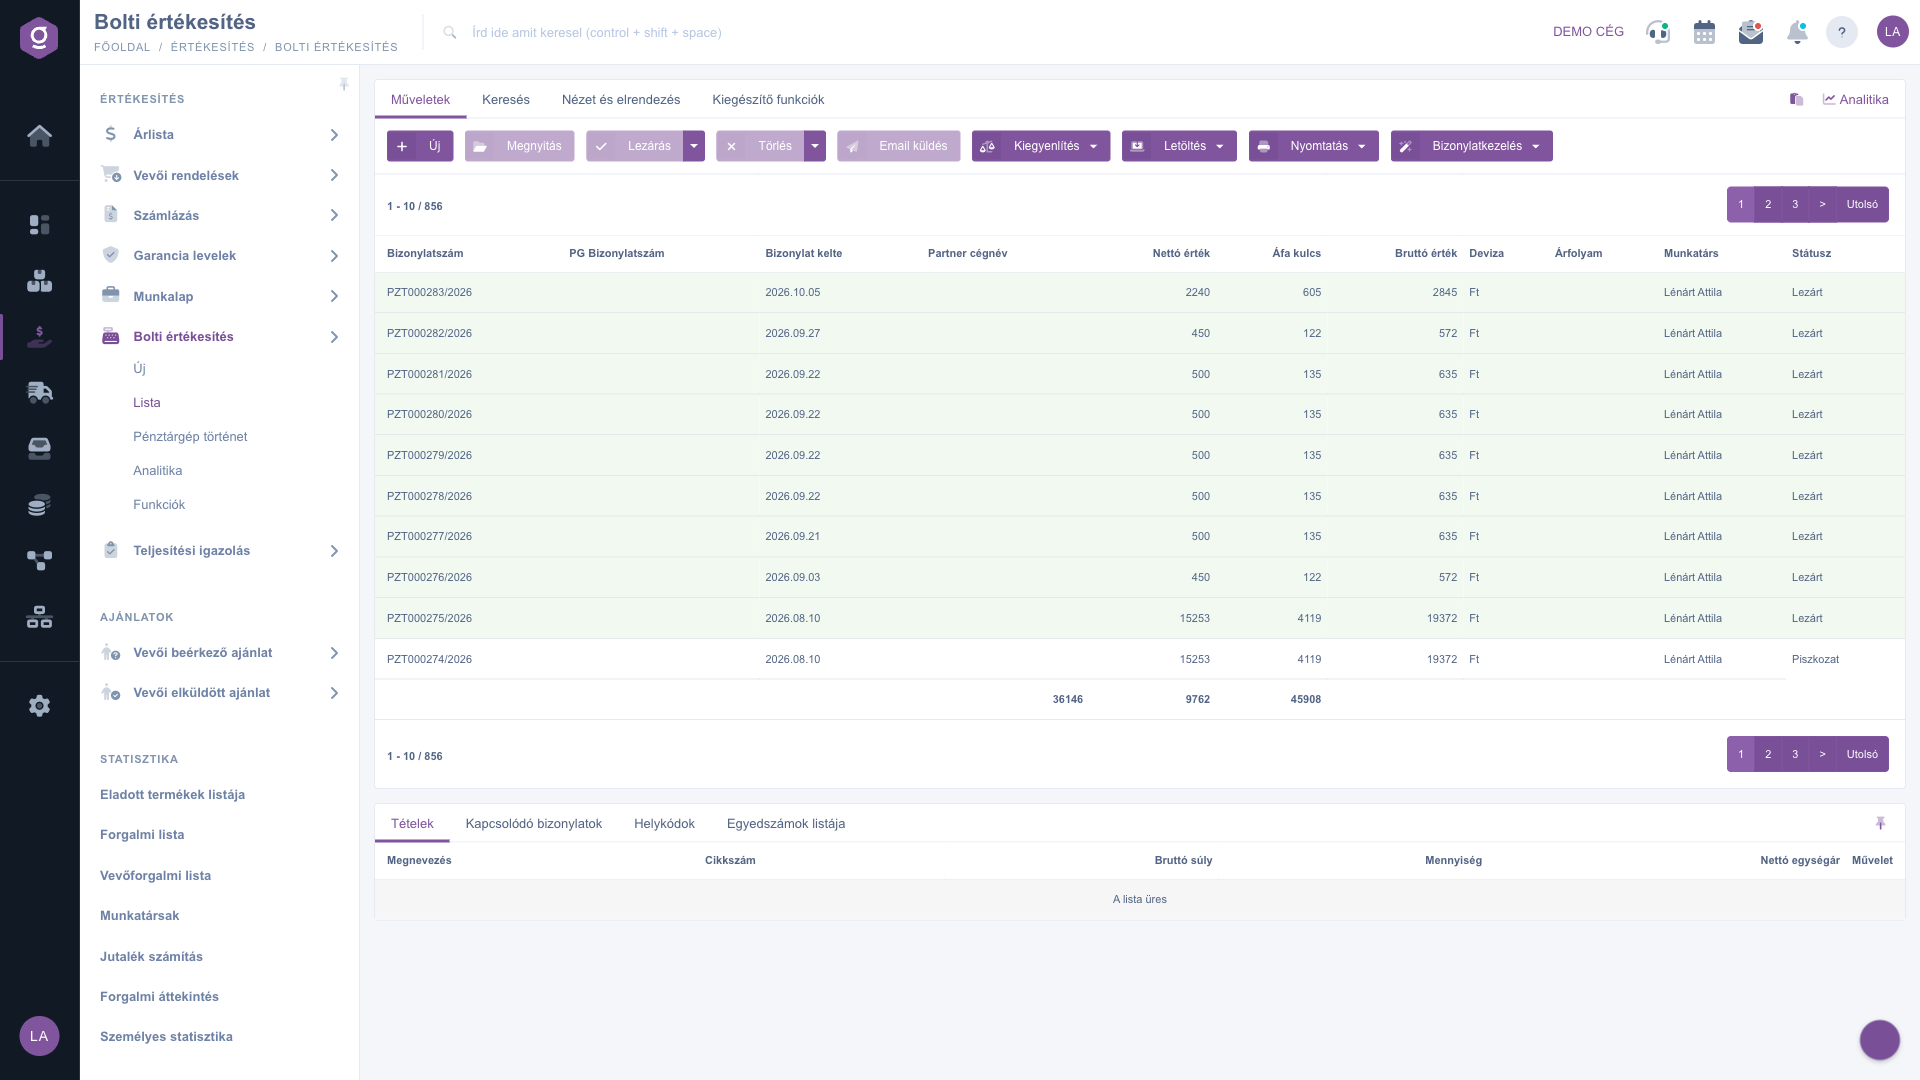
In-store sale list – Actions tab and preview panel
2. Searching and filtering
On the Search tab the most commonly used filters (partner company name, document number, currency, status, sites, employee, sales representative, payment method) are shown right away. Clicking “Expand” opens further filters: search by Document date and Performance date (from - to), the Settled and Used state, the Part number and the Cash register. Use the Search button to apply the conditions.
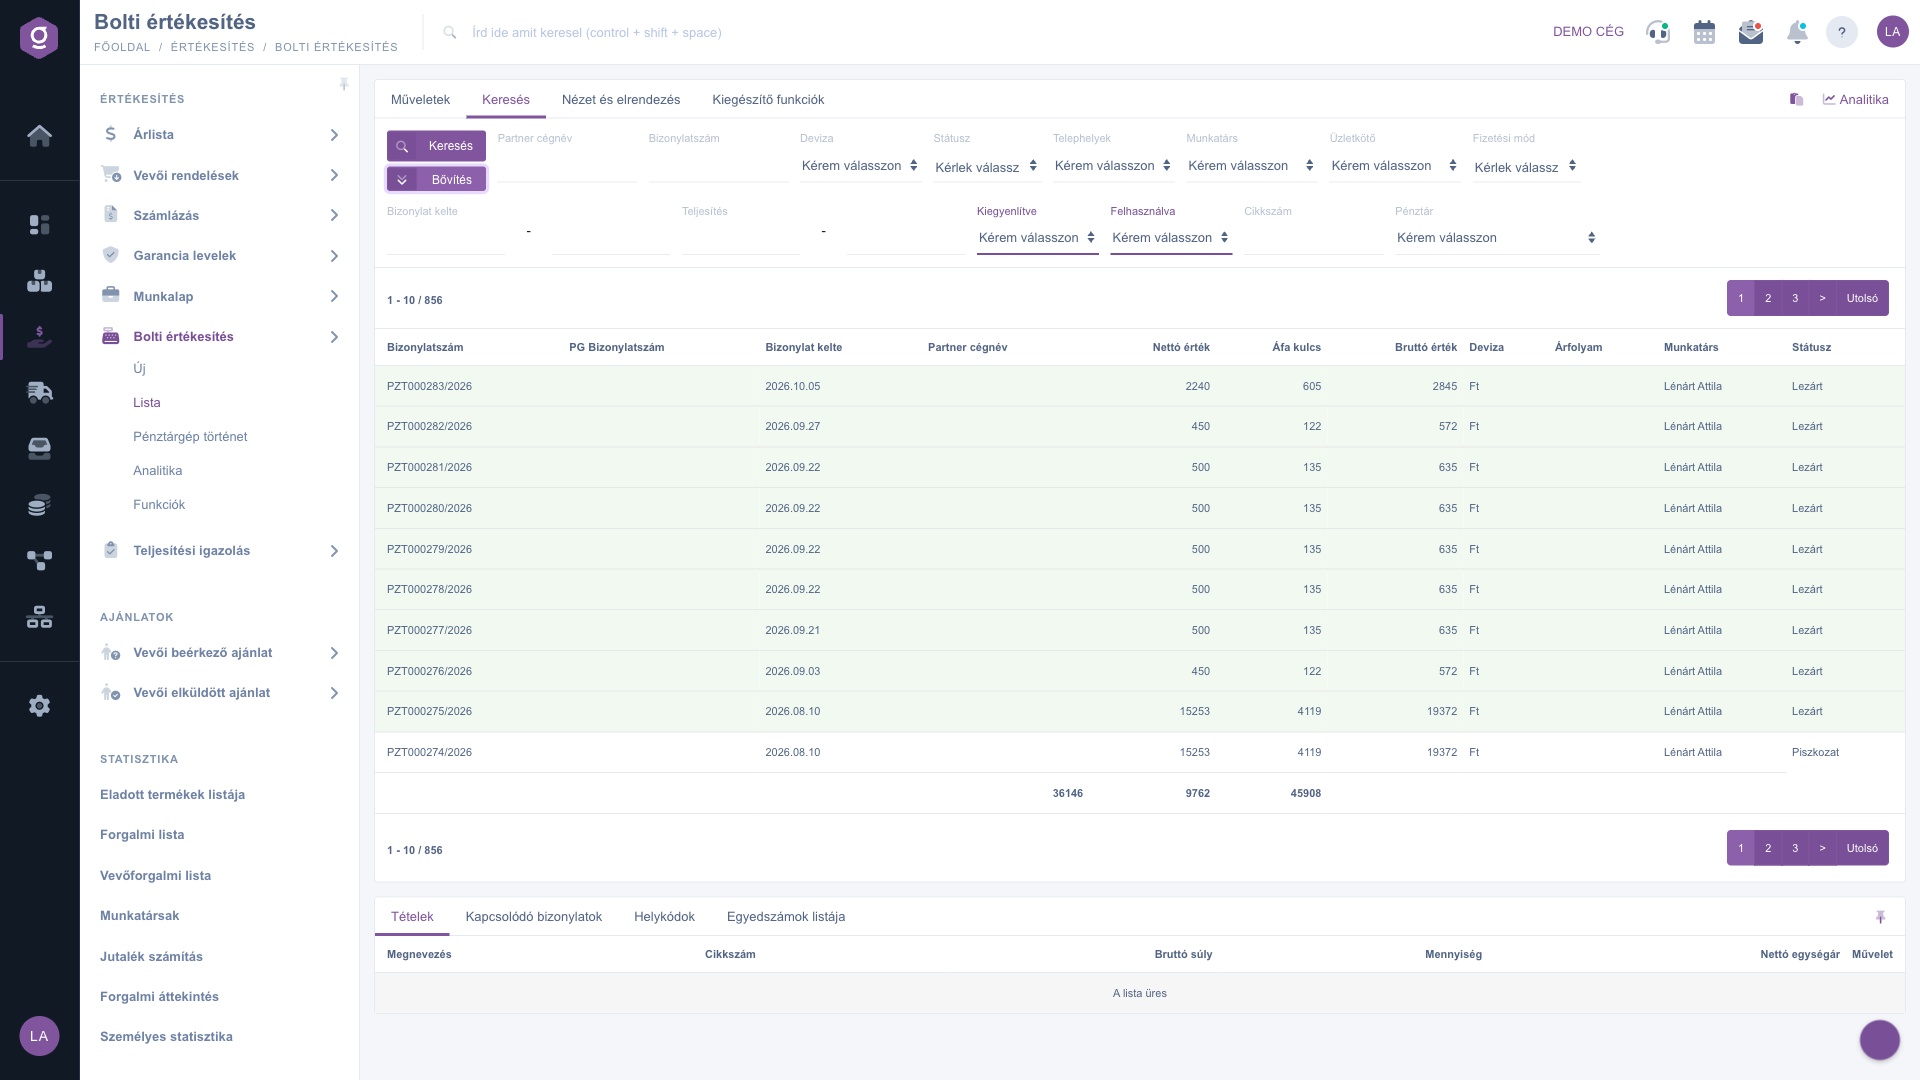
Search tab – expanded filters
3. Download and export
Select a sale, then open the Download drop-down menu, which has two blocks. The List operation block (XLSX list, XLSX item list) exports the entire filtered list to a spreadsheet, so you can also process the in-store turnover in Excel. The Document operation block applies to the selected sale: XLSX items and XLSX serial number list save the items, PDF saves the document, and QR code (Sam4s) generates the QR code intended for the Sam4s cash register.
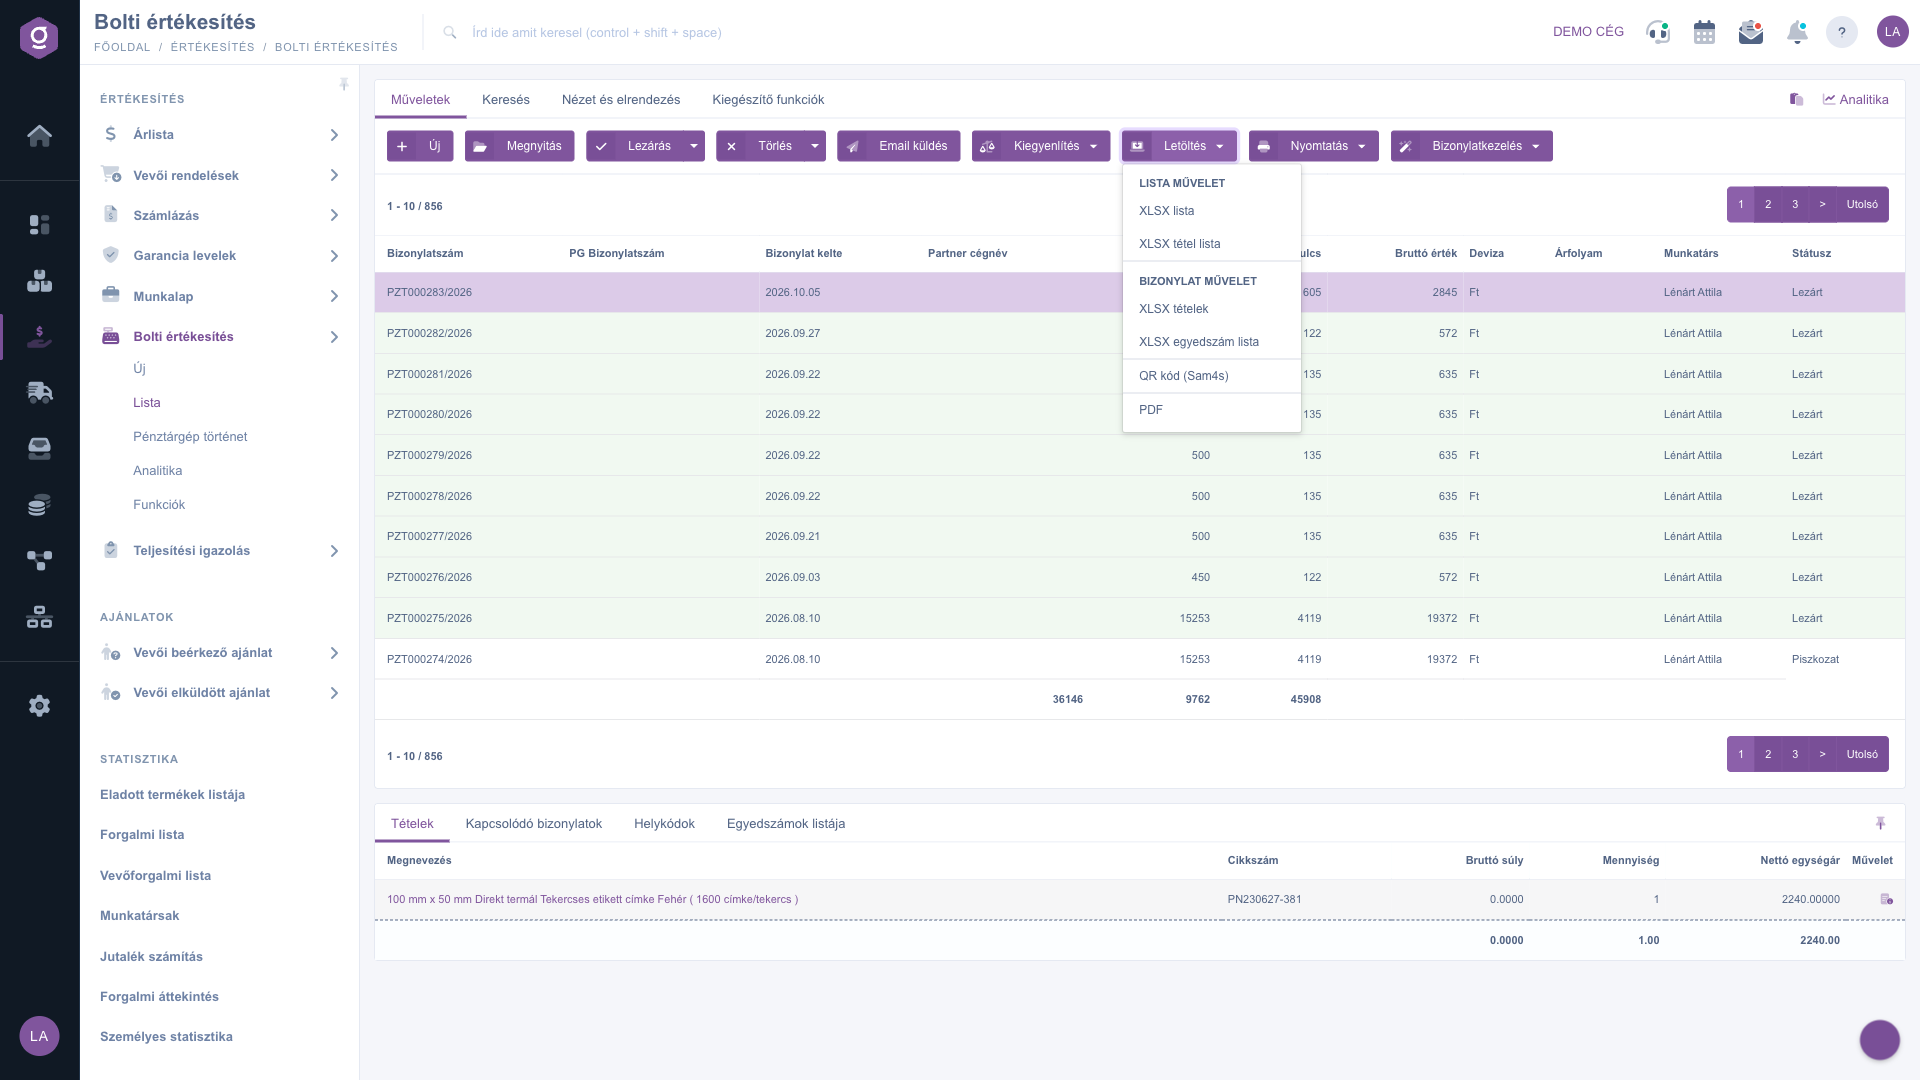
Download menu with a selected sale
Customizing the view
The View and layout tab lets you set how the list is displayed to you:
- Columns: choose which fields appear in the table, and in what order.
- Rows: set how many sales appear per page.
- Sorting: choose which column and direction the list is sorted by default.
- Preview window: turn the preview panel below the list on or off, or pin it (see below).
- Interface and behavior: other display-related settings for the list.
These settings are saved per user, so they are kept the next time you log in as well.
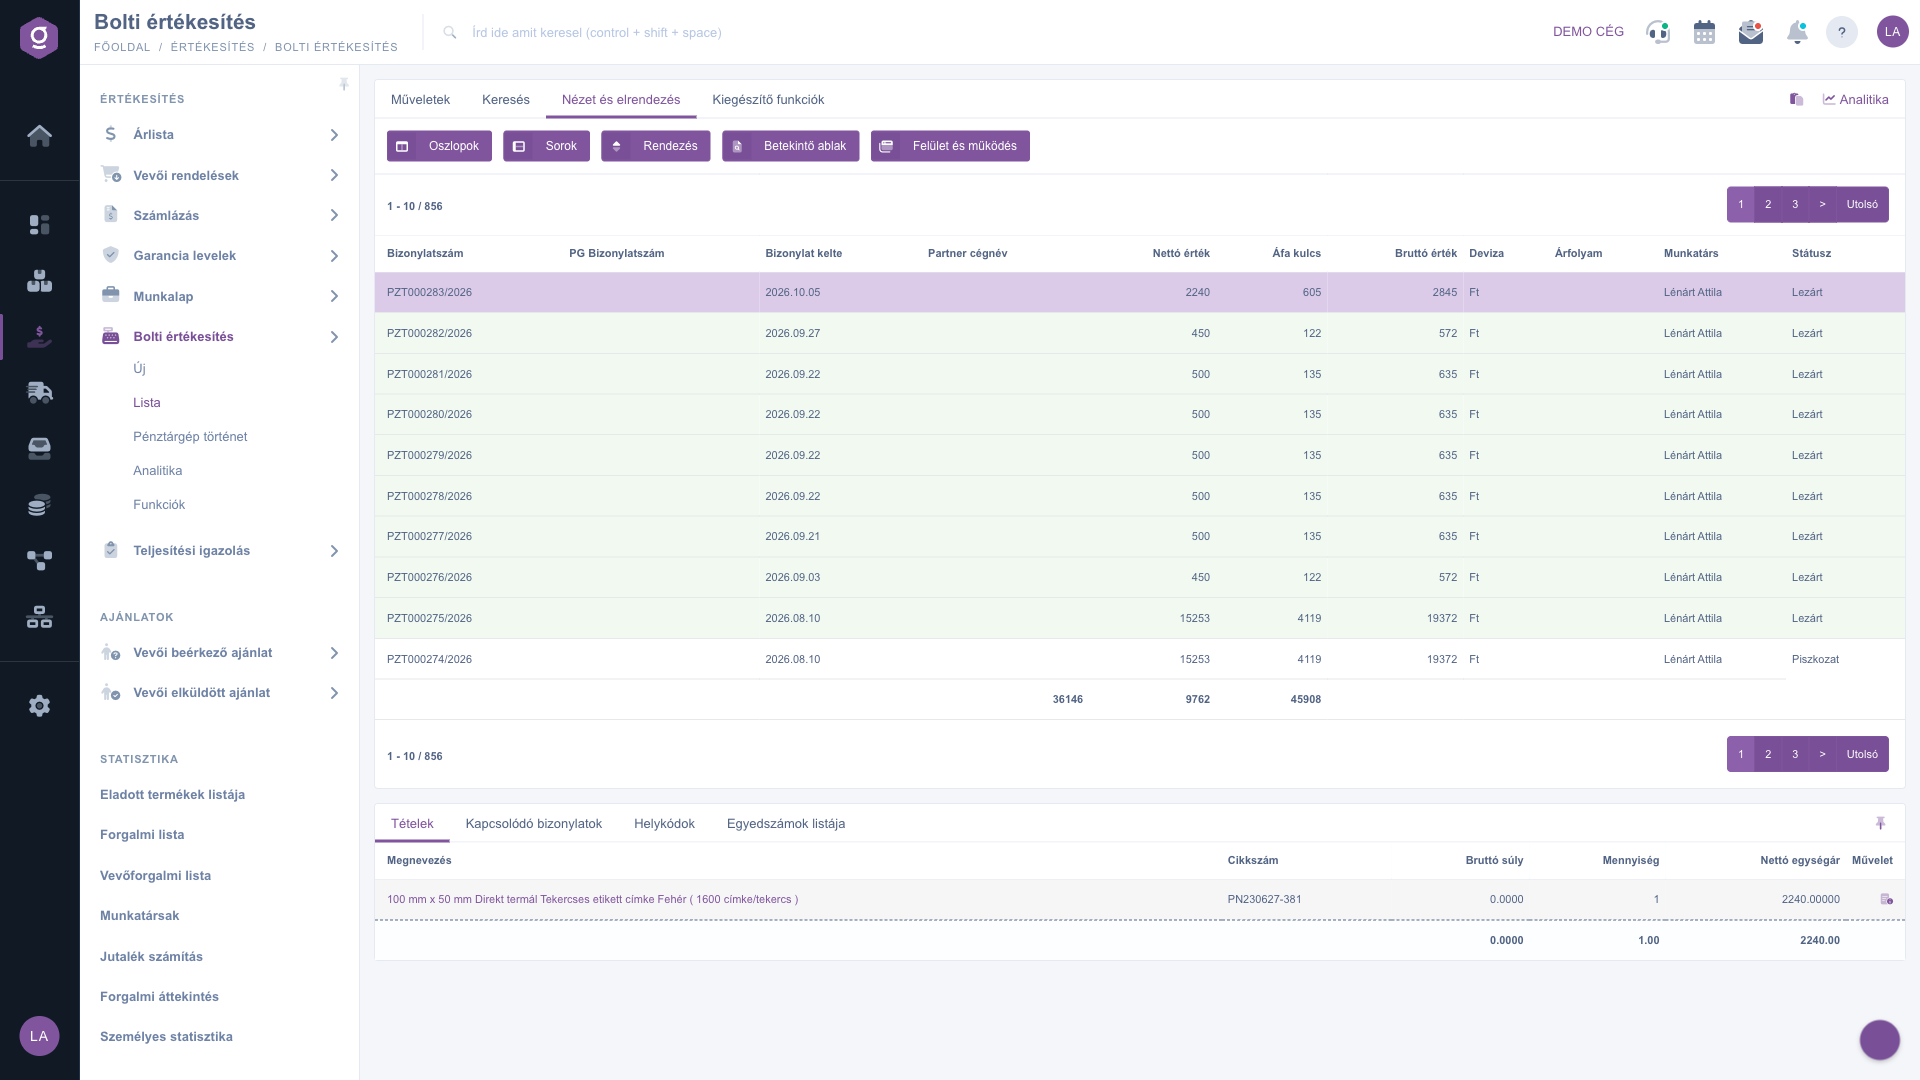
View and layout tab
The preview panel
The panel shown below the list lets you quickly check the details of a selected sale without having to open it. The panel contains several tabs:
- Items: the products, quantities and prices listed on the document.
- Related documents: other documents linked to the sale (e.g. invoice, delivery note, warehouse issue).
- Location codes: warehouse location, warehouse and pallet information for the items.
- List of serial numbers: a breakdown of the individual identifiers recorded for the items (serial number, expiry date).
The panel can be pinned (fixed to a set size) using the icon in its top-right corner, and its size can be adjusted by dragging the divider line at the top of the panel.
Additional functions
The Additional functions tab offers extra options for the selected sale that support your daily work:
- Sent items: view the emails previously sent for the document.
- New email: write a new email related to the document, either through the External mail client or the built-in Internal mail client.
- New task: create a task related to the document.
- Partner card: opens the detailed profile of the partner listed on the document.
- CRM: view the CRM notes recorded for the partner.
- Sales representative: view or change the sales representative assigned to the sale.
Right-clicking a sale row gives you the most common quick actions (New, Open, Close, Delete, Copy) from a context menu — this menu is shorter than the full set of the Actions tab.
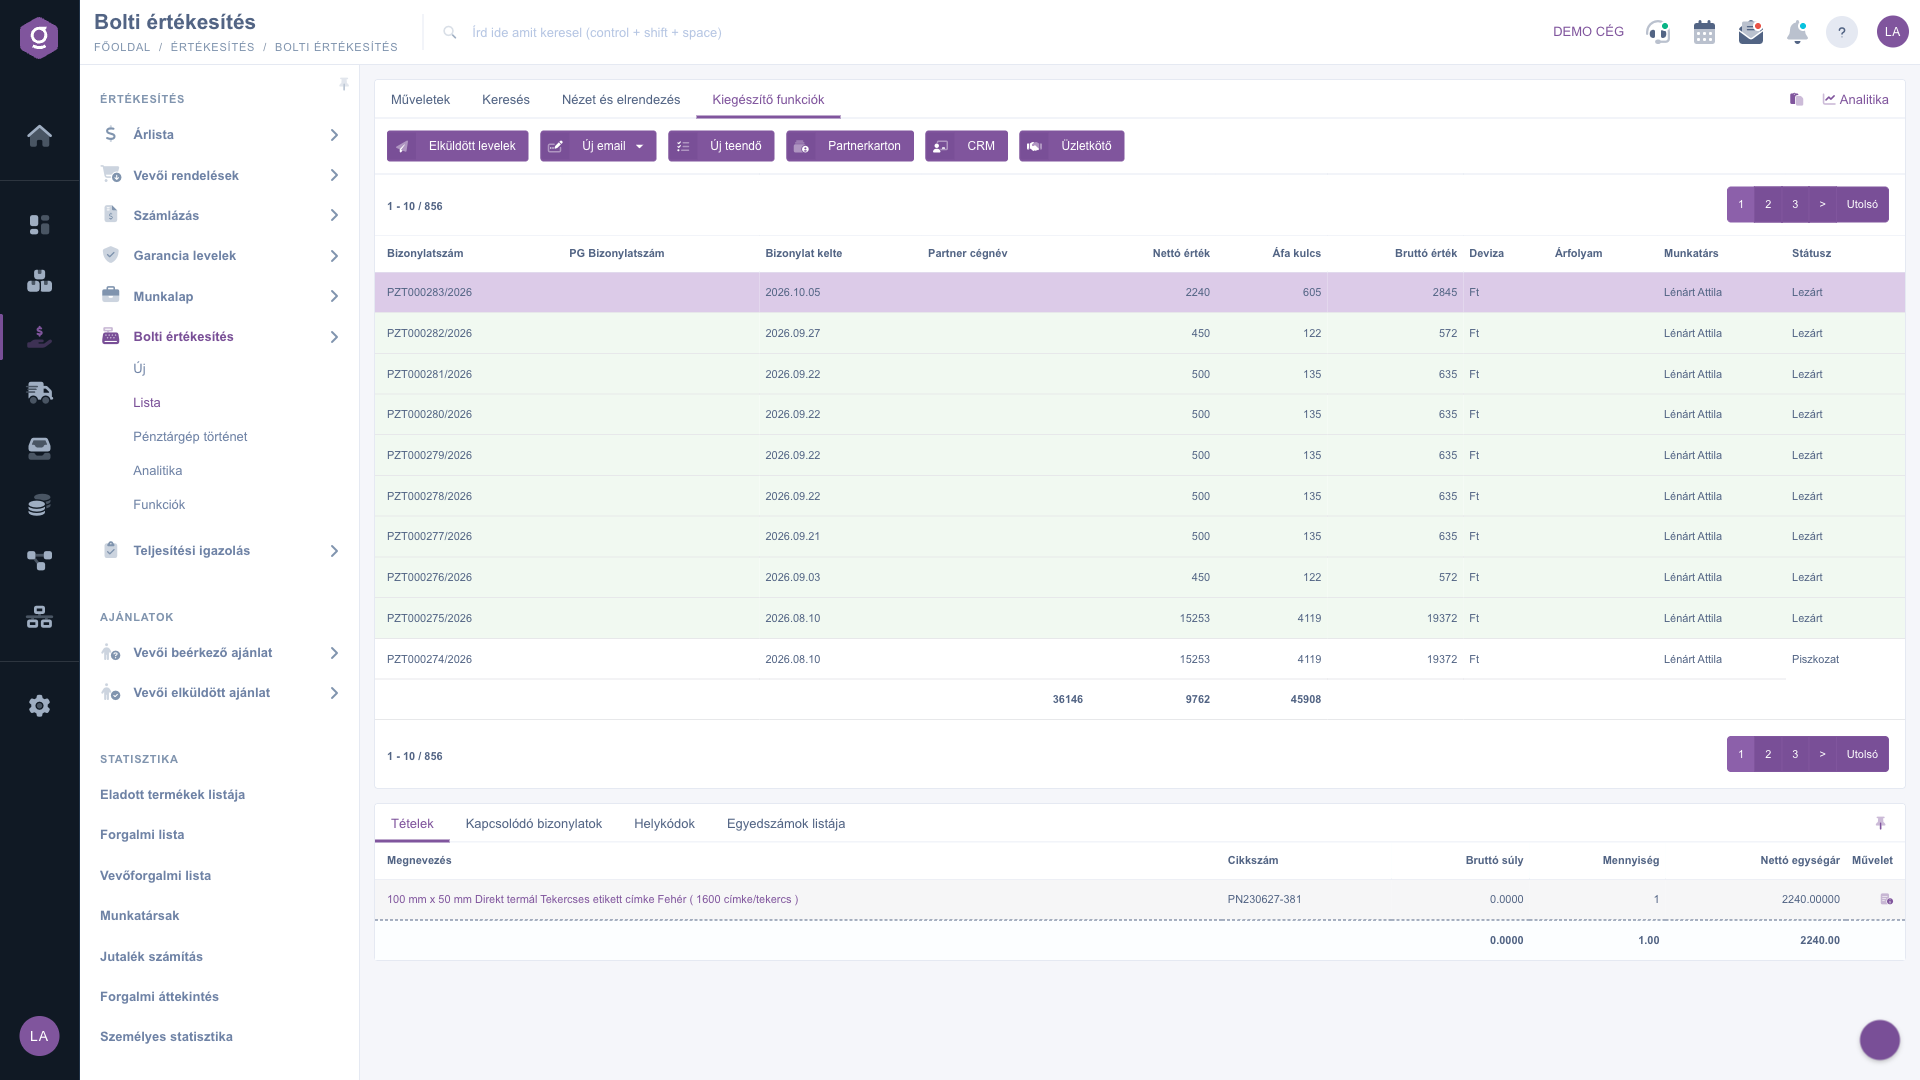
Additional functions tab
Tip
If a customer asks for an invoice afterwards for an already issued receipt, do not record the sale again: select the closed sale and choose invoicing from the Document management menu — the system carries the items over. For the end-of-day settlement, you find the daily turnover under Main menu / Sales / In-store sale / Cash register machine history.



