Job number list

Learn how the job number list works: how to search by partner, open, delete and export job numbers, and what each column means.

Function overview

This list shows the recorded Job number items. A job number is an identifier you define (for example the code of a job, project or order). You can assign it to a partner, and by selecting it on documents you can group the documents that belong to the same job under one identifier.

  • Two tabs: the Actions tab contains the New, Open, Delete and Export buttons, and the Search tab contains the filter fields.
  • Table: the columns of the list are Job number, Document date and Partner company name.
  • Paging: the list shows up to 10 items per page, and the current range is displayed at the bottom (for example 1 - 4 / 4).
  • Deleting: a deleted job number disappears from the list.

Step by step

1. Opening the list

Click Main menu / Master data / Production tracking / Job number / List. Under Job number, the New menu item opens the new job number sheet directly.
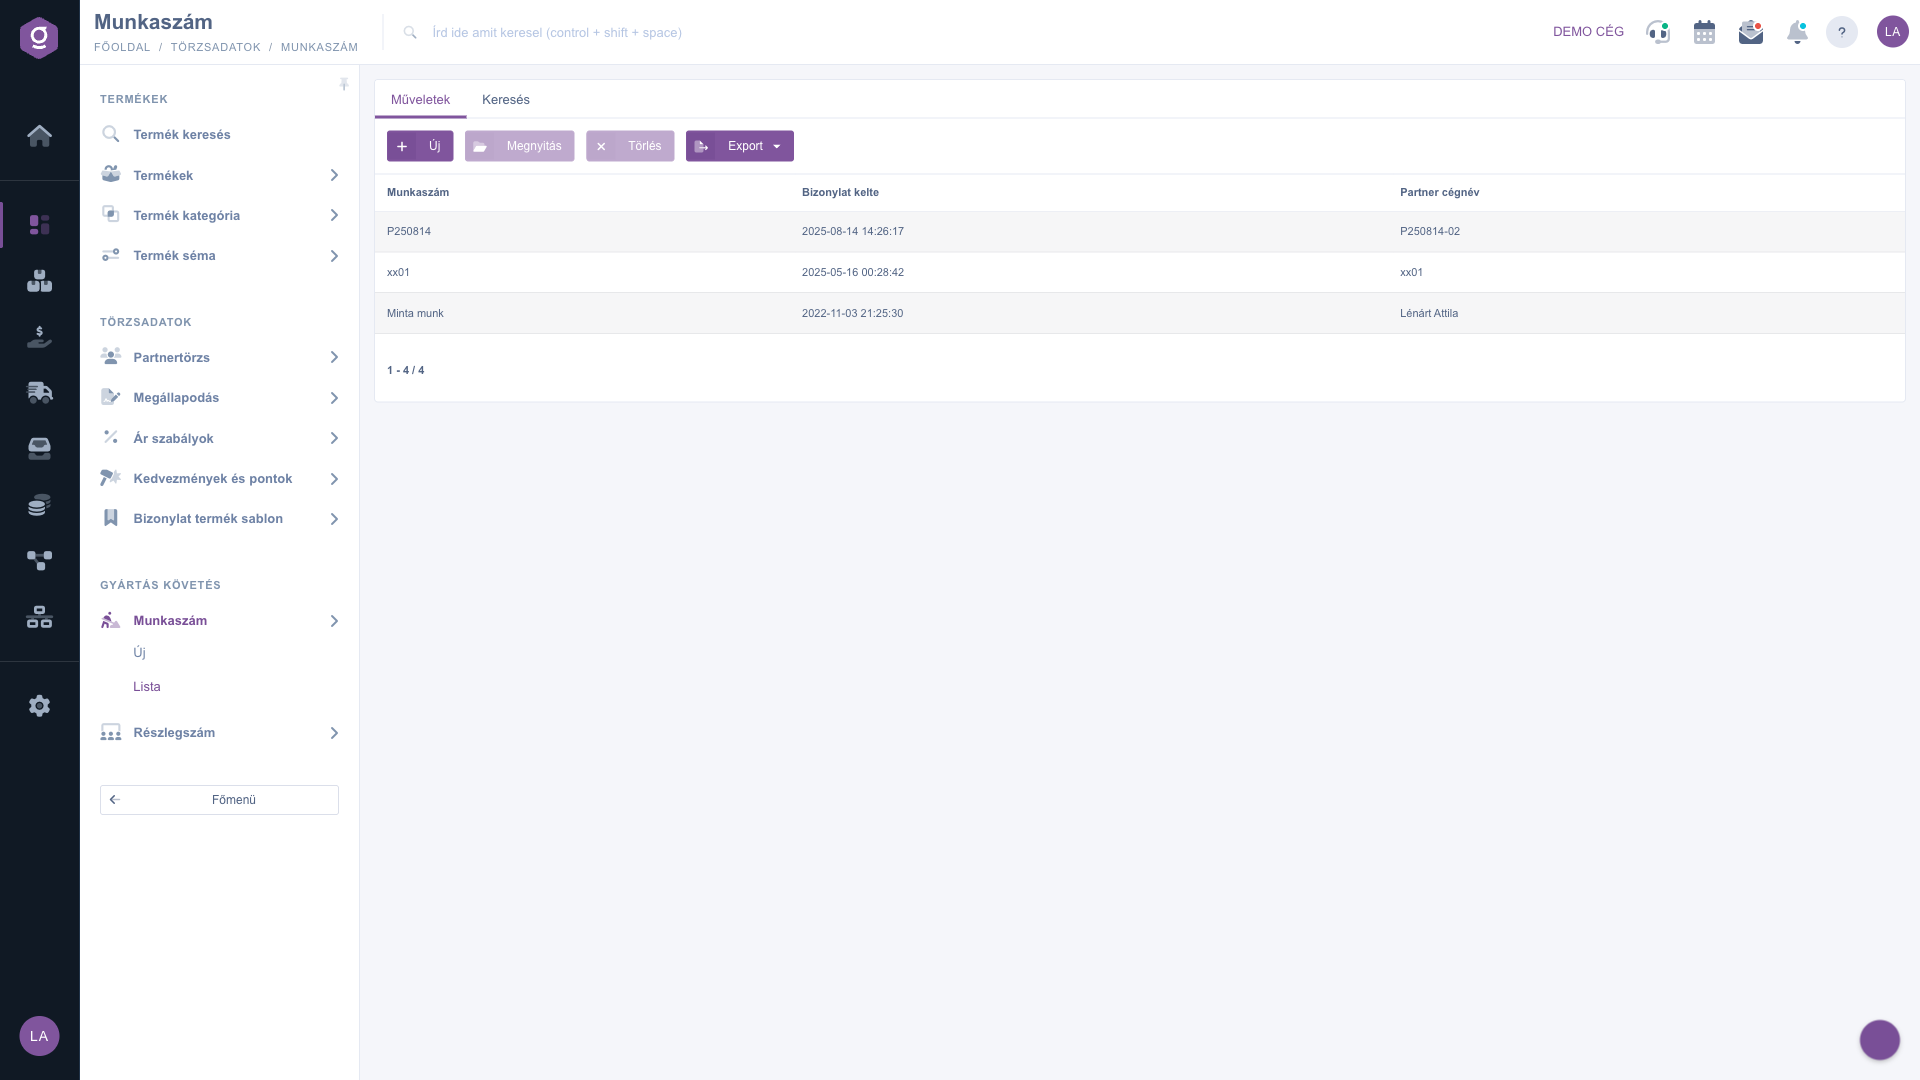
Job number list – Actions tab

2. Buttons on the Actions tab

  • New: opens the empty job number sheet so you can record a new item.
  • Open: opens the sheet of the job number selected in the list so you can edit it. Click the row first to select it.
  • Delete: deletes the selected job number; the system asks for confirmation first, deletes only after you confirm, and then refreshes the list.
  • Export: a drop-down menu where you can choose XLSX to save the job number data to an Excel file. The CSV item cannot be selected.

The same actions (New, Open, Delete) are also available in the context menu when you right-click a row.

3. Searching the list

On the Search tab, enter your filter in the Partner company name and Job number fields, then click the Search button to refresh the list. The Expand button opens more filters: the Document date pair of fields for a period, and the Employee list for the colleague who recorded the job number. If nothing matches, the list shows an empty-list notice with the possible reasons.
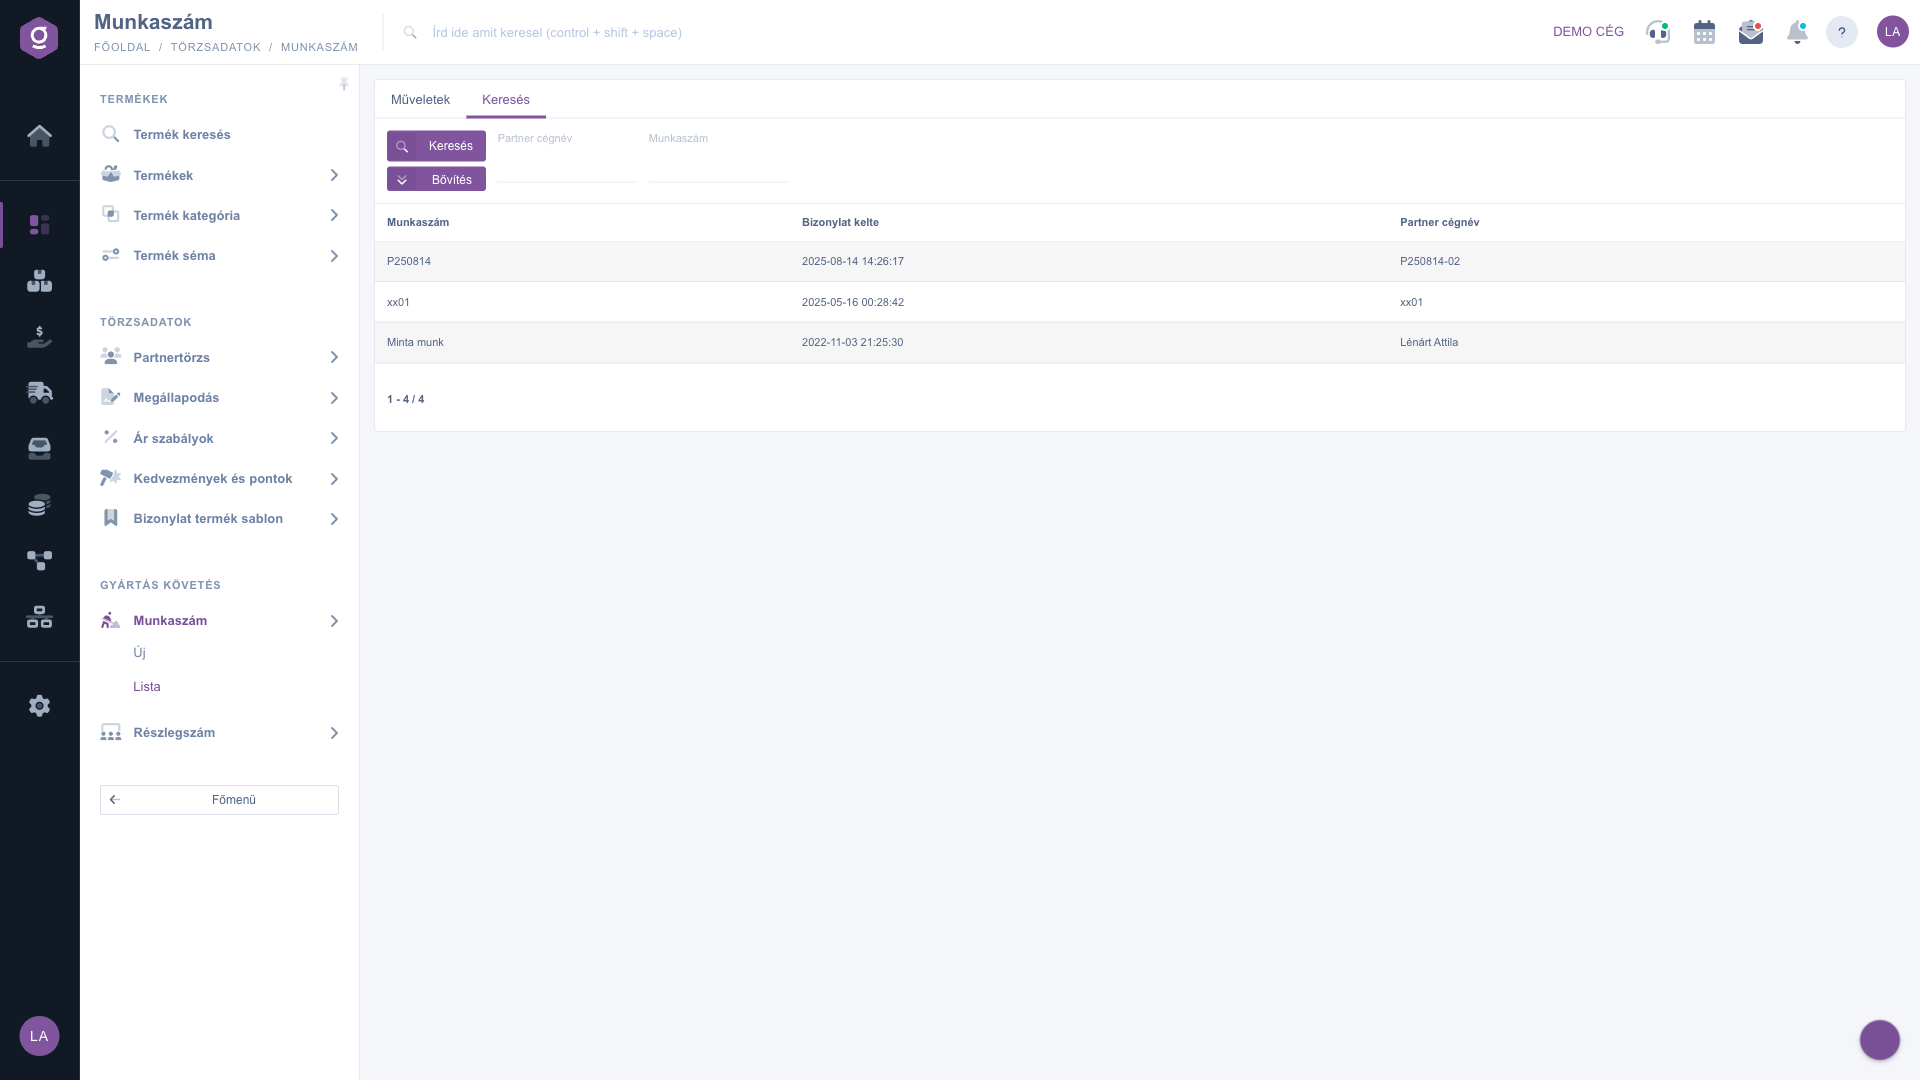
Job number list – Search tab

4. Opening and editing a job number

Select the row, then click the Open button. On the sheet you can edit the job number name, the partner, the partner contact person and the comment, and save your changes with the Save button.

Tip


To see all job numbers of one partner, enter just part of the name in the Partner company name field on the Search tab and click Search: the filter looks for the text anywhere in the name.

Recording a new job number is described in the Job number sheet guide, and using a job number on a document is covered in the Invoice sheet guide.

Field descriptions

The columns and buttons of the list:

Column / ButtonDescription
Job numberThe name or identifier of the job number.
Document dateThe date and time the job number was recorded.
Partner company nameThe name of the partner linked to the job number; empty if no partner is set.
New, Open, DeleteRecord a new job number, open the selected one, or delete it.
ExportExports the job numbers to an XLSX file.

The filter fields of the Search tab:

FieldDescription
Partner company nameFilters by part of the partner name.
Job numberA filter field for the name of the job number.
Document date (Expand)Two date fields (from and to) for filtering by period.
Employee (Expand)A list for choosing the employee who recorded the job number.
Search, ExpandStarts the search, or opens the additional filters.

Frequently asked questions

The Job number module appears under Main menu / Master data / Production tracking only if it is assigned to your user. If you cannot see it, ask your system administrator to check the module assignment in your user settings.

The system shows a warning window asking you to select an item from the list. Click the row you want to select it first, then use the Open or Delete button.

After deletion the job number no longer appears in the list, and there is no restore button in the interface. Make sure you no longer need it before you click Delete. If you still need the same job, record it again with the New button.

Open the Search tab, type the partner name (or part of it) into the Partner company name field and click Search. The list then shows only the job numbers of that partner. You can narrow the period with the Document date fields under the Expand button.

On the job number list only the XLSX format is available in the Export menu, and the CSV item is inactive. Click the Export button and choose XLSX.

On document sheets, start typing in the Job number field and pick the recorded job number from the results; the + button next to the field lets you record a new one. Examples are the Invoice sheet, the Incoming invoice sheet and the Warehouse issue document.

Need personalized help?

Don't want to spend hours searching for a solution? Choose the most efficient way: book a personalized, 45-minute online training session dedicated entirely to you. Whether it's a walkthrough of the basics or a detailed setup of a specific module, our expert colleague will guide you through the whole process, step by step.

Don't waste your time - ask for help!
Our goal is to get you using our system as quickly and efficiently as possible. Whether you're completely new to us or stuck on a specific setting, don't hesitate to ask for help!

Logzi warehouse management software

Get in touch with us

Interested in our software? Feel free to write to us!

Need help?

If you can't find the answer and need assistance

Create your account now,
pay later!

Try it free for 3 days, no risk, no obligation!

