Notification rules

Learn how to link a notification template to a document type and an event in Logzi, and how the recurring Continuous rule works.

Feature overview

Notification rules tie together the three things an automatic notification needs: which document type the rule belongs to, which event it should run on, and which notification template supplies the content. The template only provides the text of the email or SMS; the rule decides when and for which document a notification is generated from it.

  • Document type: defines which document the rule belongs to (for example Order, Invoice, Proforma invoice).
  • Event: controls which operation triggers the notification. The values are: Insert, Modify, Delete, Close and Continuous.
  • Template: you can choose from the notification templates you have already created; it determines the content of the notification.
  • Continuous rule: a scheduled, recurring notification with its own settings (status, number of repetitions, offset, task creation).

The parameters set in the rules control the notifications that are sent out, so any change affects how they work immediately. Make every modification carefully!

Step by step

1. Opening the rule list

Click Main menu / CRM / Correspondence / Notification rules. The list has three columns: Document type, Event and Subject (the subject of the selected template). Above the table there are three buttons: New (new rule), Open (edit the selected rule) and Delete (delete the selected rule). Select a row in the table before using Open or Delete. If you have no rules yet, the list is empty. The screenshots were taken in the Hungarian interface; in the other languages the button and menu names are given with the Hungarian label in brackets where needed.
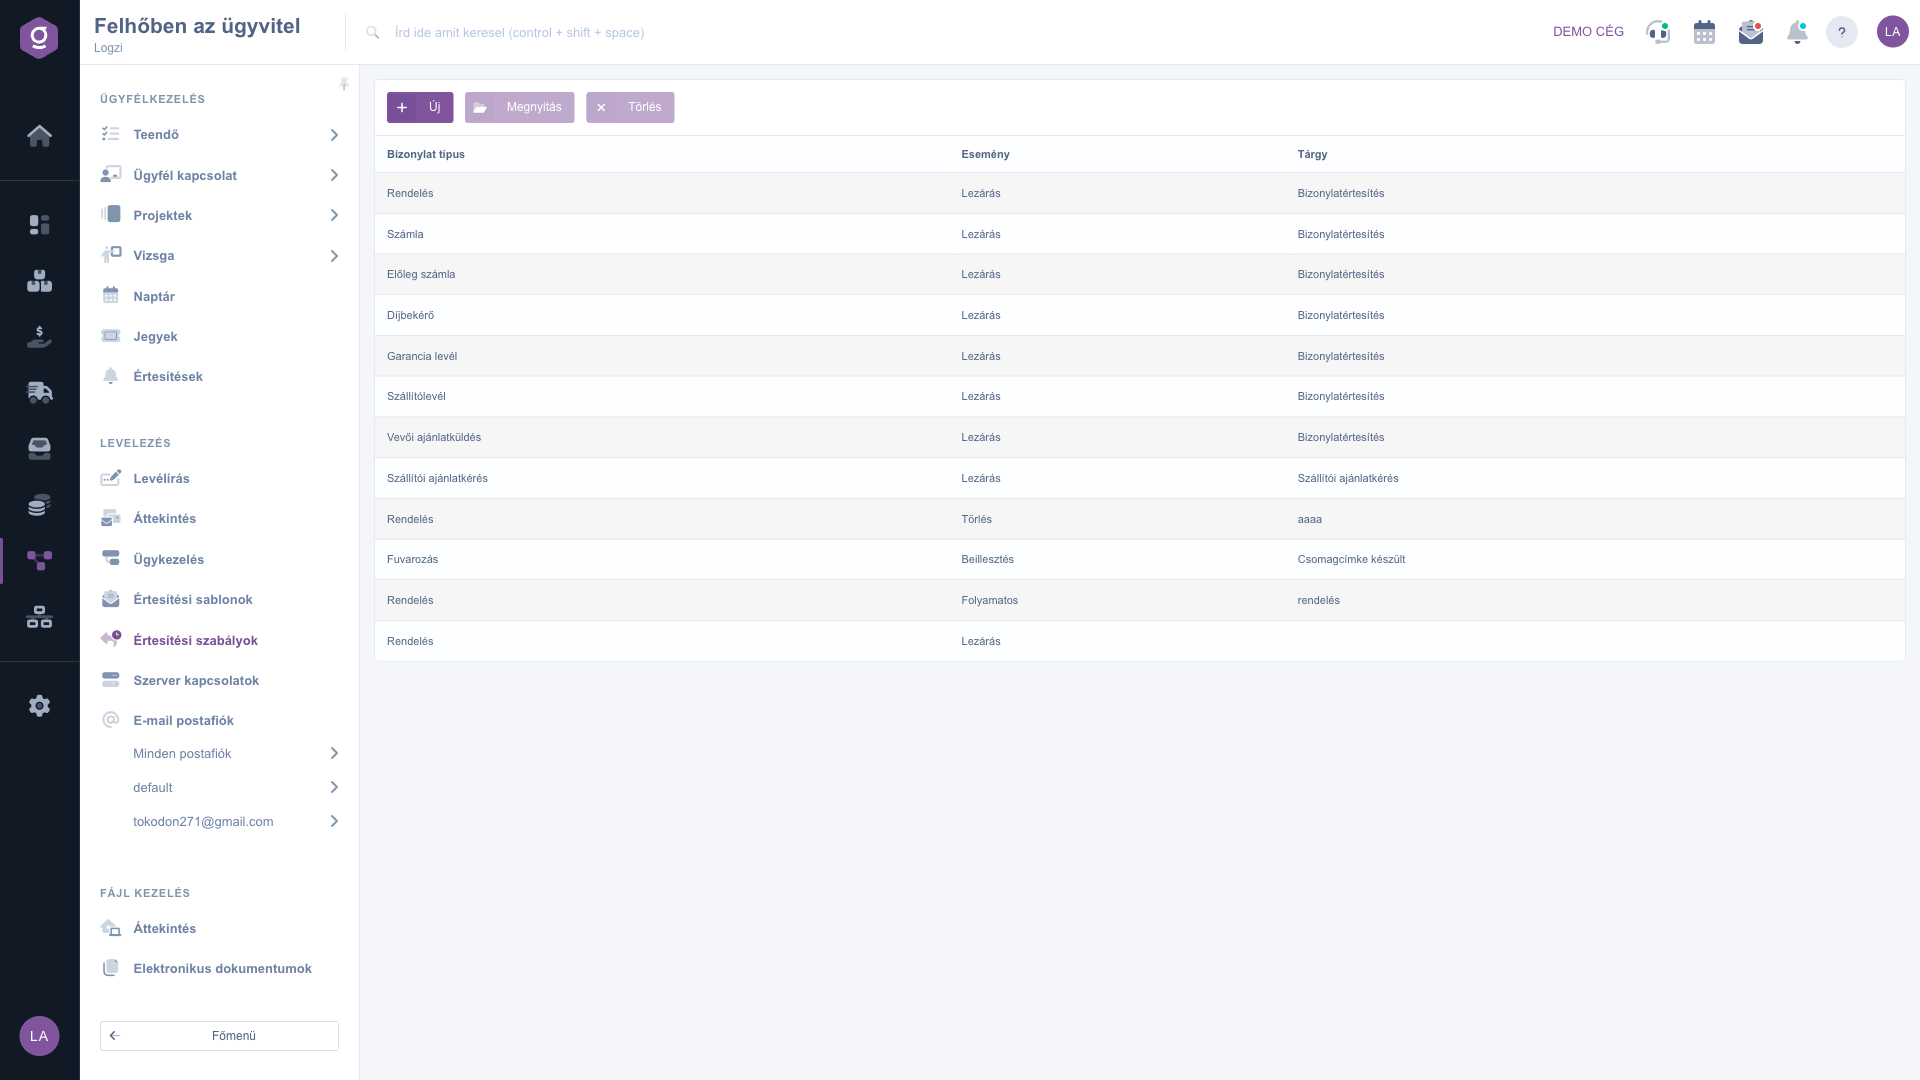
The list of notification rules

2. Creating a new rule

Click the New button. On the Actions tab of the window you will find the Save and Close buttons. Below them are three fields: Document type, Should occur on the following event (the event) and Template (shown as Sablon in the Hungarian screenshot). At the bottom of the window a blue information box briefly summarises what the three fields mean.
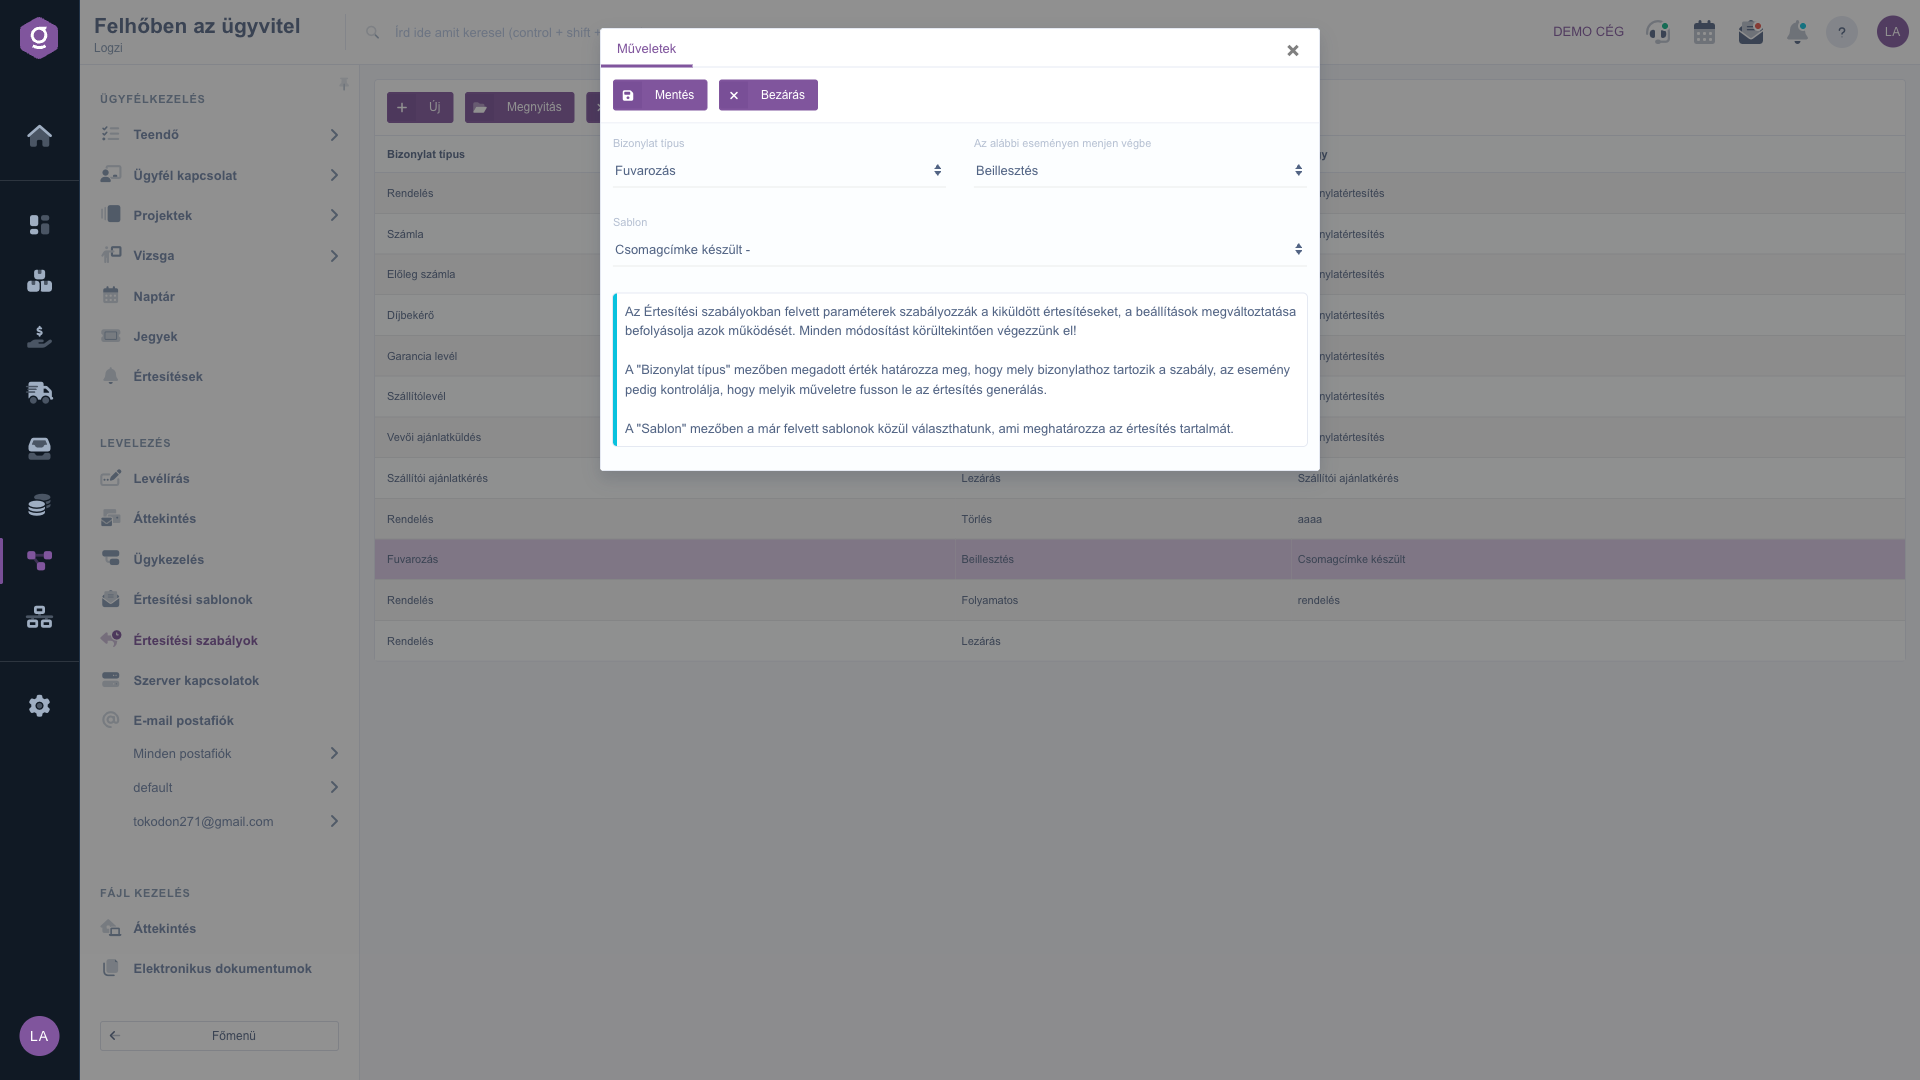
The notification rule editor window

3. Choosing the document type and the event

In the Document type drop-down list, choose which document the rule belongs to (for example Order, Invoice, Advance invoice, Proforma invoice, Warranty letter, Delivery note, Customer quotation, Supplier quotation request, Transport). In the event field, specify which operation should trigger the notification: Insert (Beillesztés), Modify (Módosítás), Delete (Törlés), Close (Lezárás) or Continuous (Folyamatos).

4. Choosing the template

In the Template field you can choose from the notification templates you have already created. Templates appear in the list in the form Subject - Name, so it is worth giving your templates descriptive names. If there is no suitable template yet, first create one on the Notification templates page.

5. Extra settings of the Continuous event

If you choose Continuous as the event, additional fields appear: Status, External/webshop status, Number of repetitions, Repetition reference, Repetition offset (hours) and Create task when sending. This type of rule runs on a schedule, and the program can send a notification about the same document repeatedly. The meaning of the fields is described in the table in the Field explanations section. The Continuous rule currently works for the Order document type, as well as for Invoice, Advance invoice and Proforma invoice.

6. Saving, editing and deleting

Use the Save button to save the rule and the Close button to close the window. To modify an existing rule, select its row, click Open, and save after making your changes. Delete removes the selected rule; after that, the automatic notification belonging to it is no longer generated.

Tip


Before creating a new rule, try out the template with the Test button on the Notification templates page, and only then assign it to the rule. A change to a rule takes effect on the notifications immediately, so change only one thing at a time and check the result.

The text of the notifications and the variables you can use are described in the Notification templates guide.

Field explanations

The fields of the rule form and their meaning. Fields marked "Continuous" are only visible when the event value is Continuous.

Field / ElementRequiredDescription
Document typeDefines which document the rule belongs to. The list shows the names of the document types (for example Order, Invoice, Proforma invoice).
Should occur on the following event (Event)Controls which operation triggers the notification. Its values are: Insert, Modify, Delete, Close, Continuous. The Continuous value means a scheduled, recurring notification.
Template (Sablon)You can choose from the notification templates you have already created; it determines the content of the notification. The items in the list appear in the form Subject - Name.
Status (Continuous)The document status the rule filters on. For orders, the rule takes into account orders with the specified status.
External/webshop status (Continuous)The customer-side, external or webshop status the rule filters on. It can be used for orders.
Number of repetitions (Continuous)How many times in total the notification can be sent about the same document. The sendings are logged.
Repetition reference (Continuous)Which date the timing is relative to. Options: Record date, Fulfillment date, Due date.
Repetition offset (hours) (Continuous)How many hours after the reference date (or before it, if you enter a negative number) the sending should take place. For repetitions, the offset is also counted from the previous sending.
Create task when sending (Continuous)Yes or No. If Yes, the program also creates a Task when the notification is sent. It is only visible for the Continuous event, where it is required.

Frequently asked questions

The event determines which operation performed on the document generates a notification: Insert, Modify, Delete or Close. Continuous is different: it is not tied to an operation but runs on a schedule, and based on the specified status, number of repetitions and offset it can send a notification repeatedly.

Check the following: the Continuous rule only works for the Order, Invoice, Advance invoice and Proforma invoice document types. The rule runs on a schedule as a background process, so the sending does not happen immediately but at the next run. For orders, the status and the external/webshop status filters also count, and the program skips prepaid orders that have not been paid yet. The Number of repetitions limits the total number of sendings per document, so once it is reached, no more notifications go out. For invoices, the offset means a 24-hour time window; a negative value gives a point in time before the reference date (for example before the due date).

If you choose Yes, the Continuous rule also creates a Task when the notification is sent, so the sending can be tracked among your tasks as well. With No, only the notification is sent. The field is only visible for the Continuous event, where it is required.

The rule only defines the condition for sending. For an email to actually go out, the template must exist, and you must set up the Email mailbox with its Server connection. If email sending is disabled for a partner, the program does not send the email and skips it without an error.

Yes. Select the row in the list and click the Delete button. No more automatic notifications are generated based on a deleted rule. The template used by it remains and can still be used for another rule.

The menu item is located under Main menu / CRM / Correspondence. If you cannot see it, the required module or permission is probably not assigned to your user; ask your administrator to check your settings.

Need personalized help?

Don't want to spend hours searching for a solution? Choose the most efficient way: book a personalized, 45-minute online training session dedicated entirely to you. Whether it's a walkthrough of the basics or a detailed setup of a specific module, our expert colleague will guide you through the whole process, step by step.

Don't waste your time - ask for help!
Our goal is to get you using our system as quickly and efficiently as possible. Whether you're completely new to us or stuck on a specific setting, don't hesitate to ask for help!

Logzi warehouse management software

Get in touch with us

Interested in our software? Feel free to write to us!

Need help?

If you can't find the answer and need assistance

Create your account now,
pay later!

Try it free for 3 days, no risk, no obligation!

