Partner master data list

Learn how to search, filter, import and export your partners, and how to create a document for the selected partner.

Function overview

The partner master data is the central address book of Logzi: this is where you keep track of all your customers and suppliers, both companies and private individuals. You only need to create a partner once, then you can select it on every document (invoice, order, quote, delivery note) and in the CRM, so you do not have to retype the company name, tax number, addresses and payment terms. The list helps you quickly find the partner you are looking for, open its sheet or create a document for it.

  • Clear list: partners are shown in a paged table with the company name, tax number, payment method, limit and bank.
  • Search and filter: you can filter by company name, tax number, type, payment method and employee, and with the Expand button also by contact person, email address and identifier.
  • Import and export: you can load partners in bulk from an XLSX file and export the list to an XLSX file.
  • Document management: from the selected partner you can start an invoice, an order or a quote with one click.
  • Customizable view: you decide which columns are visible, how many rows are shown on a page and how the list is sorted.

Partners have no document status (there is no Draft or Closed state): a partner is either active, in which case it appears in the list, or deleted. Deleting is not final: the system only hides the partner and the documents belonging to it are kept. If you open the sheet of a deleted partner, the Partner deleted page appears, where you can restore it with one click.

Step by step

1. Viewing the list and the actions you can perform on partners

Click Main menu / Master data / Partner master data / List to see all the partners you have created. Above the list there are four tabs: Actions, Search, View and layout and Additional functions. With the buttons on the Actions tab you work with the selected row (to select a row, click it in the table):

  • New: create a new partner on an empty sheet. Choose it when the partner is not yet in the master data.
  • Open: open the sheet of the selected partner when you want to change something on it.
  • Delete: delete the selected partner. The action asks for confirmation and is not final, the partner can be restored later.
  • Partner card: open the summary card of the selected partner when you want to see the data and documents of the partner in one place.
  • Import: load partners in bulk. From the dropdown you can choose XLSX - Master data, XLSX - Contact person and XLSX - Address (the CSV options are currently not available), while Universal opens the general import interface in a new tab.
  • Export: download the list to an XLSX file, useful when you want to analyse the partners further in a spreadsheet.
  • Document management: a new document started from the selected partner, see below.

If you right-click a row, the New, Open and Delete actions are also available from the context menu.
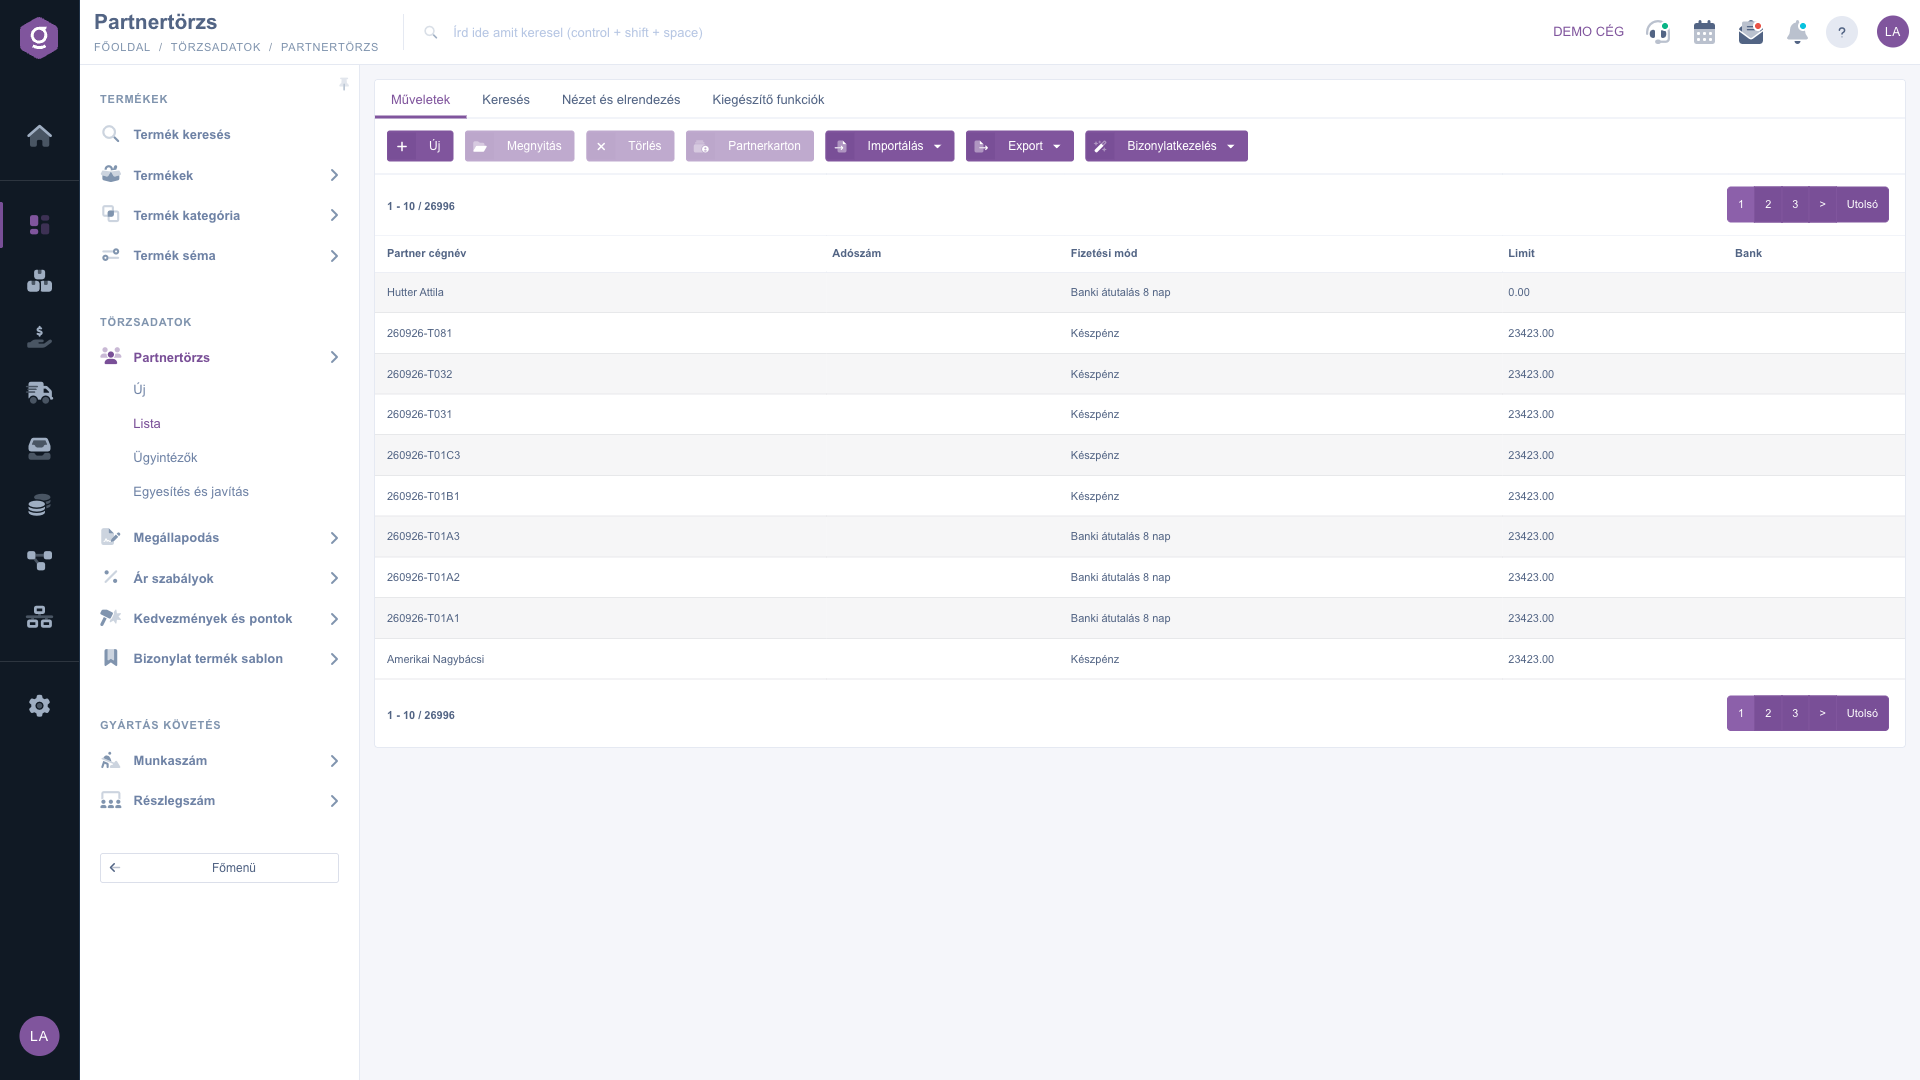
Partner master data list – Actions tab (Műveletek)

Creating a document for the selected partner

Select a partner in the list, then in the dropdown of the Document management button choose which document you want to create: Invoice, Incoming invoice, Incoming delivery note, Delivery note, Customer order, Supplier order or Quote sent to customer. The new document opens with the data of the selected partner, so you do not have to look the partner up again.

Searching among partners

On the Search tab you can filter by the following fields: Partner company name, Tax number, Type, Payment method and Employee. If you click the Expand button, more filters open: Contact person, Contact email address, Contact phone number, Central email address and Identifier. Use the Search button to filter by the conditions you set.
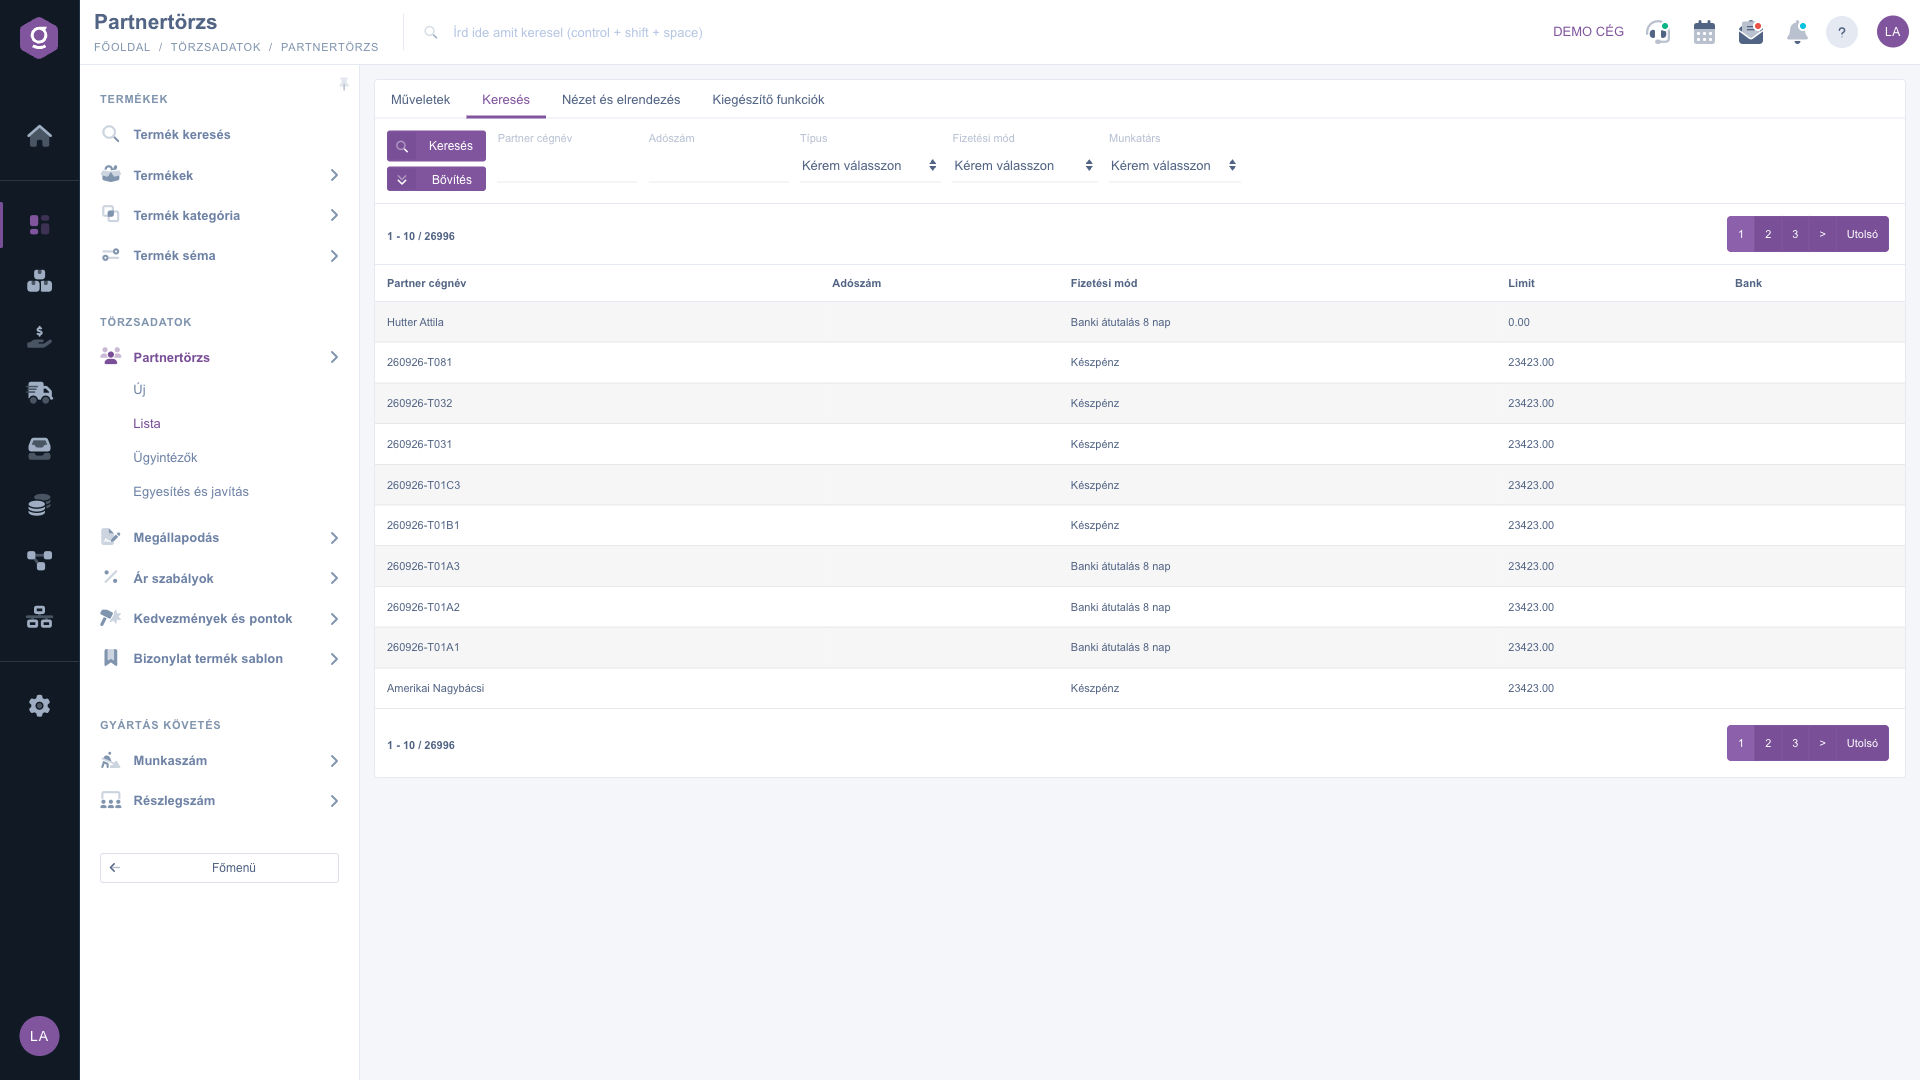
Partner master data list – Search tab (Keresés)

Customizing the view

On the View and layout tab you can set how the list is displayed for you:

  • Columns: choose which columns are shown. By default the Partner company name, Tax number, Payment method, Limit and Bank are visible. In the window you can use the Active checkboxes, reorder with the move icon, and use the Save, Default, Select all and Deselect all buttons.
  • Rows: set how many rows are shown on a page (10 by default).
  • Sorting: choose which column and in which direction the list is sorted (by company name, ascending, by default).
  • Preview window: opens the settings of the preview window.
  • Interface and behavior: further display-related settings.

These settings are saved per user, so they stay in place the next time you sign in. The labels of the Columns and Rows buttons appear in Hungarian (Oszlopok, Sorok) in every language.
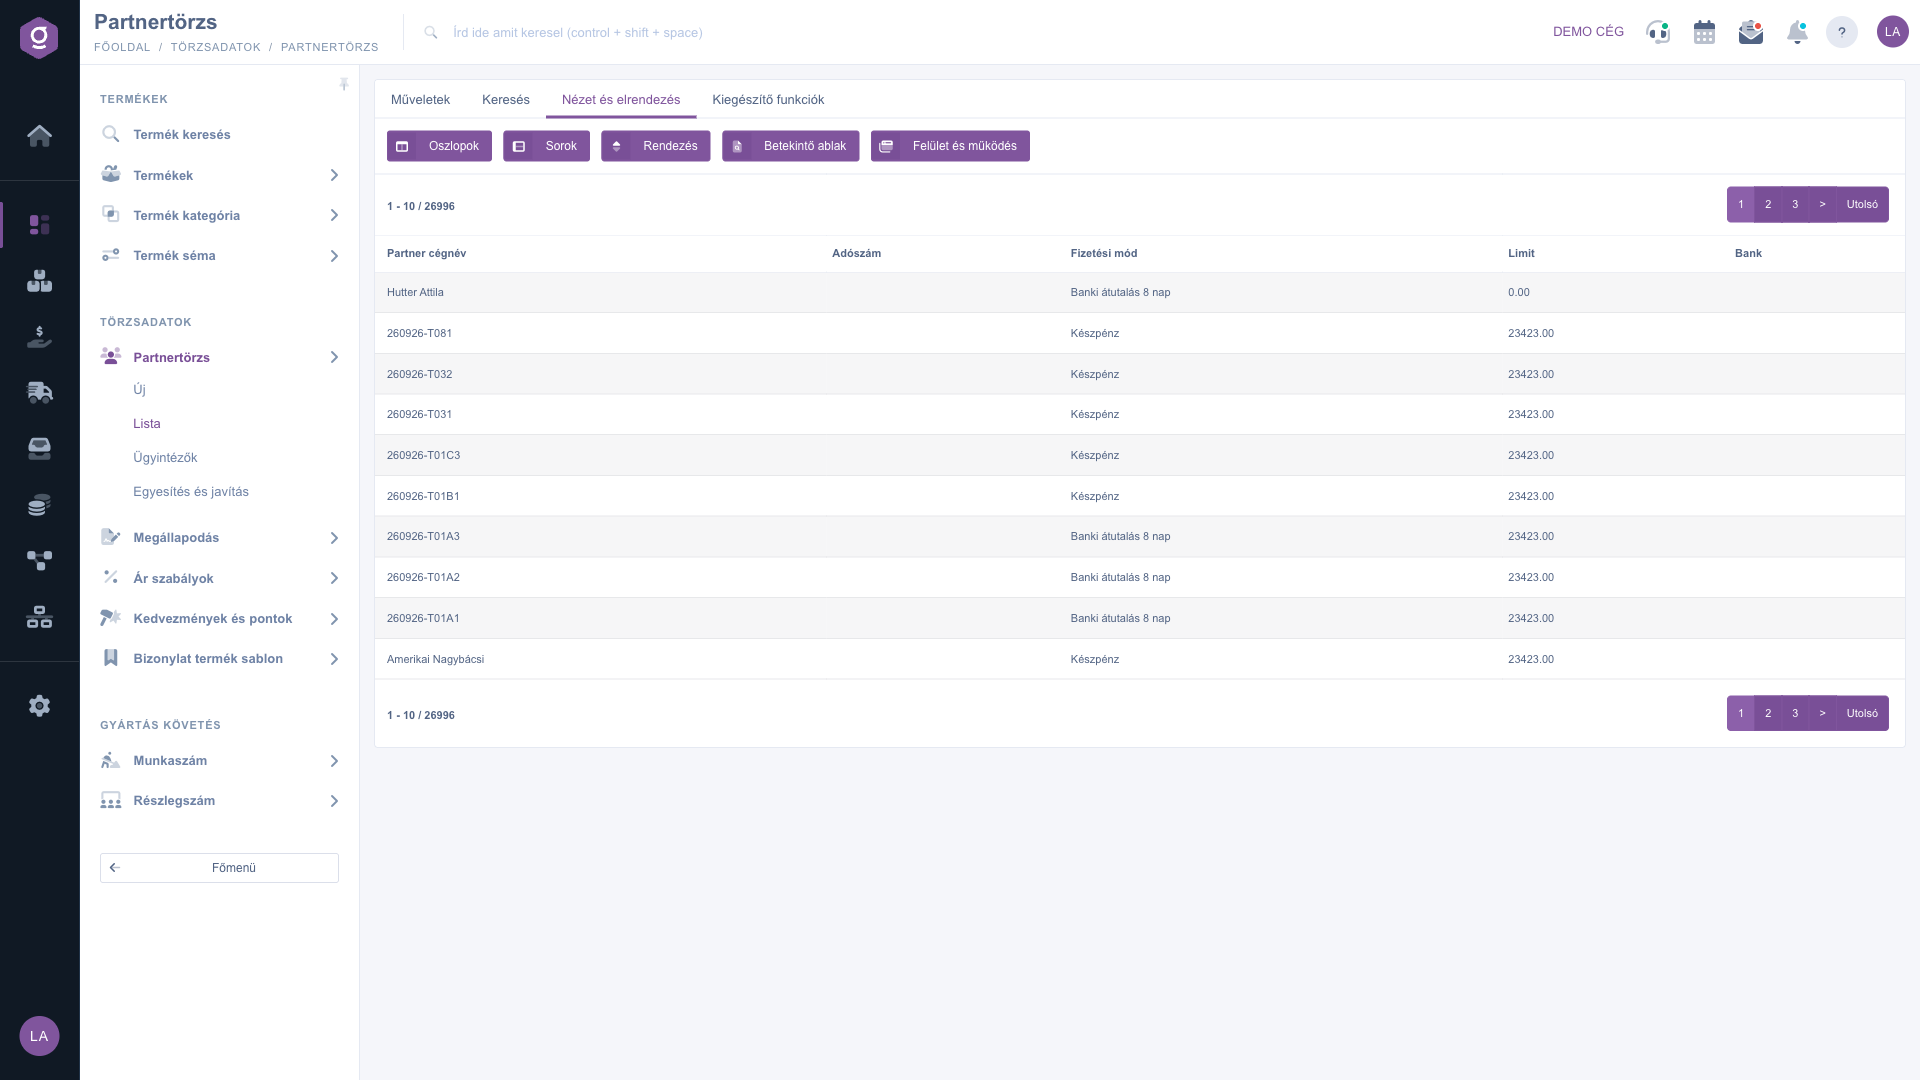
Partner master data list – View and layout tab (Nézet és elrendezés)

Additional functions

On the Additional functions tab you find quick actions related to the selected partner: in the dropdown of the New email button you can choose between the External mail client and the Internal mail client, and with the New task button you can create a task linked to the partner.

You can enter every detail of a partner, such as addresses, contact persons and financial settings, on the partner sheet. You can read about using the sheet in the Partner sheet guide.

Tip


If you want to issue an invoice to a customer quickly, enter a part of the company name (for example "Sample") in the Partner company name field on the Search tab, click Search, select the result and choose Document management / Invoice. If the same partner appears twice in the master data, the Merge and fix menu item (Main menu / Master data / Partner master data) helps you remove the duplicates.


Field descriptions

The columns of the default table and their meaning:

Field / ElementRequiredDescription
Partner company nameThe company name of the partner or, for a private individual, the name. The partners are sorted by this by default.
Tax numberThe tax number of the partner. It can stay empty for private individuals.
Payment methodThe default payment method set for the partner (for example Cash or Bank transfer 8 days).
LimitThe credit limit set for the partner, that is the amount of the receivables limit.
BankThe name of the partner bank, if it is entered on the sheet.

The set of displayed columns can be customized under View and layout > Columns, the list above shows the default view.

The fields of the Search tab and their meaning:

Field / ElementRequiredDescription
Partner company nameThe company name (or a part of it) you filter by.
Tax numberThe tax number (or a part of it) of the partner.
TypeFilter by the partner type from the dropdown list.
Payment methodFilter by the payment method set for the partner.
EmployeeFilter by the employee assigned to the partner.
Contact person, Contact email address, Contact phone numberUnder the Expand button: filter by the name, email address or phone number of the partner contact person.
Central email addressUnder the Expand button: filter by the central email address of the partner.
IdentifierUnder the Expand button: filter by the identifier code entered for the partner.

Frequently asked questions

Yes. Delete does not remove the partner permanently, it only hides it from the list, because documents, orders and other data may be linked to it. If you open the sheet of a deleted partner (for example from an old document), you can restore it on the Partner deleted page with the Yes, I want to make it active again button. The system does not create a new record, it reactivates the original one.

These buttons apply to a selected partner, so they stay inactive until you click a row in the table. The Document management button also starts the new document from the selected partner.

This is usually because no partner matches the conditions set in the search (for example Partner company name, Type, Payment method), or the results continue on a later page. Clear the search fields, choose Please choose in the dropdowns and click Search again. If the list is still empty, you have not created a partner yet: you can add the first one with the New button.

Use the Import button. With XLSX - Master data you load the basic data of partners, with XLSX - Contact person the contact persons and with XLSX - Address the addresses. For more complex cases you can also use the Universal import interface.

You find the contact persons of a partner on the partner sheet or in the separate contact person list. You can read about the contact person list in the Partner contact persons list guide.

The Partner master data module appears under Main menu / Master data only if it is assigned to your user. The Contact persons and Merge and fix submenus belong to a separate module. If you cannot see one of them, ask the system administrator to check the module assignment in your user settings.

Need personalized help?

Don't want to spend hours searching for a solution? Choose the most efficient way: book a personalized, 45-minute online training session dedicated entirely to you. Whether it's a walkthrough of the basics or a detailed setup of a specific module, our expert colleague will guide you through the whole process, step by step.

Don't waste your time - ask for help!
Our goal is to get you using our system as quickly and efficiently as possible. Whether you're completely new to us or stuck on a specific setting, don't hesitate to ask for help!

Logzi warehouse management software

Get in touch with us

Interested in our software? Feel free to write to us!

Need help?

If you can't find the answer and need assistance

Create your account now,
pay later!

Try it free for 3 days, no risk, no obligation!
