1. Opening a new stocktaking document
Click Main menu / Stock management / Stocktaking / New to open an empty document. You can open an existing document from Main menu / Stock management / Stocktaking / List. At the top of the page you find the Actions, Additional functions and View and layout tabs, below them the document header, and then the Items tab and the other tabs.
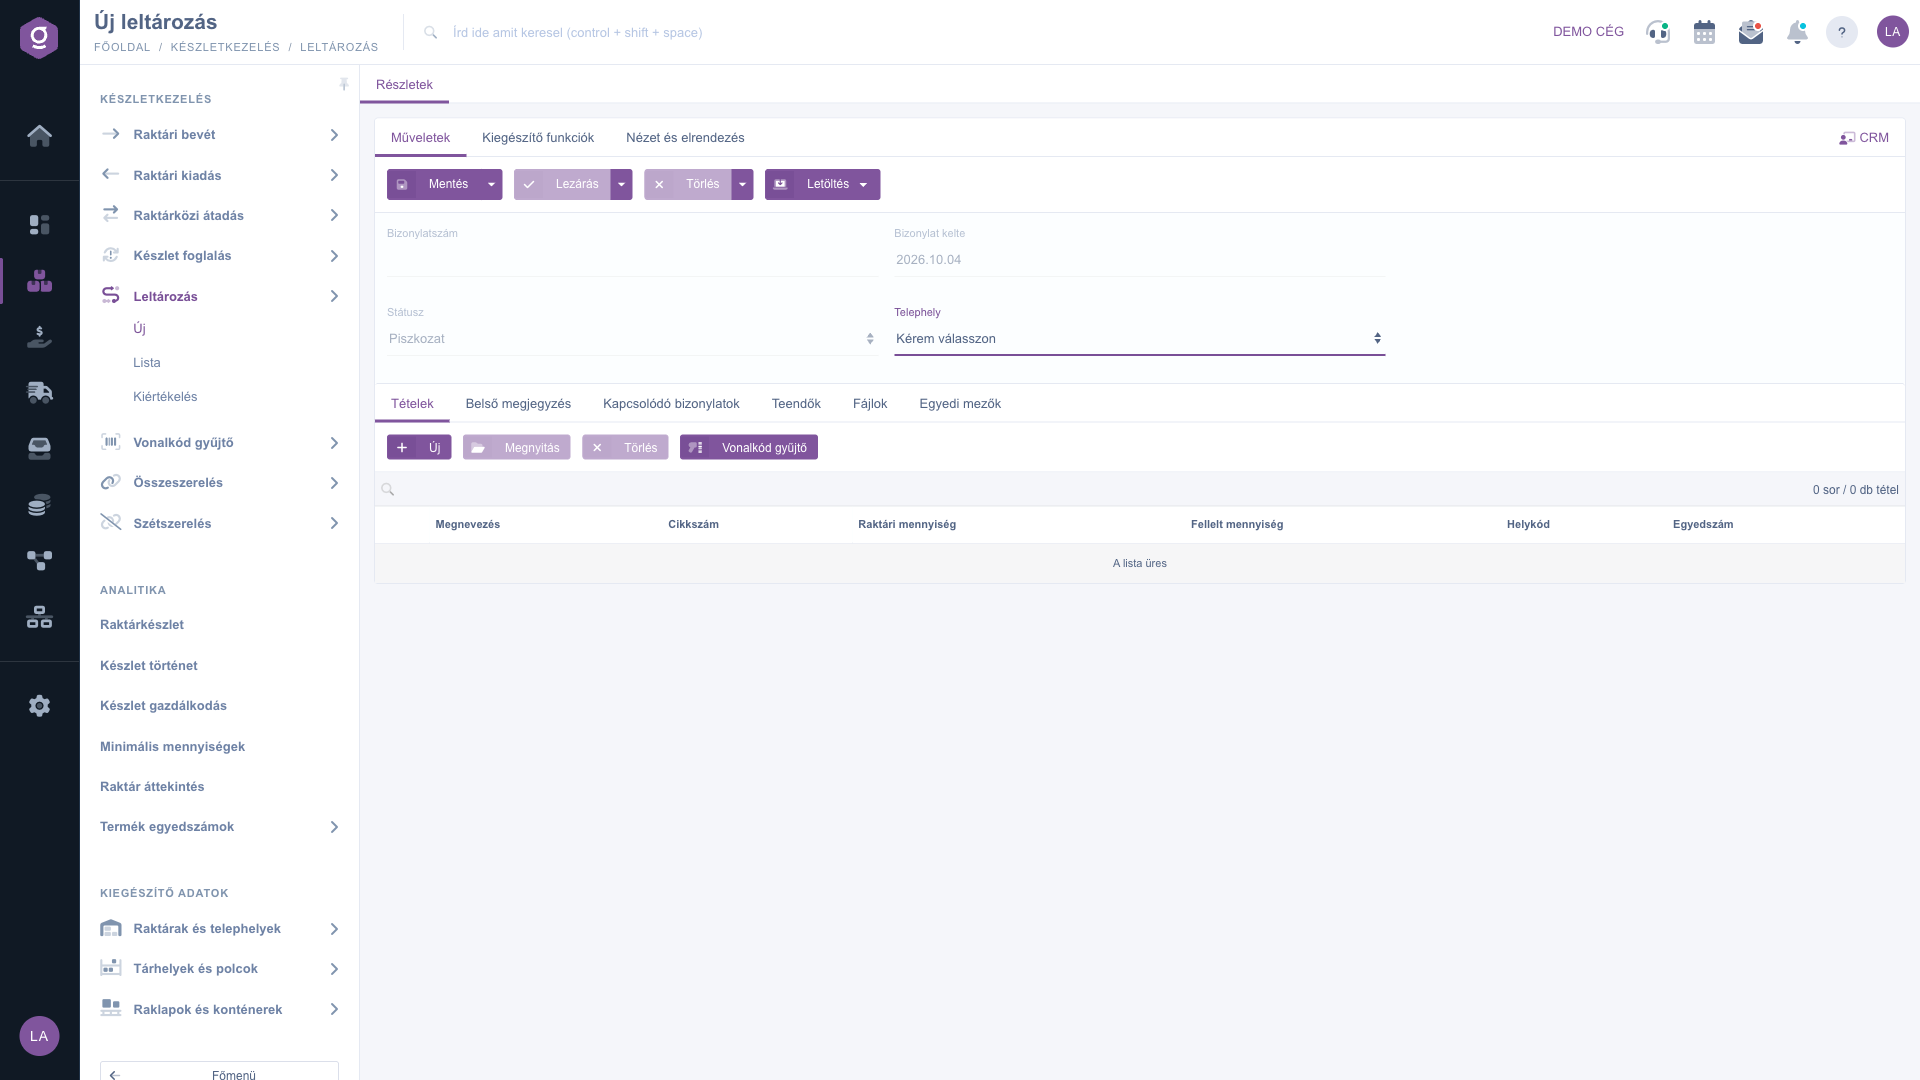
New stocktaking document – header and Items (Tételek) tab
2. The header and selecting the site
In the header you find the following fields - the detailed description is in the Field descriptions section:
- Document number: empty before saving, assigned automatically on the first save, cannot be edited manually.
- Status and Document date: filled in by the system, not editable. A new document is in Draft status.
- Site: choose the site whose stock you are counting. The default value of the field is Please choose.
When you select the Site, a Warning (Figyelmeztetés) window asks whether the item list should be filled with the stock of the products currently in the warehouse of that site. You can choose from three buttons:
- Yes (Igen): the system loads one row per product, with the whole stock of the site in the Warehouse quantity column.
- Yes, with location code (Igen, helykóddal): the system loads a row per product and per storage location, so you can count shelf by shelf, location code by location code.
- No (Nem): the window closes and the item list stays empty, you add the items yourself.
In the loaded rows the Found quantity is initially 0. Loading completely replaces the previous list of items, so if you have already entered items, think twice before selecting the site again.
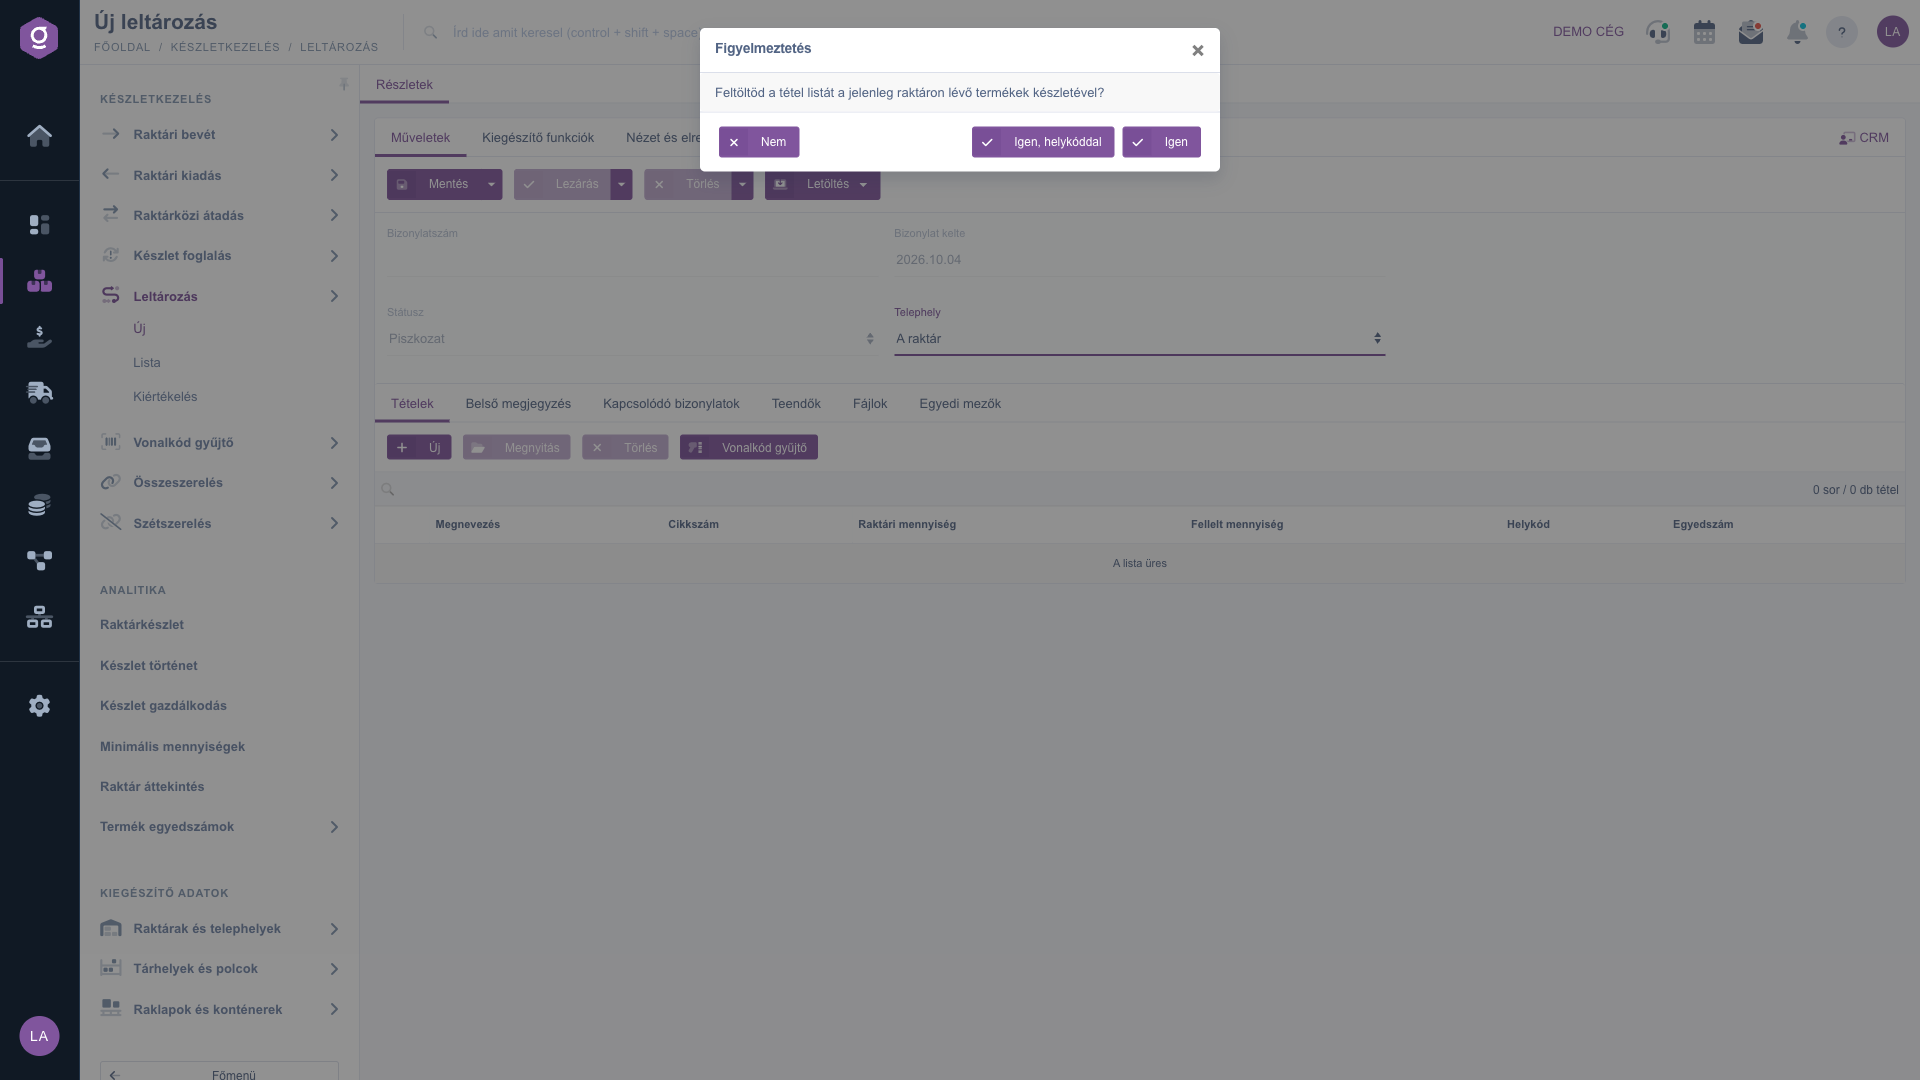
Selecting the site – Warning (Figyelmeztetés) window asking about loading the stock
3. Adding items and recording the found quantity
You manage the content of the document on the Items tab, with the buttons above the item table and in the table. Items can only be edited while the document is in Draft status. The columns of the table are: Name, Item number, Warehouse quantity, Found quantity, Location code and Serial number. With the search field above the table you can filter the items already added.
- New: opens the item editor window, where you select the product by item number or name and enter the found quantity. Choose it when you want to add a single item or supplement the loaded list.
- Open: opens the selected item for editing - for example to overwrite the loaded found quantity of 0.
- Delete: removes the selected item from the list; the final deletion happens when you save the document.
- Barcode collector: in a text field you can type or scan barcodes and the counted quantities, one per line (format: [barcode];[quantity]), and the system adds the items from them in one go. If you leave out the quantity, 1 is recorded. If the same item number is already on the list, the scanned line overwrites it and the quantities are not added up.
On the single tab of the item window, called Actions, you can choose from the following buttons:
- Add: adds the item to the document and closes the window.
- Add and new product: adds the item, then immediately opens a new, empty item window for the next product.
- Close: closes the window without adding the item.
In the window you select the product by entering the Item number and the Name, the Warehouse quantity field is read-only, and in the Found quantity field you enter the counted number of pieces (decimals are allowed). With the Storage locations and shelves field you can assign a location code to the item. If the product is not in the product master data, you get an error message - in that case create the product first (see the Additional functions part).
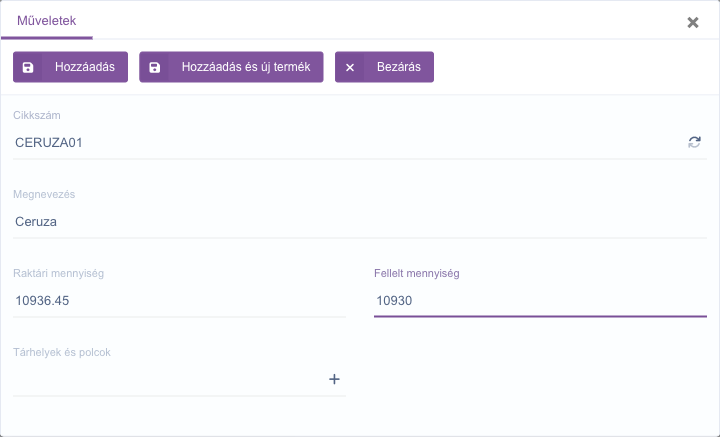
Adding an item - the item window
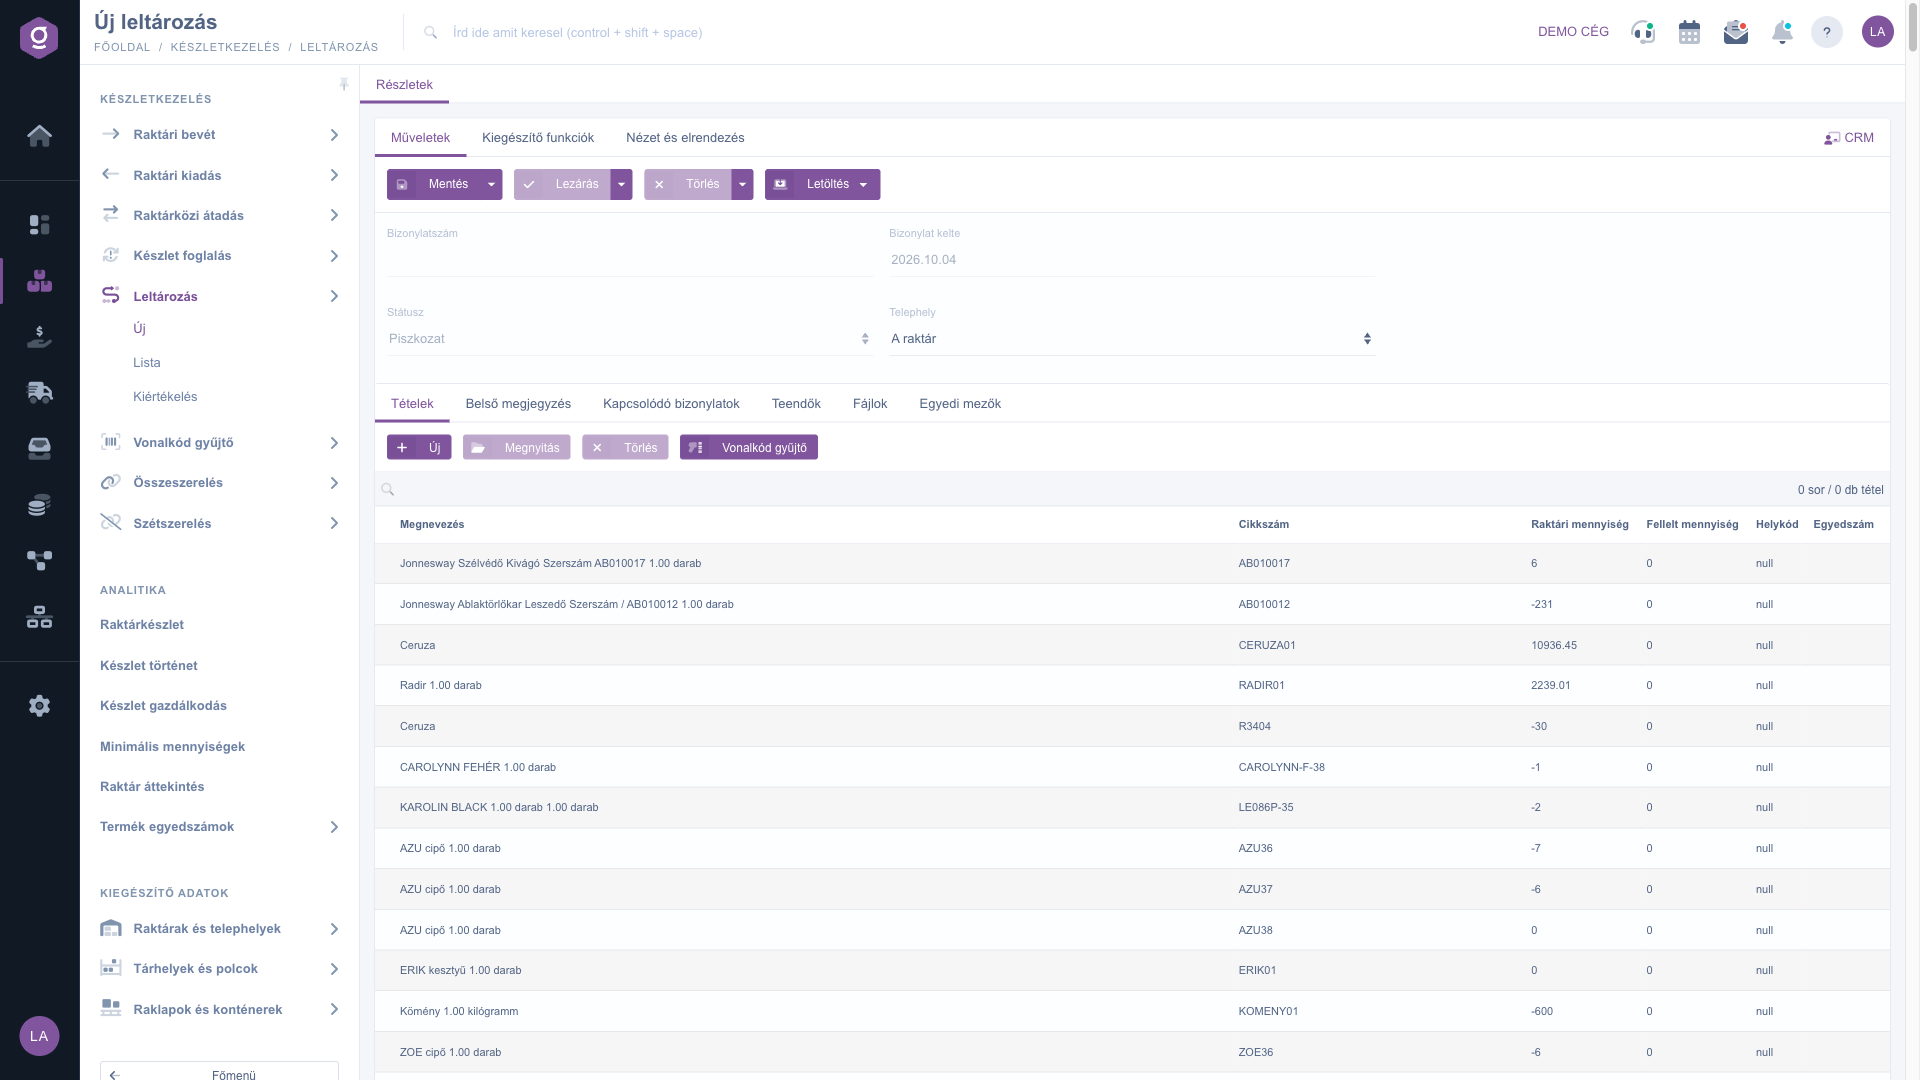
Loaded items on the Items (Tételek) tab - Warehouse quantity and Found quantity
4. Comments and attachments
Besides the Items tab there are further tabs:
- Internal comment: a note visible only within the company; from the drop-down at the top of the tab you can also load a saved text template.
- Related documents: the list of documents related to this document, with the columns Document number, Document date, Document type, Issuing employee and Action.
- Tasks: the list of tasks recorded for the document.
- Files: managing the documents attached to the document (for example a scanned copy of the count sheet).
- Custom fields: the company's own additional fields for the document.
5. Saving, closing and deleting
On the Actions tab you find the buttons that control the life cycle of the document:
- Save: the data is recorded, but the document stays in Draft status and can still be edited; saving does not change the stock yet. A new document can only be saved with at least one item. In the drop-down menu of the button, Save and close saves and closes the document in one step.
- Close: finalises the document and this is when the stock correction takes place - after this it can no longer be modified. It is only available for a document in Draft status. From the drop-down menu, Close and print or Close and download produces the printout right after closing.
- Delete: the document moves to Cancelled status and cannot be restored. You can only delete documents in Draft and Closed status. The Delete and copy option in the drop-down menu also makes a copy next to the deletion - if you entered the stocktake with wrong data, you can start over with it in one step.
- Download: the document can be downloaded in XLSX format and in a PDF preview, and after closing also in CSV and PDF format.
6. What happens to the stock when you close the document?
When you close the document, the system compares the Warehouse quantity recorded on each item with the Found quantity and settles the difference immediately:
- Surplus (the found quantity is higher than the warehouse quantity): a Warehouse receipt document is created for the stocktake with the quantity of the difference.
- Shortage (the found quantity is lower than the warehouse quantity): a Warehouse issue document is created for the stocktake with the quantity of the difference.
- Match: no document is created for the item, its stock stays unchanged.
The resulting receipt and issue are created for the Site of the stocktake, item by item with the location code entered, and the system closes them automatically, so the stock is set to the found quantity right away. When you delete the stocktake, the system also deletes these documents, so the stock correction is reversed.
7. Additional functions and customising the view
On the Additional functions tab you find extra options that help your daily work: with the New product button you can add a new product to the product master data (it opens in a new tab, so the stocktake stays open), and with the New task button you can create a task related to the document.
On the View and layout tab, the Interface and behavior button lets you customise how the page is displayed. This setting is saved for your user, so it is kept the next time you sign in.
Tip
After loading the stock the Found quantity is 0 in every row, and closing books the items you did not actually count as a full shortage. So only load the stock for a site and product list that you can really count through, and before closing check that no uncounted row is left. For shelf storage, loading with Yes, with location code helps you work from shelf to shelf.
If you want to list, search or manage the stocktakes you have already created, see the
Stocktaking list guide. You can learn about the differences of closed stocktakes in the
Stocktaking evaluation guide.



