Document types define which prefix, currency and print template a given kind of document is created with. For example, you can add separate types for your forint and euro invoices.
Click Main menu / Settings / System settings / Document type. Above the list you will find the New, Open and Delete buttons. The table columns are Name, Document prefix, Currency and Default. The screenshots were taken in the Hungarian interface.
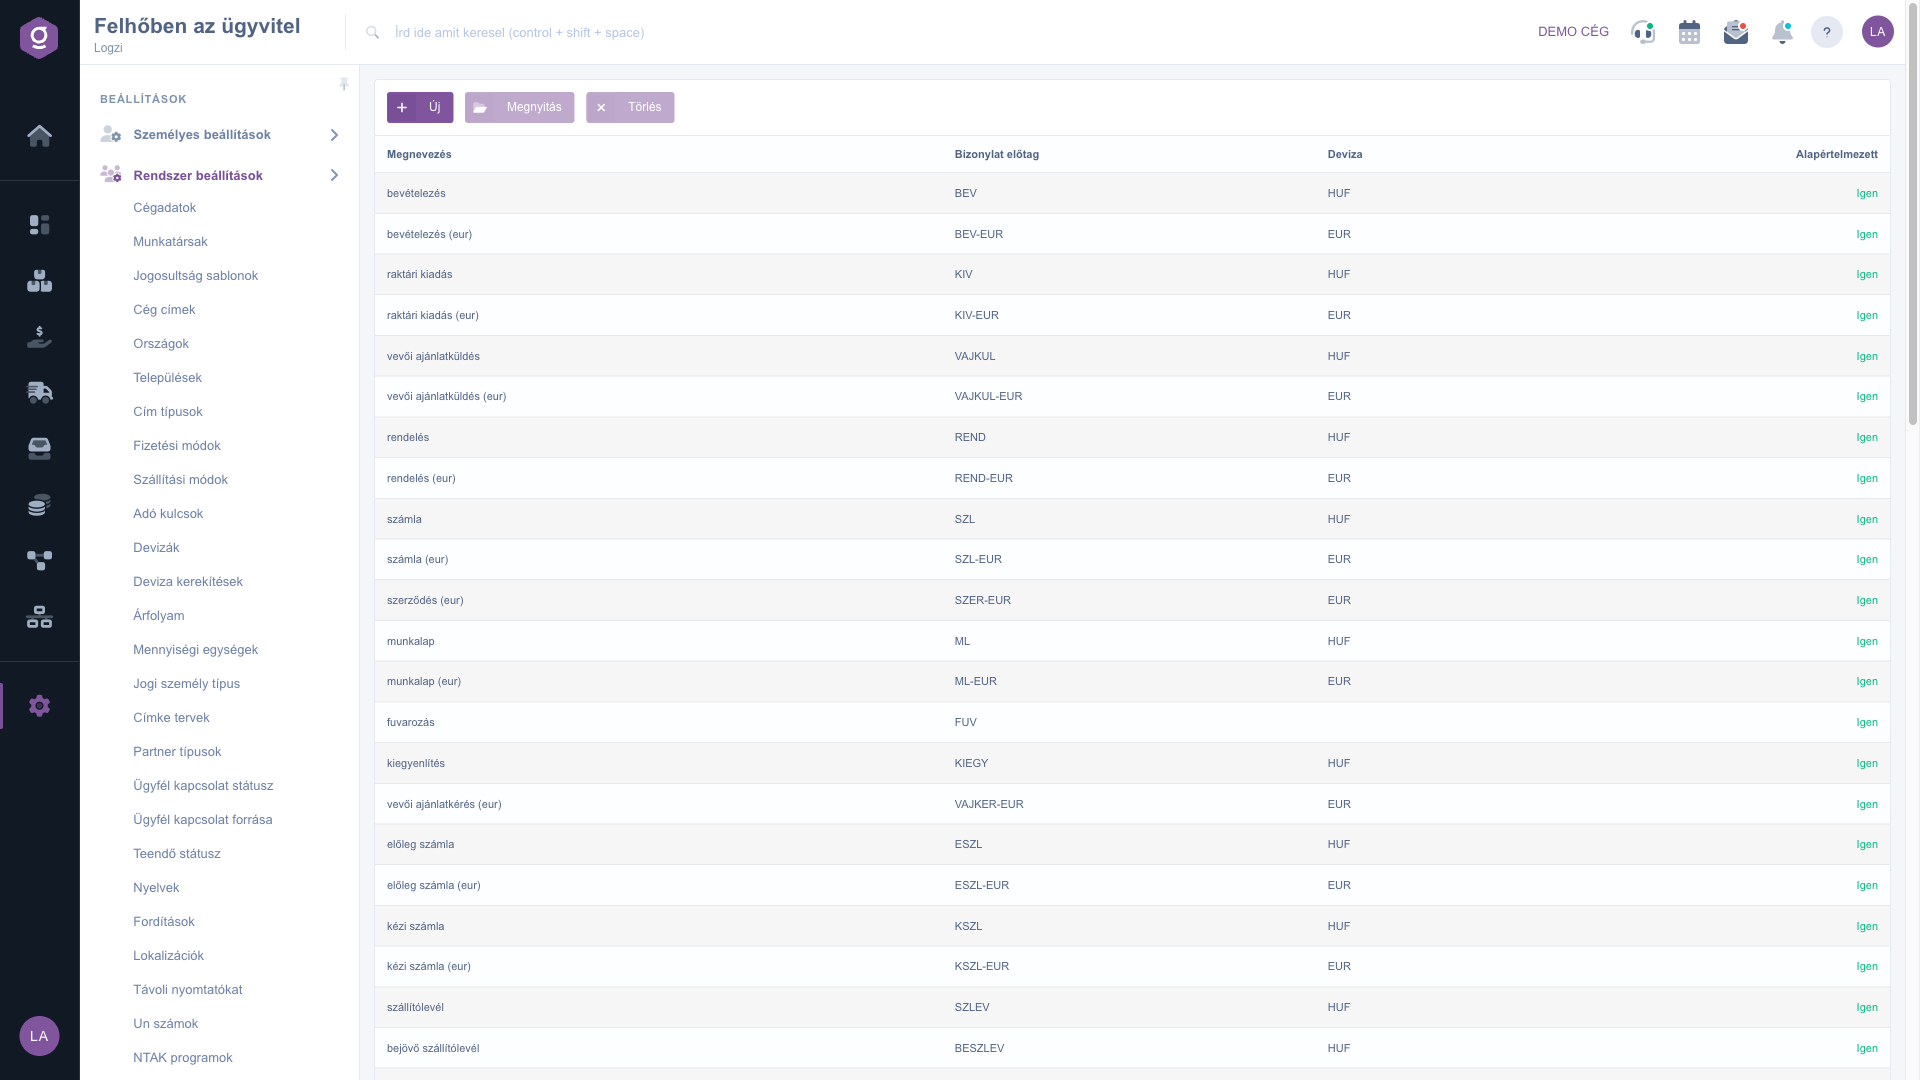
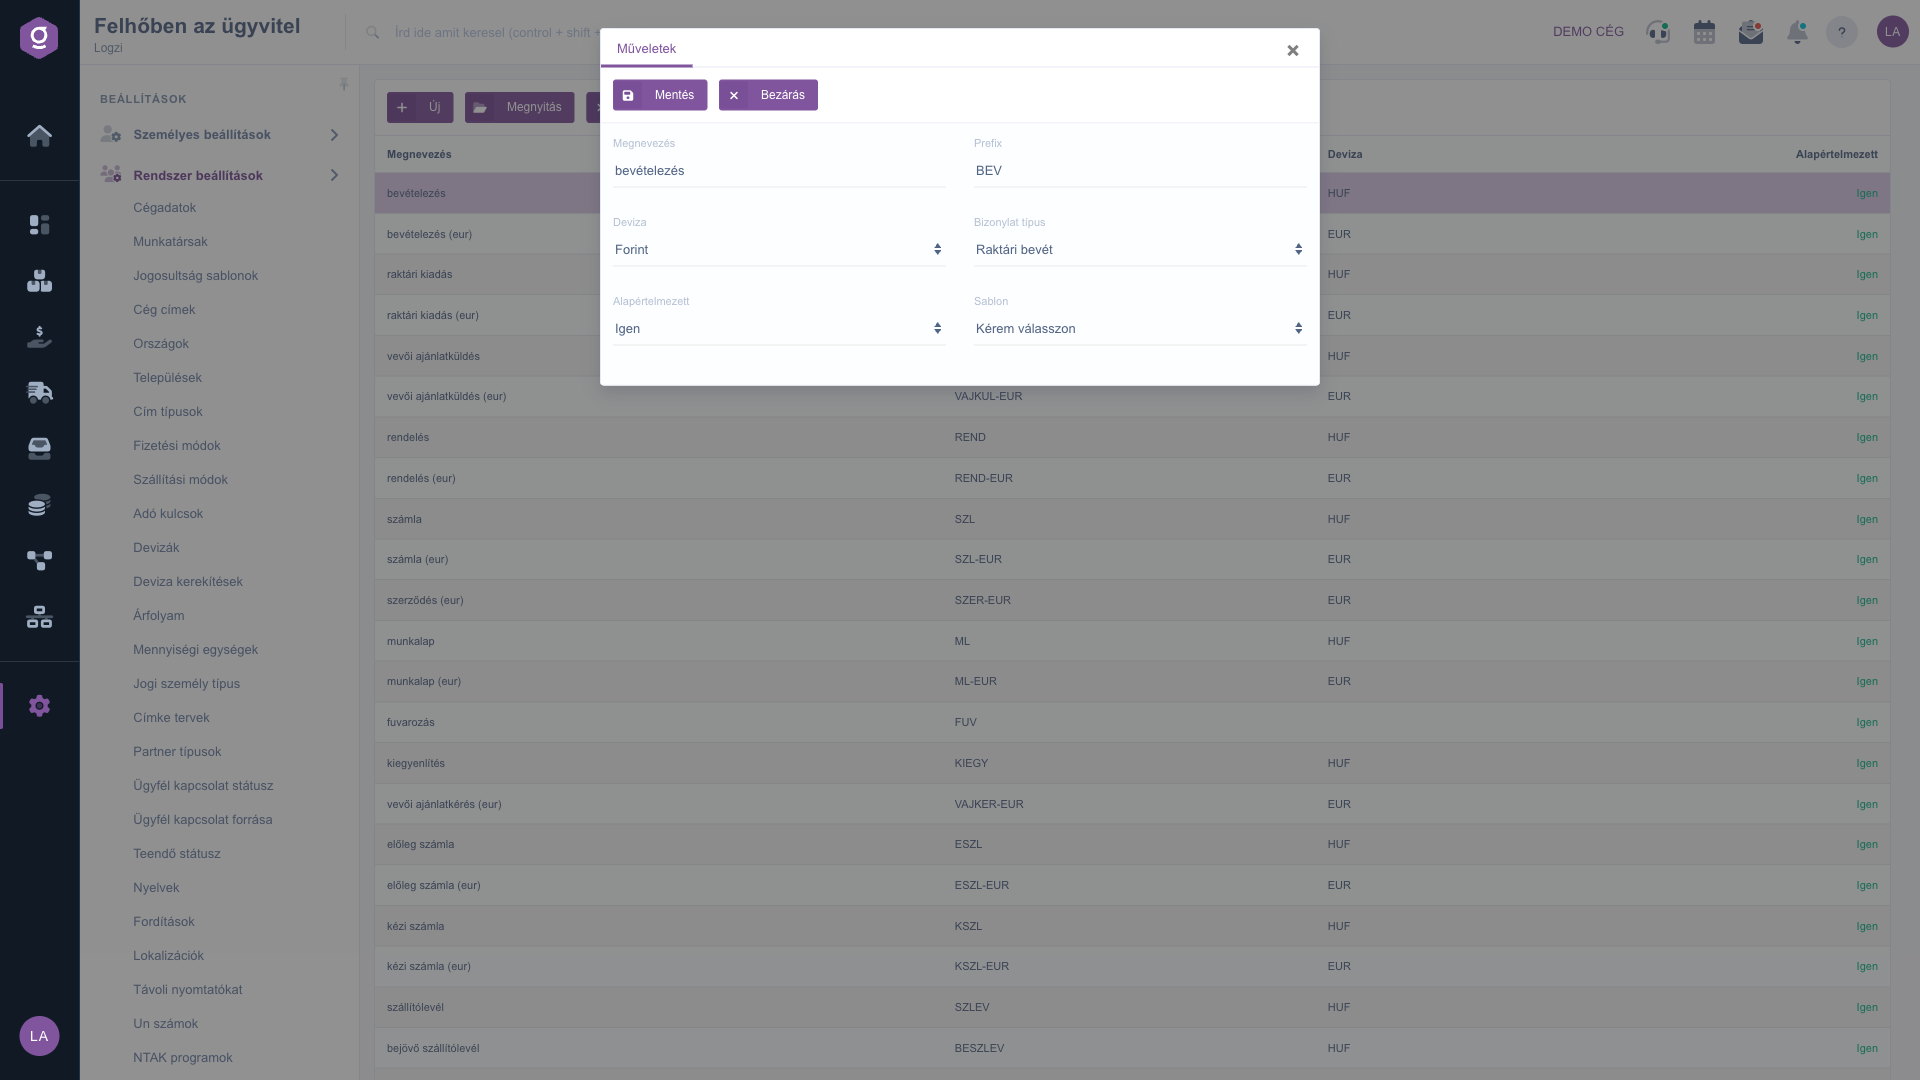
Click New, or select a row and click Open. On the Actions tab enter the Name and Prefix, choose the Currency, Document type and Template, and set the Default field (Yes/No). Use Save to save, or Close to close the window without saving.
Select the row you want to remove, click Delete and confirm the action.
If you invoice in several currencies with the same kind of document, create a separate document type per currency with a different prefix, so the document identifiers are easy to tell apart.
The following fields are available when editing a document type.
| Field | Required | Description |
|---|---|---|
| Name | Name of the document type, at least 2 characters long. | |
| Prefix | Prefix of the document identifier, at least 2 characters long. | |
| Currency | The currency of the document type. | |
| Document type | The kind of document the type belongs to. | |
| Default | Yes or No: sets whether this is the default type. | |
| Template | The print template the system uses for this type. |
The prefix is the first part of the document identifier. It helps you tell document types apart, for example invoices in different currencies.
The default document type shows which type the system offers first for the given kind of document.
The template defines which print template belongs to the type. If you do not have a suitable template yet, create one first on the Document print templates page.
Yes, you can edit them any time by opening the row, but for documents already issued this may cause a difference compared to earlier identifiers, so change them carefully.
The menu item is located under Main menu / Settings / System settings. If you cannot see it, you probably do not have permission, so ask your administrator to enable it.
Don't want to spend hours searching for a solution? Choose the most efficient way: book a personalized, 45-minute online training session dedicated entirely to you. Whether it's a walkthrough of the basics or a detailed setup of a specific module, our expert colleague will guide you through the whole process, step by step.
Don't waste your time - ask for help!
Our goal is to get you using our system as quickly and efficiently as possible. Whether you're completely new to us or stuck on a specific setting, don't hesitate to ask for help!
Create your account now,
pay later!


