On the Account data page you manage the data of your own user account: you can change your name and contact details, change your login password, and turn on two-factor authentication. The settings apply to the user you are logged in as.
The password and two-factor authentication affect how you log in, so always change them with care!
Click Main menu / Settings / Personal settings / Account data. At the top of the page you see the Save button (Mentés), below it the personal data fields, and then two tabs: Login data (Belépési adatok) and Two-factor authentication (Kétfaktoros hitelesítés). The screenshots were taken in the Hungarian interface; where needed, the Hungarian label is given in brackets.
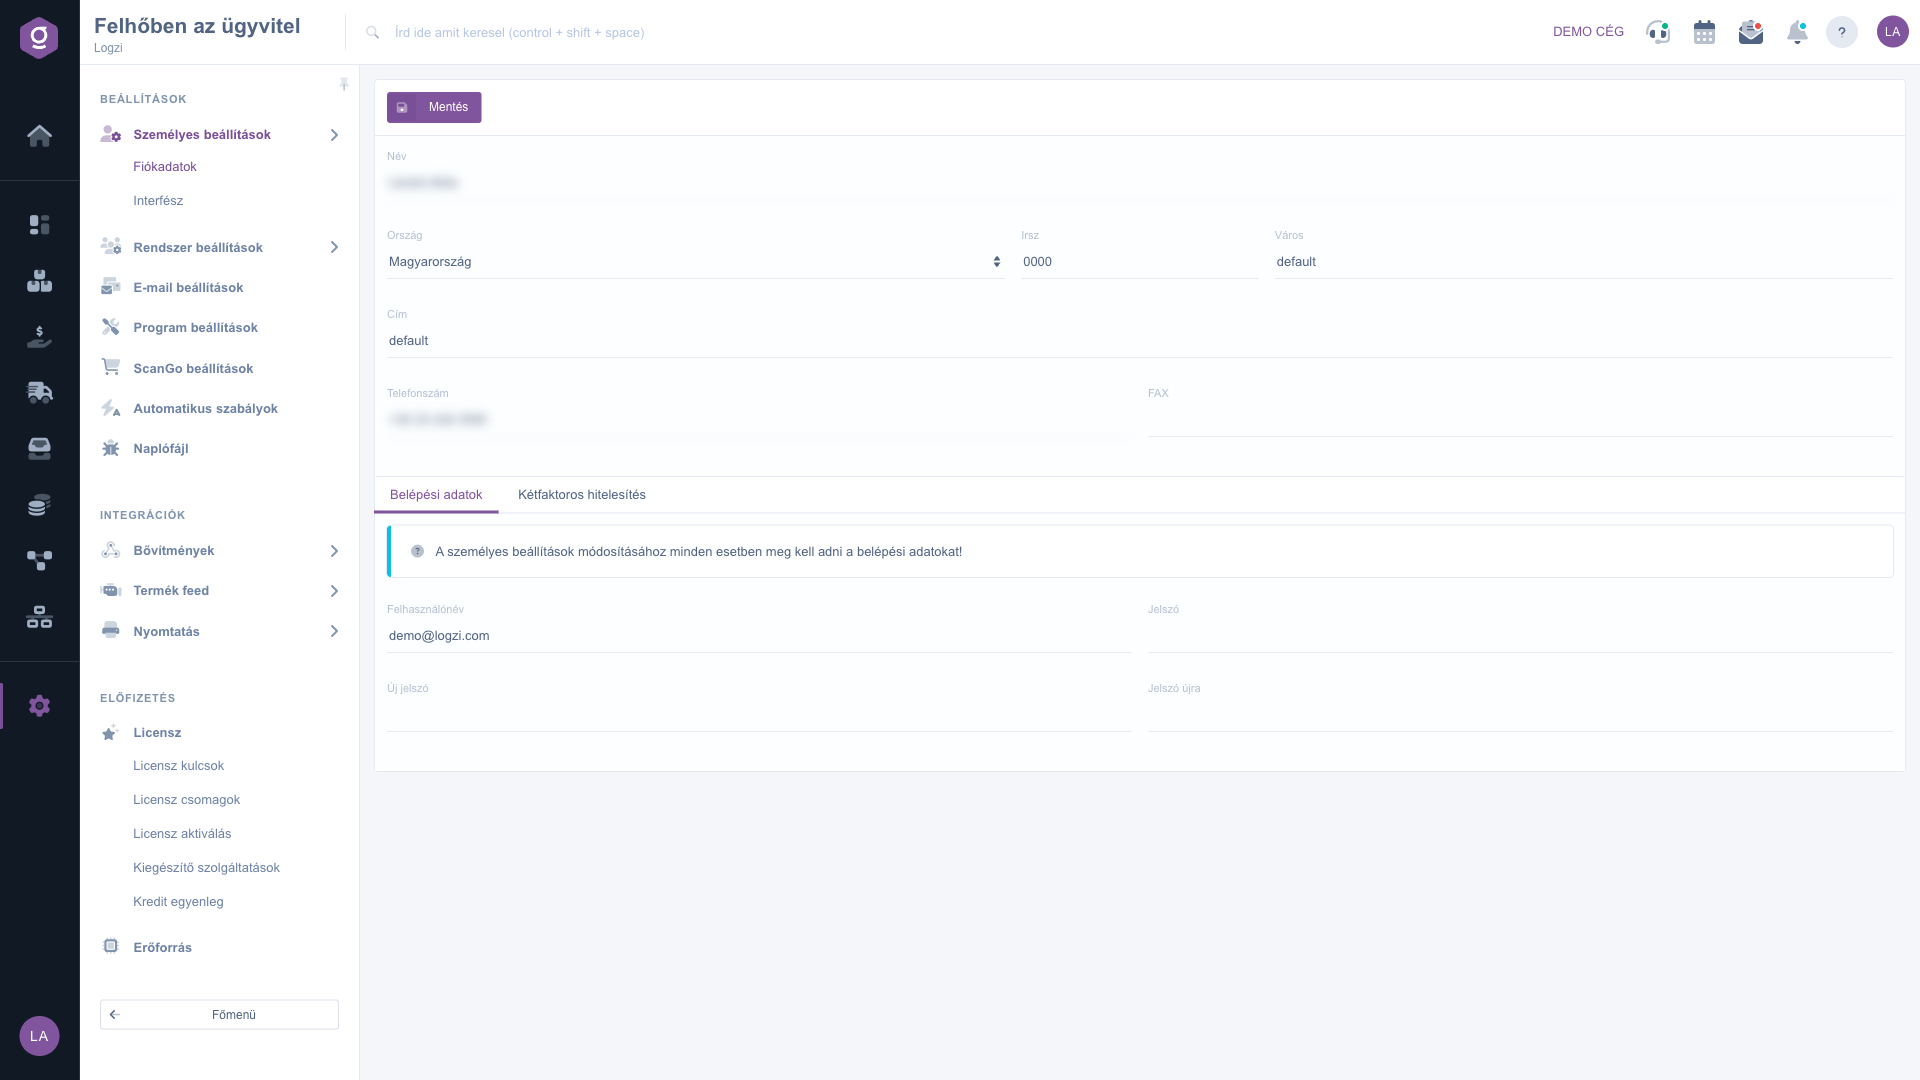
Edit the fields you need: Name, Country (drop-down list), Zip, City, Address, Phone number and FAX. While you type the Zip, the system tries to fill in the city as well; you can overwrite it manually if needed.
On the Login data tab the Username field is read-only. Click the blue information bar (Login data must always be provided in order to modify personal settings!) to open the explanation. To change your password, enter your current password in the Password field (it is used for verification), and enter the new password twice in the New password and Password again fields.
Save always requires the New password and Password again fields to be filled in, and the two values must match. If you do not want to change your password, enter your current password in both fields.
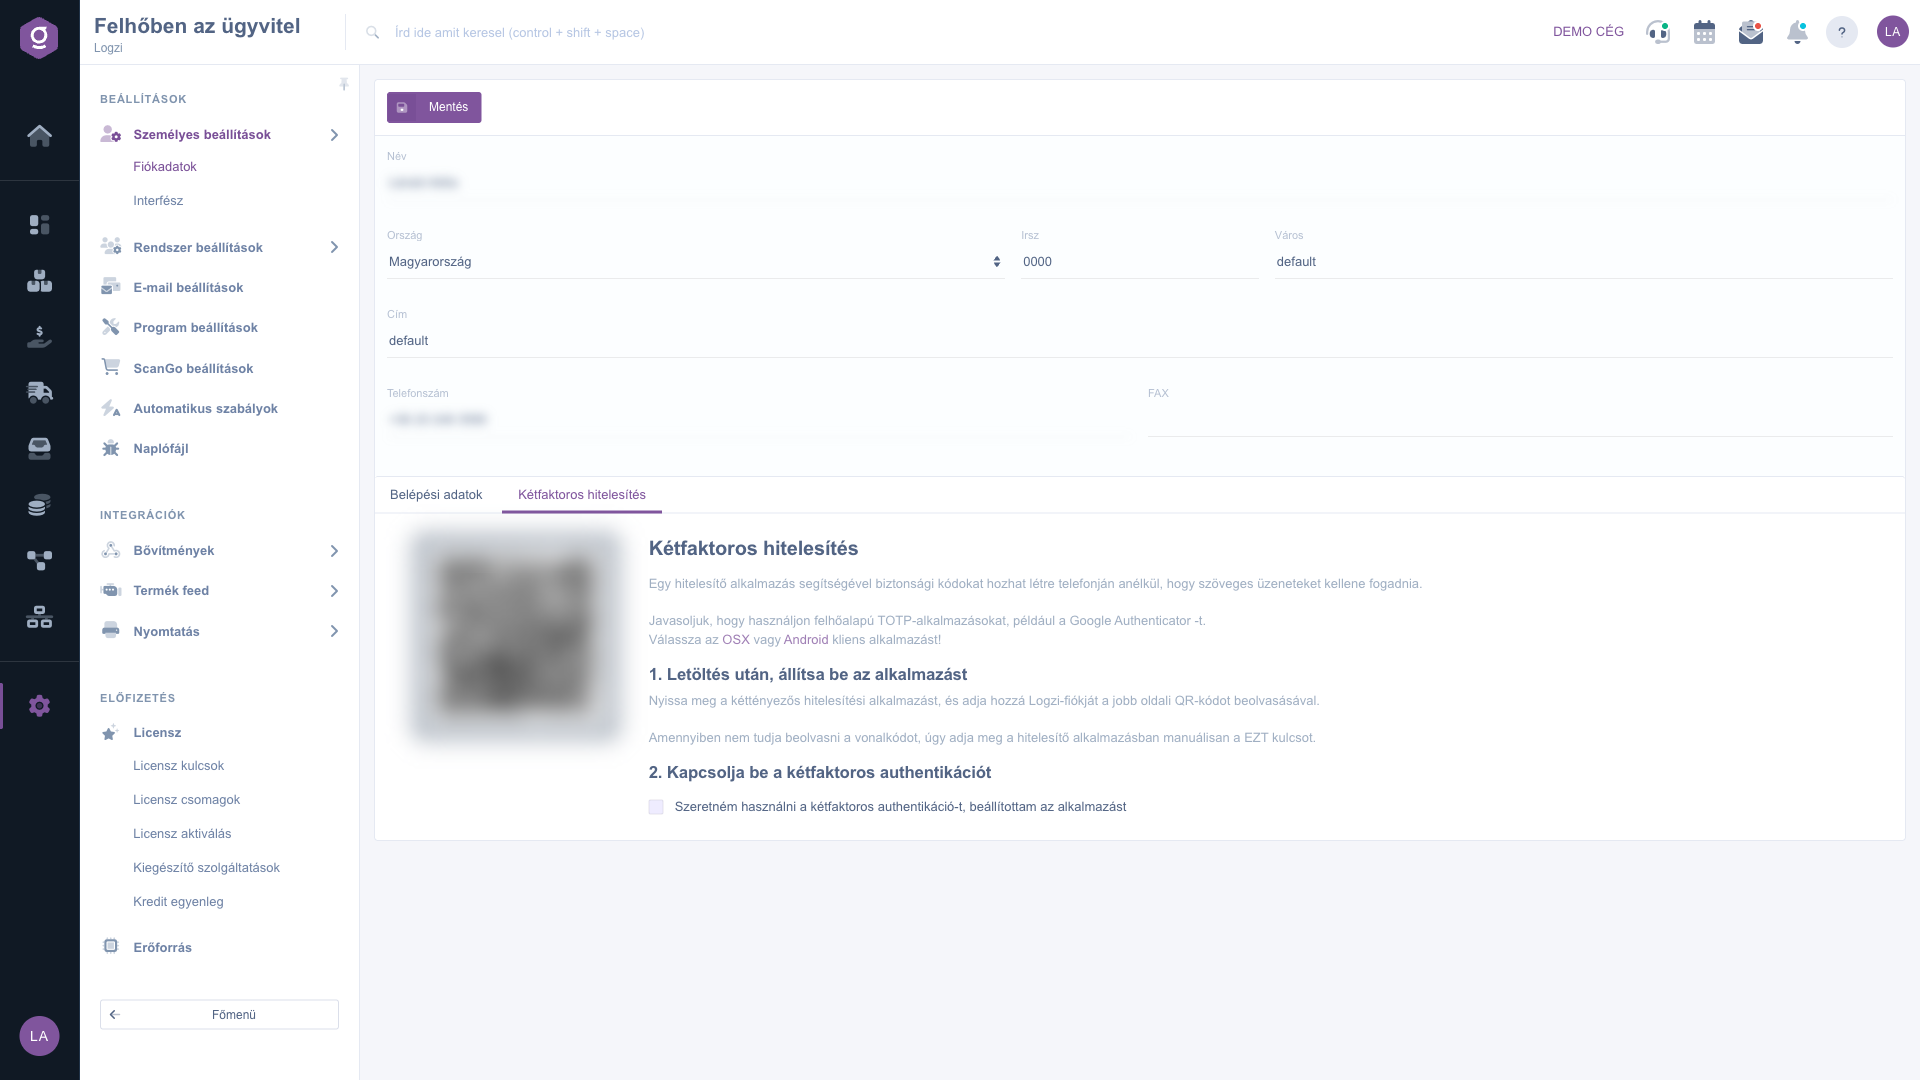
Open the Two-factor authentication tab. The page recommends a TOTP-based authenticator app such as Google Authenticator; the OSX and Android links lead to the download page of the app. In step 1. After downloading, set up the application, open the app and scan the QR code on the left. In step 2. Turn on two-factor authentication, tick the I want to use two-factor authentication, I have set up the application checkbox and click Save. To turn it off, clear the checkbox and save again.
Use Save to record your changes; after a successful save the page reloads. If something is wrong (for example a missing or different new password), a warning window appears and the changes are not saved.
Before you turn on two-factor authentication, scan the QR code with the authenticator app and make sure it generates codes. Only then tick the checkbox, otherwise you will not be able to enter the code at your next login.
The fields of the Account data page and their meaning.
| Field / Item | Required | Description |
|---|---|---|
| Name | The name of the user. | |
| Country | Select the country from the drop-down list. | |
| Zip | Zip code. While you type, the system tries to fill in the city. | |
| City | The name of the city or town. | |
| Address | Street, house number and other address details. | |
| Phone number | The phone number given as a contact. | |
| FAX | Fax number, if you have one. | |
| Username | Your login ID. Read-only, it cannot be changed. | |
| Password | Your current (old) password, for verification. | |
| New password | The new password. It must always be filled in when saving. | |
| Password again | The new password repeated; it must match the New password field. | |
| I want to use two-factor authentication, I have set up the application | Turns two-factor authentication on or off. When it is on, you must enter the code generated by the app in addition to your password when you log in. |
Save also checks the New password and Password again fields on the Login data tab: both must be filled in and the two values must match. If you do not want to change your password, enter your current password in both fields. If a value is missing or different, the system shows a warning and the changes are not saved.
Install an authenticator app on your phone (for example Google Authenticator), scan the QR code shown on the Two-factor authentication tab, tick the checkbox and click Save. To turn it off, clear the checkbox and save again.
After you enter your password, the system asks for the code generated by the authenticator app in an additional step. If the code is wrong, the login fails, so always keep your phone at hand.
No, the Username field is read-only. To change your login ID, contact your administrator.
The menu item is under Main menu / Settings. If you cannot see it, your user probably does not have the required module or permission assigned; ask your administrator to check the settings.
Don't want to spend hours searching for a solution? Choose the most efficient way: book a personalized, 45-minute online training session dedicated entirely to you. Whether it's a walkthrough of the basics or a detailed setup of a specific module, our expert colleague will guide you through the whole process, step by step.
Don't waste your time - ask for help!
Our goal is to get you using our system as quickly and efficiently as possible. Whether you're completely new to us or stuck on a specific setting, don't hesitate to ask for help!
Create your account now,
pay later!


