Incoming delivery note list

Learn how to list, search and manage incoming delivery note documents in the Logzi interface.

Feature overview

This module lets you review and manage Incoming delivery note documents. An incoming delivery note records which goods you have received from a supplier — you create the document based on the delivery note sent by the supplier. The list view gives you access to every document you have created in one place, lets you search among them, and you can start the most important actions directly from here (create a new document, close, delete, download, print, send email, create an incoming invoice or a warehouse receipt based on the document).

  • Clear list: documents are shown by document number, date, partner, amount and status in a paged table, with summary rows (net value, VAT, gross value) at the bottom of the table for the listed documents.
  • Quick actions: with one click you can open, close, delete, copy, download, print or email the selected document, without having to enter each document.
  • Preview window: below the list, the items and other details of the selected document are available immediately, without leaving the list.
  • Saved searches and a customizable view: you can save frequently used search conditions and set the sorting and appearance of the list to your own needs.

The possible statuses of Incoming delivery note documents are: Draft, Closed, Cancellation, Cancelled, Used — the meaning and restrictions of each status are explained in the Frequently asked questions section.

Step by step

1. Viewing the list and the actions available for a document

Click Main menu / Transport / Incoming delivery note / List to see all the incoming delivery notes created so far. Above the table, the buttons on the Actions tab let you work with the selected document:

  • New: create a new incoming delivery note on an empty form. Click the arrow next to the button to choose New based on PDF — use it when you have the delivery note available as a PDF.
  • Open: open the detailed view of the selected document to view and edit the header data and the items.
  • Close: close the document — available only for documents in Draft status. With the arrow next to the button you can combine closing with printing (Close and print) or downloading (Close and download).
  • Delete: delete the selected document. The arrow next to the button offers Delete and copy (delete and create a copy in one step — if you entered the document with wrong data, you can quickly start over) and Permanent deletion, which removes documents already in Cancellation or Cancelled status.
  • Cloning: create a new document based on the data of the selected one — for recurring supplier deliveries it is faster than entering everything again with the New button.
  • History: view the history related to the document, that is, the other documents linked to it.
  • Used: puts the selected Closed document into Used status, so on the list you can see which delivery notes you have already dealt with.
  • Send email: send the selected document by email — available only for documents in Closed (or a later) status.
  • Download: export the list or the selected document. In the List operation block you can download the whole list (XLSX list, XLSX item list), and in the Document operation block the data of the selected document (XLSX items, XLSX serial number list, PDF, PDF preview, Download attachments). The final PDF can only be created from a closed document, while the PDF preview also works for a draft.
  • Printing: the Document option prints the whole document, the Product label option prints the labels belonging to the items.
  • Document management: start a new document from the selected delivery note. The Incoming invoices and Warehouse receipt options open a new incoming invoice or warehouse receipt pre-filled with the data of the delivery note, Worksheets starts a worksheet, while Modification and Cloning create a new, editable copy from the document.

At the right end of the tab row, the Analytics link takes you to the statistics page of incoming delivery notes, and the clipboard icon copies the content of the table to the clipboard, for example for pasting into a spreadsheet.
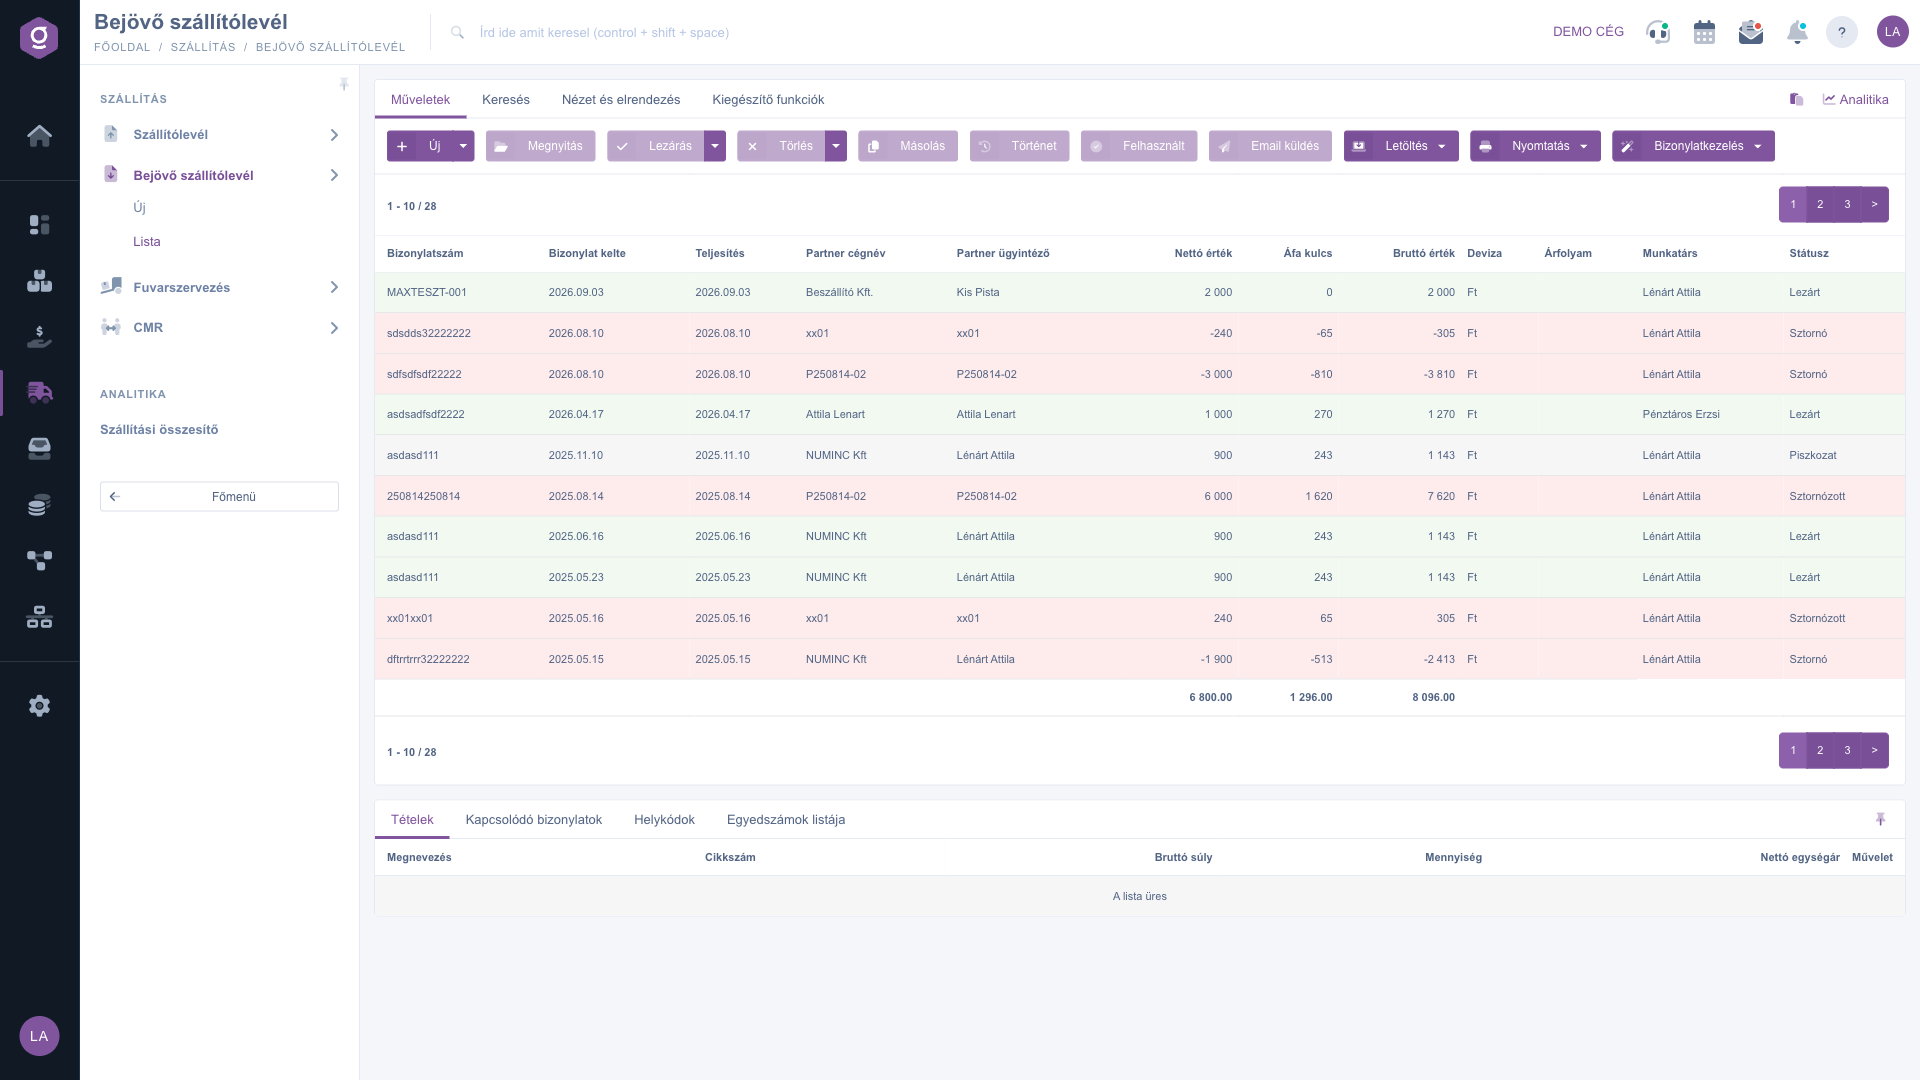
Incoming delivery note list – Actions tab

2. Searching among the documents

Click the Search tab above the table to see the filtering options. The fields visible right away are: Partner company name, Document number, Currency and Status (you can select several statuses at once). The “Expand” button opens further filters: Document date, Performance date, Employee, Item number, Project, Job number and Department number. Use the Search button to filter by the conditions you set.

The disk icon next to the search button saves the current search conditions — after that the list loads according to the saved state — and the icon next to it deletes the saved search.
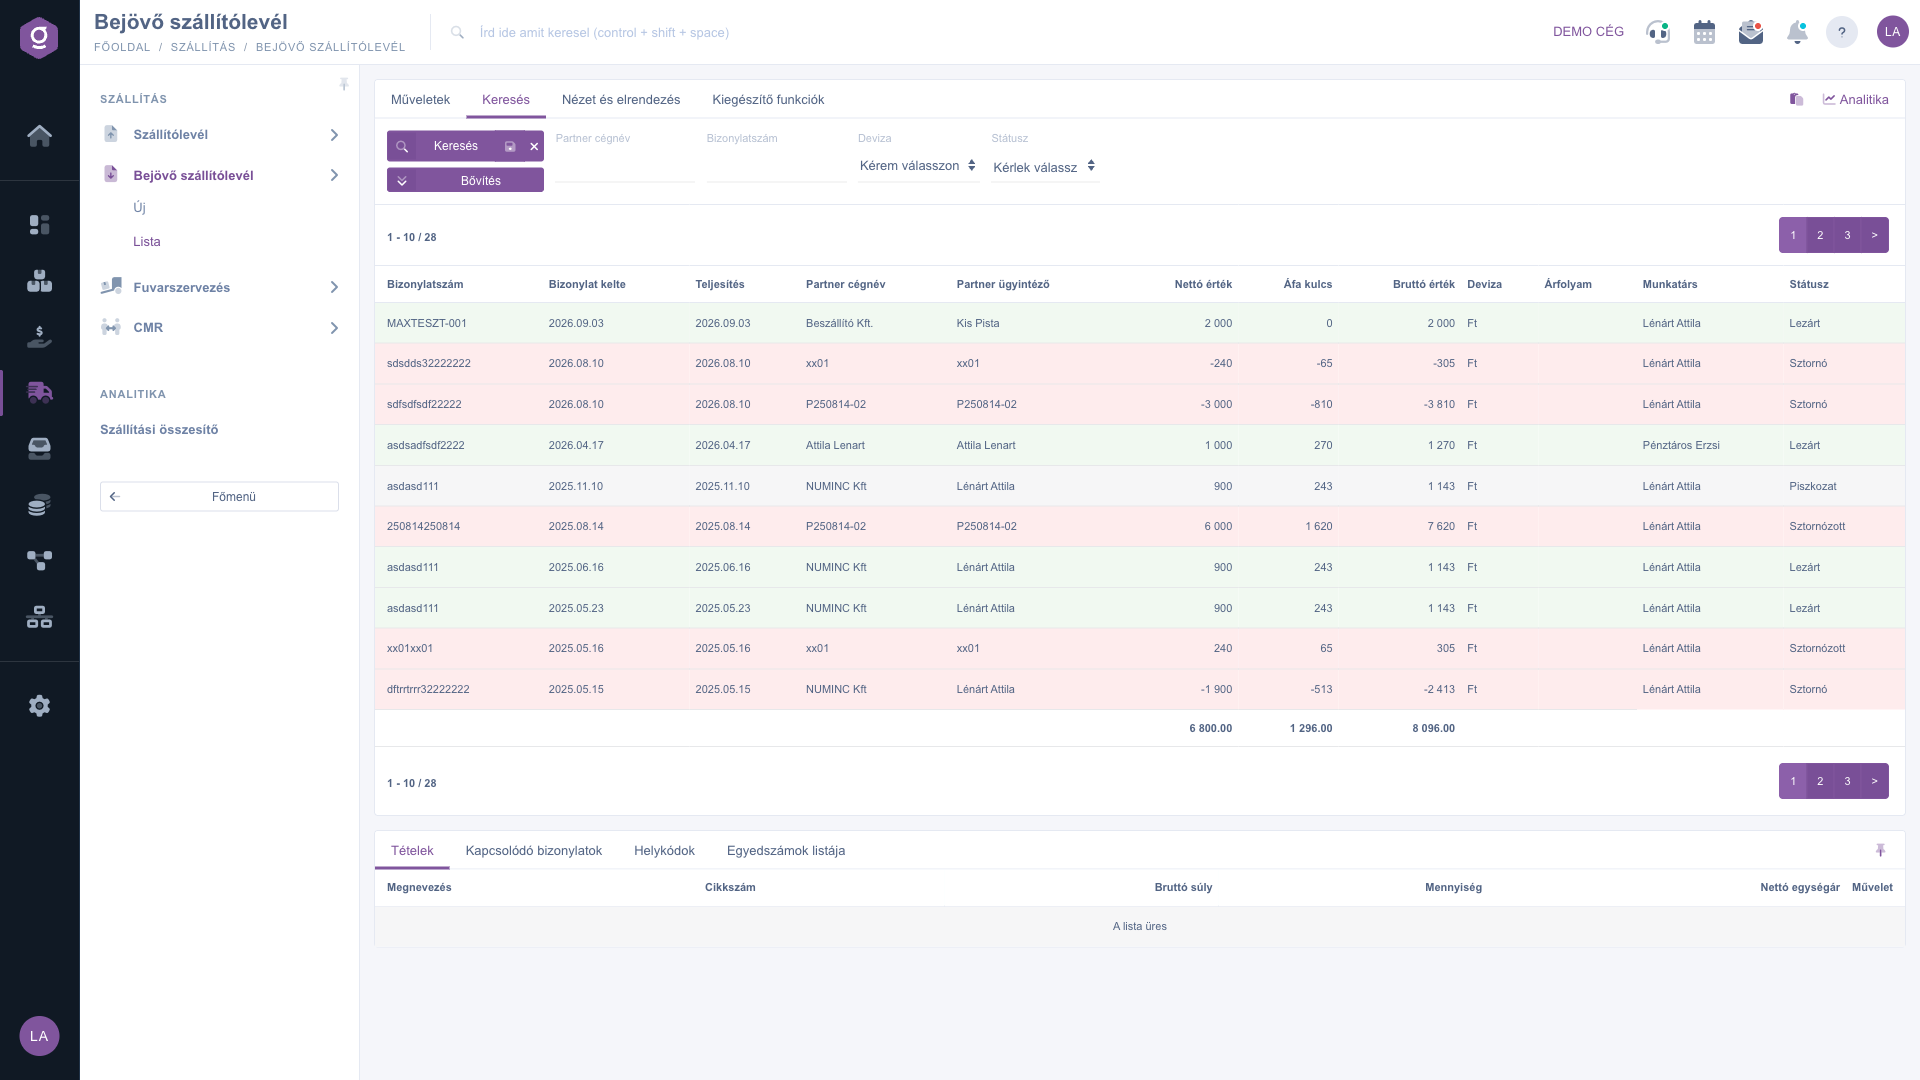
Incoming delivery note list – Search tab

3. Customizing the view

On the View and layout tab you can set how the list appears for you:

  • Sorting: choose which column and in which direction the list is sorted by default.
  • Preview window: the settings of the preview panel below the list (switching it on or off, pinning).
  • Interface and behavior: other settings of the list interface related to appearance and operation.

These settings are saved per user, so they are kept the next time you sign in.
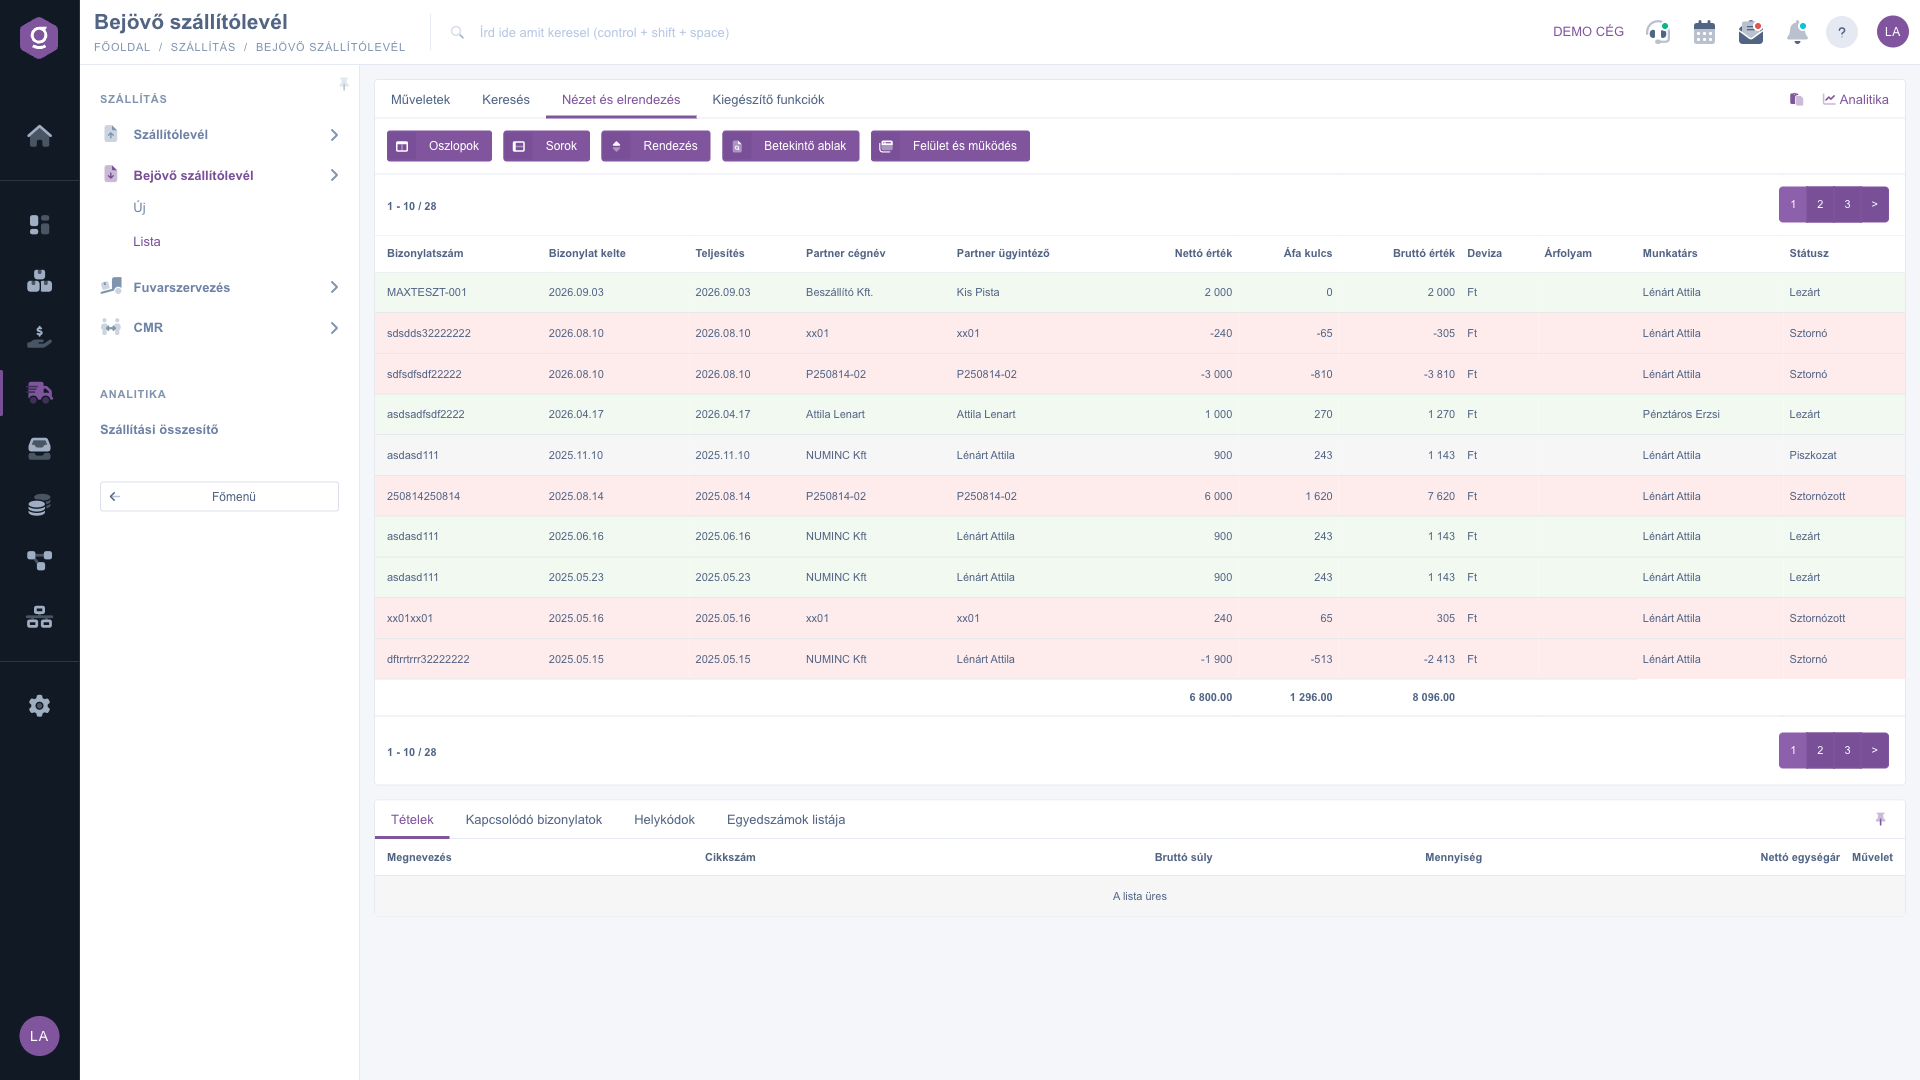
Incoming delivery note list – View and layout tab

4. The preview window

In the panel below the list you can quickly view the details of a selected document without opening the document itself. The tabs of the panel:

  • Items: the products, quantities and prices on the document.
  • Related documents: other documents linked to the document (for example the incoming invoice or warehouse receipt created from it).
  • Location codes: the warehouse location code, warehouse and pallet information belonging to the items.

The panel can be pinned with the icon in its top right corner, and its size can be adjusted by dragging the divider line at the top of the panel.

5. Additional functions

On the Additional functions tab you find extra options related to the selected document:

  • Sent items: view the emails previously sent for the document.
  • New email: write a new email related to the document, using either the External mail client or the Internal mail client built into the system.
  • New task: create a task related to the document.

Tip


If you want to record the supplier invoice based on the delivery note, do not enter the data again: select the closed delivery note, then use Document management / Incoming invoices — the new incoming invoice opens pre-filled with the data of the delivery note. If you need the document file right after closing, choose Close and download from the arrow next to the Close button.

If you would like to read in detail about entering a single incoming delivery note, recording the items and closing it, see the Incoming delivery note document guide.
The goods-receipt counterpart of the incoming delivery note is the warehouse receipt: if you are looking for details about taking the received products into the warehouse and managing receipt documents, see the Warehouse receipt list guide.

Field descriptions

The default table columns and their meaning:

Field / ElementRequiredDescription
Document numberThe identifier of the incoming delivery note, usually the number printed on the delivery note by the supplier.
Document dateThe date the document was created.
Performance dateThe date the delivery was actually carried out, that is, the date the goods arrived.
Partner company nameThe name of the partner (supplier) linked to the document.
Partner contact personThe name of the contact person on the partner side.
Net valueThe total net value of the items on the document.
VAT rateThe VAT amount of the items on the document.
Gross valueThe total gross value of the items on the document.
CurrencyThe currency used on the document (for example HUF, EUR).
Exchange rateThe exchange rate used on the document, if it was not created in the base currency of the company.
EmployeeThe name of the colleague who recorded the document.
StatusThe current state of the document (Draft, Closed, Cancellation, Cancelled, Used).

The set of displayed columns can be customized under View and layout — the list above shows the default view.

The columns of the Items tab in the preview window and their meaning:

Field / ColumnRequiredDescription
NameThe name of the product on the item.
Item numberThe unique item number of the product, by which it can also be identified in the master data.
Gross weightThe total (quantity-multiplied) gross weight of the item, calculated from the unit weight recorded in the product master data.
QuantityThe quantity of the received product, in the unit of measure of the product.
Net unit priceThe net price of one unit of the product on the document.
ActionQuick actions for the row — in the preview window they can only be viewed; the items can be edited after opening the document.

Frequently asked questions

Only documents in Draft status can be closed. Documents in Draft, Closed and Used status can be deleted; documents in Cancellation and Cancelled status can only be removed from the list with Permanent deletion. If closing stops with an error message, read the message, check the data and items of the document, then try again.

The Used status shows that you have finished with the closed delivery note. The Used button only works for documents in Closed status and puts the document into this status, so on the list you can easily tell apart the processed delivery notes from those still waiting to be processed. You can also filter by it in the Status field of the Search tab.

These actions are only available for documents in Closed (or a later) status, because a draft can still change. For a draft you can use Download / PDF preview and the XLSX exports — if you need the final copy, close the document first (even with the Close and download option). Also make sure the row is selected in the table, because without a selection the buttons are not active.

Document management starts another document from the data of the selected delivery note, so you do not have to type the same data again. You can choose between Incoming invoices, Warehouse receipt and Worksheets, and with the Modification and Cloning options you can create a new, editable copy from the delivery note.

Filter the list to the documents you need on the Search tab, then with Download / XLSX list you can export the whole list you currently see into one spreadsheet, even without a selection. If you also need the items, use the XLSX item list option.

The Incoming delivery note module only appears under Main menu / Transport if it is assigned to your user. If you do not see it, ask the system administrator to check the module assignment in your user settings.

Need personalized help?

Don't want to spend hours searching for a solution? Choose the most efficient way: book a personalized, 45-minute online training session dedicated entirely to you. Whether it's a walkthrough of the basics or a detailed setup of a specific module, our expert colleague will guide you through the whole process, step by step.

Don't waste your time - ask for help!
Our goal is to get you using our system as quickly and efficiently as possible. Whether you're completely new to us or stuck on a specific setting, don't hesitate to ask for help!

Logzi warehouse management software

Get in touch with us

Interested in our software? Feel free to write to us!

Need help?

If you can't find the answer and need assistance

Create your account now,
pay later!

Try it free for 3 days, no risk, no obligation!

