1. Starting a new document
Click Main menu / Stock management / Assembly / New, or the New button in the Assembly list. An empty document opens, titled New assembly. The Document number is still empty – it is assigned on the first save (for example SZR000032/2026) – and the Status is Draft. The Close and Status change buttons are greyed out at first, because there is nothing to close yet.
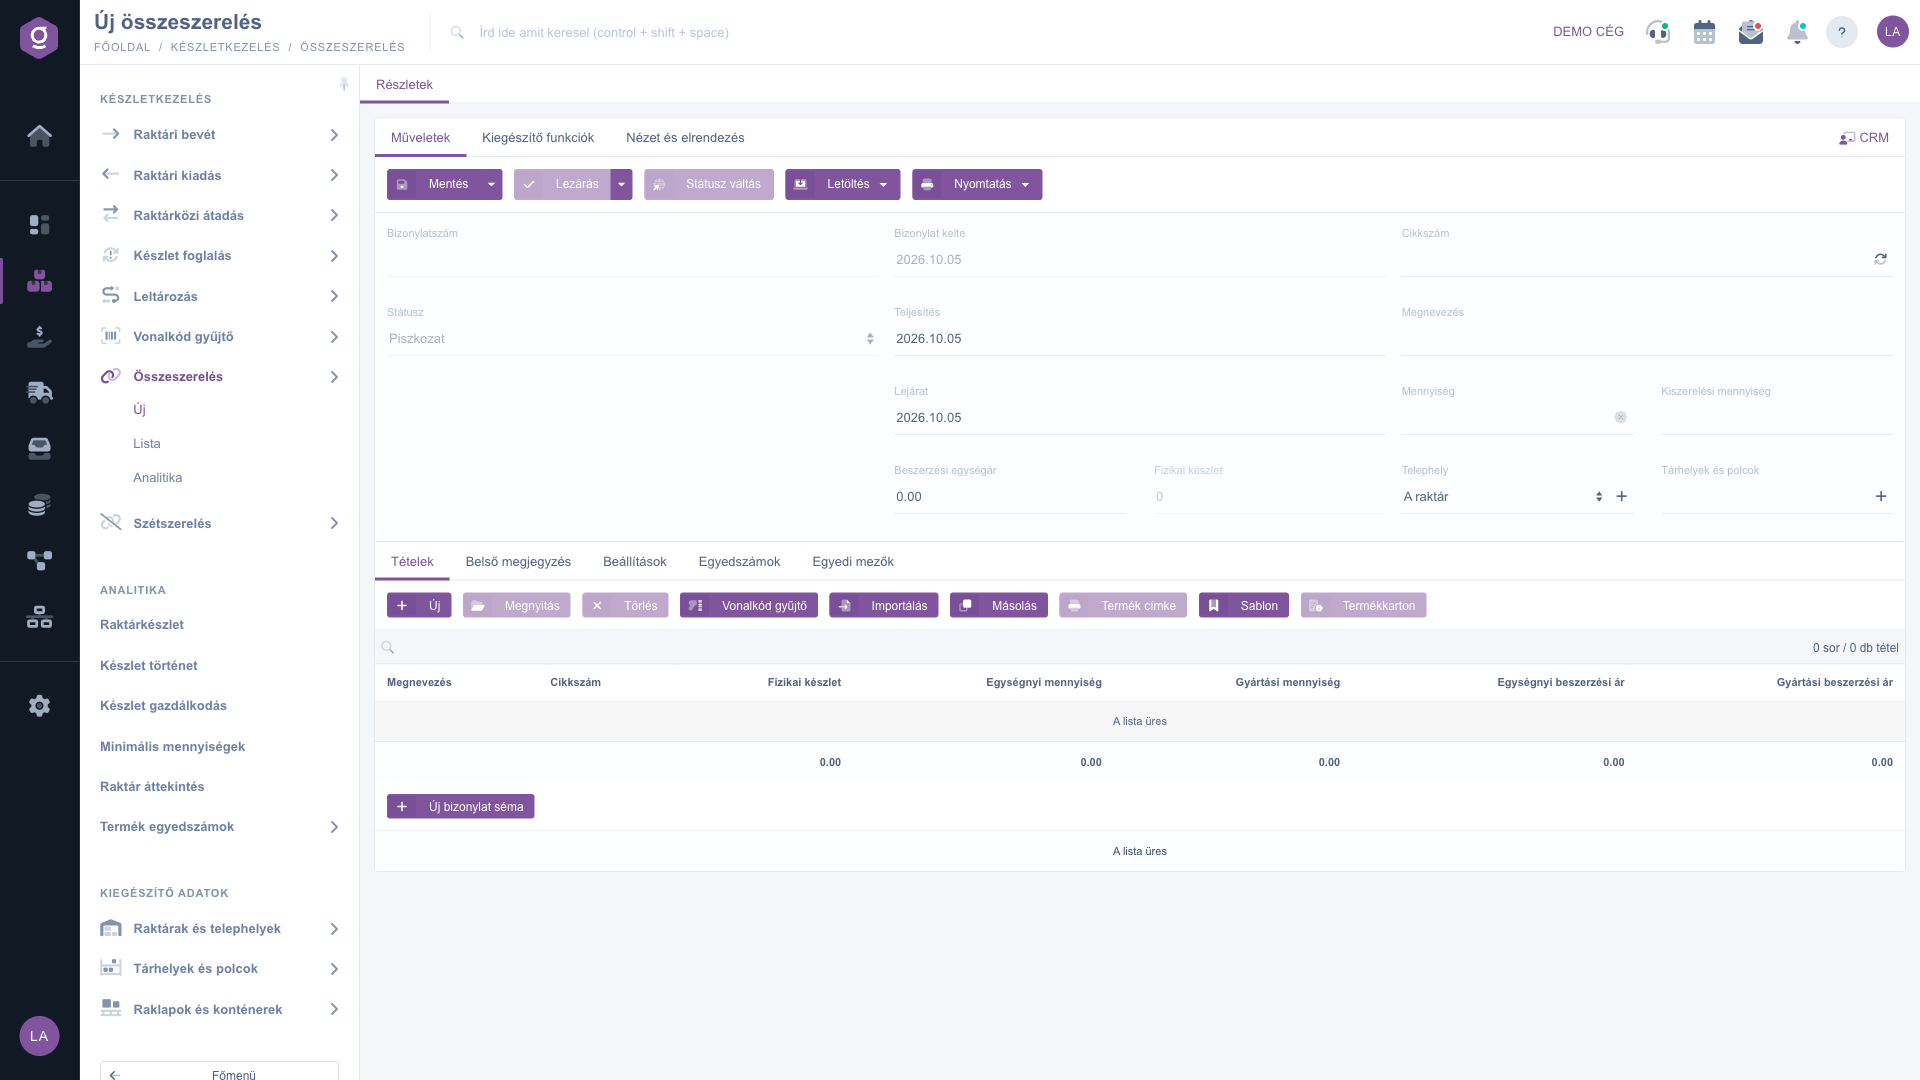
A new, still empty assembly document
2. Filling in the header
Set the Performance date – the actual day of the assembly; the stock movement is booked to this date – and the Expiration date if the finished product has a shelf life. Both are required. Document date is display-only. Choose the Site (required) where the assembly takes place and, if needed, the shelf in Storage locations and shelves where the finished product goes (search by barcode or name; the plus icon next to it lets you add a new storage location).
3. Entering the finished product and the quantity
Enter the product in the Item number or Name field: start typing and pick from the result list. Then type the Quantity, i.e. how many pieces you assemble. The system loads the product recipe (the components of the Product card) into the Items tab, one row per component. The Physical stock field shows the current stock of the finished product. The Purchase unit price becomes the sum of the item prices; the system calculates it.
The item columns: Unit quantity is how many pieces of the component are needed for one finished product; Production quantity is that value multiplied by the header Quantity; Unit purchase price is the incoming price of the component; Production purchase price is the unit price multiplied by the production quantity. The footer shows the totals and the number of items.
Example: the recipe of ISKOLACSOMAG01 (“Iskola csomag”) has four components (AB010017, AB010012, R3404, RADIR01). With a Quantity of 10, the production quantity of every component is ten times its unit quantity.
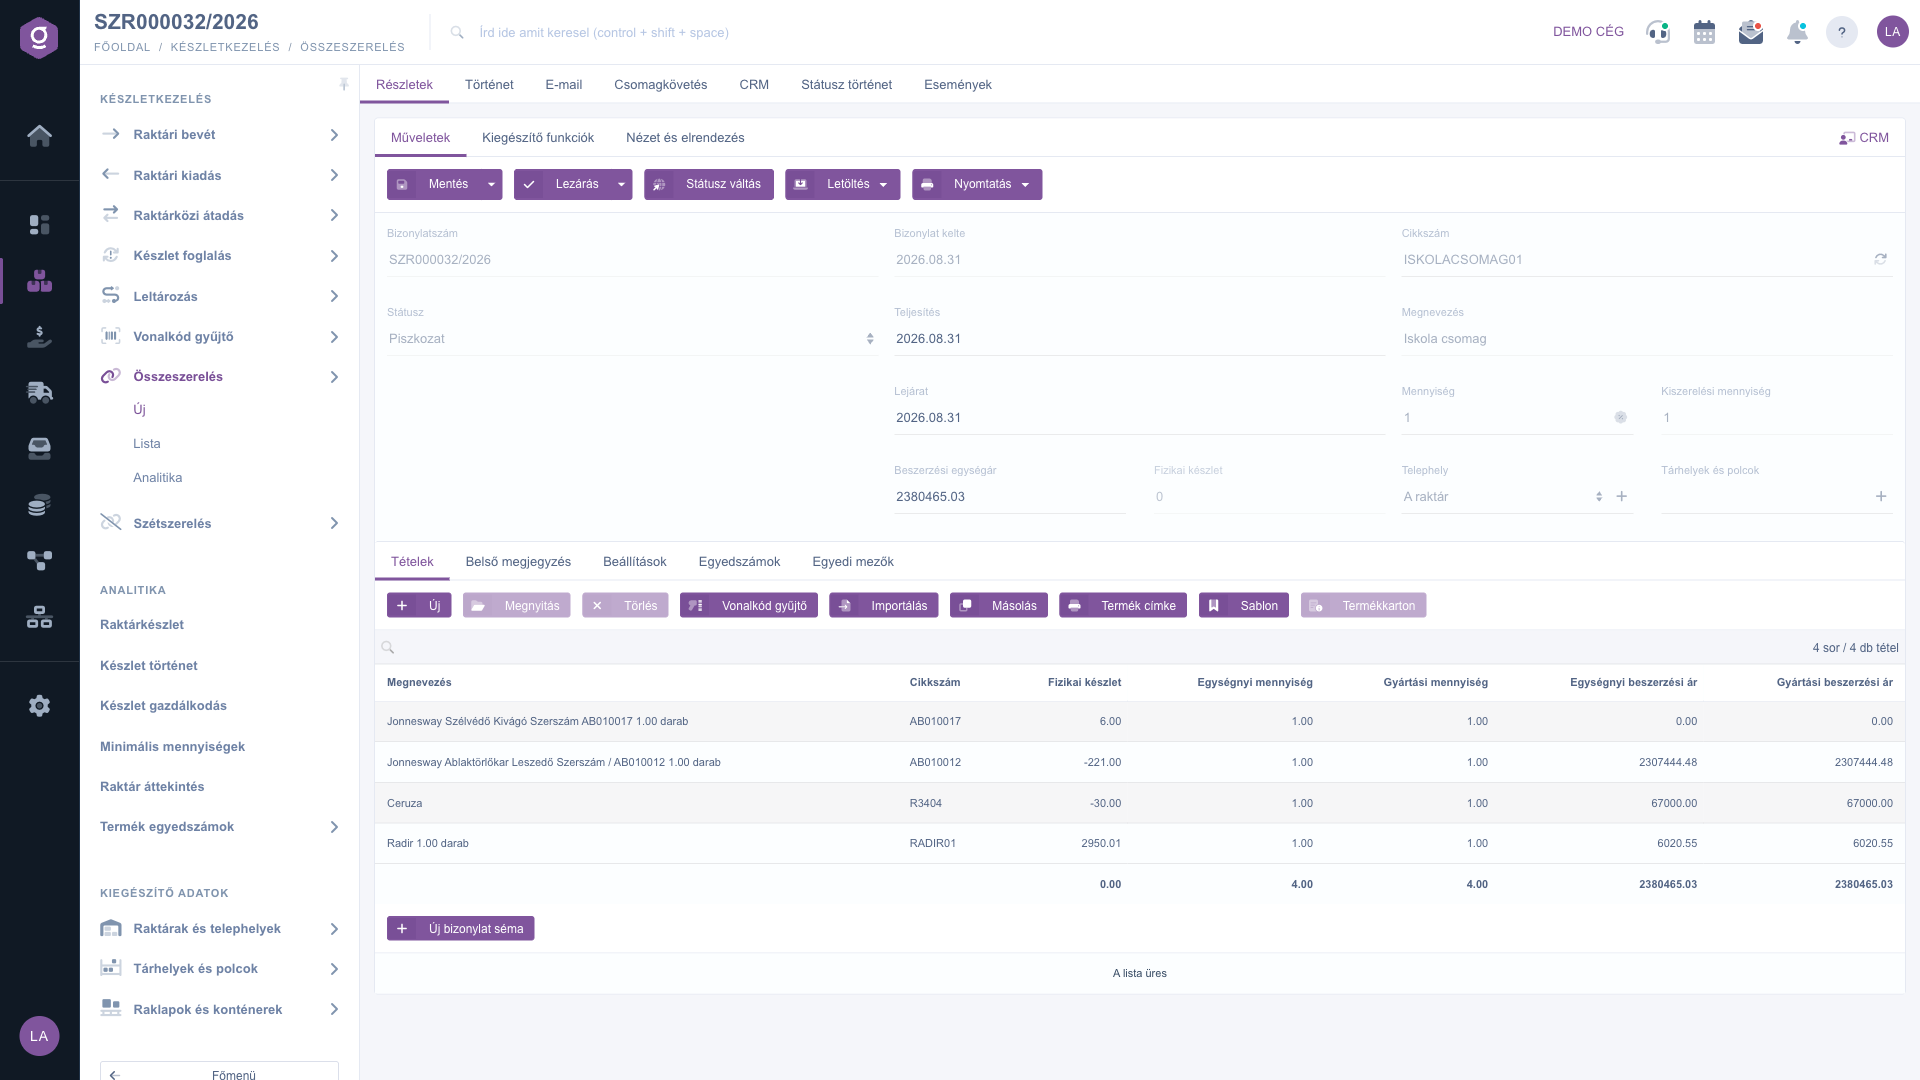
Saved assembly document with the recipe components (SZR000032/2026)
Tip
If the recipe of the product is not loaded or has changed, you can read it in again with the refresh button next to the Item number field. The recipe itself is edited in the Product card, not on this document – here you only record the actual assembly.
4. Managing items manually
Besides the loaded rows you can add further components. Above the items you find these buttons: New (add an item), Open (edit the selected item), Delete (remove the selected item), Barcode collector, Import, Cloning, Product label, Template and Product card. The New button opens the Add item window: there you can search a product (Product search), open the Product card, create a New product, and add the item to the document with Add. Add and new product opens a fresh, empty item window right after adding, so you can enter several components quickly.
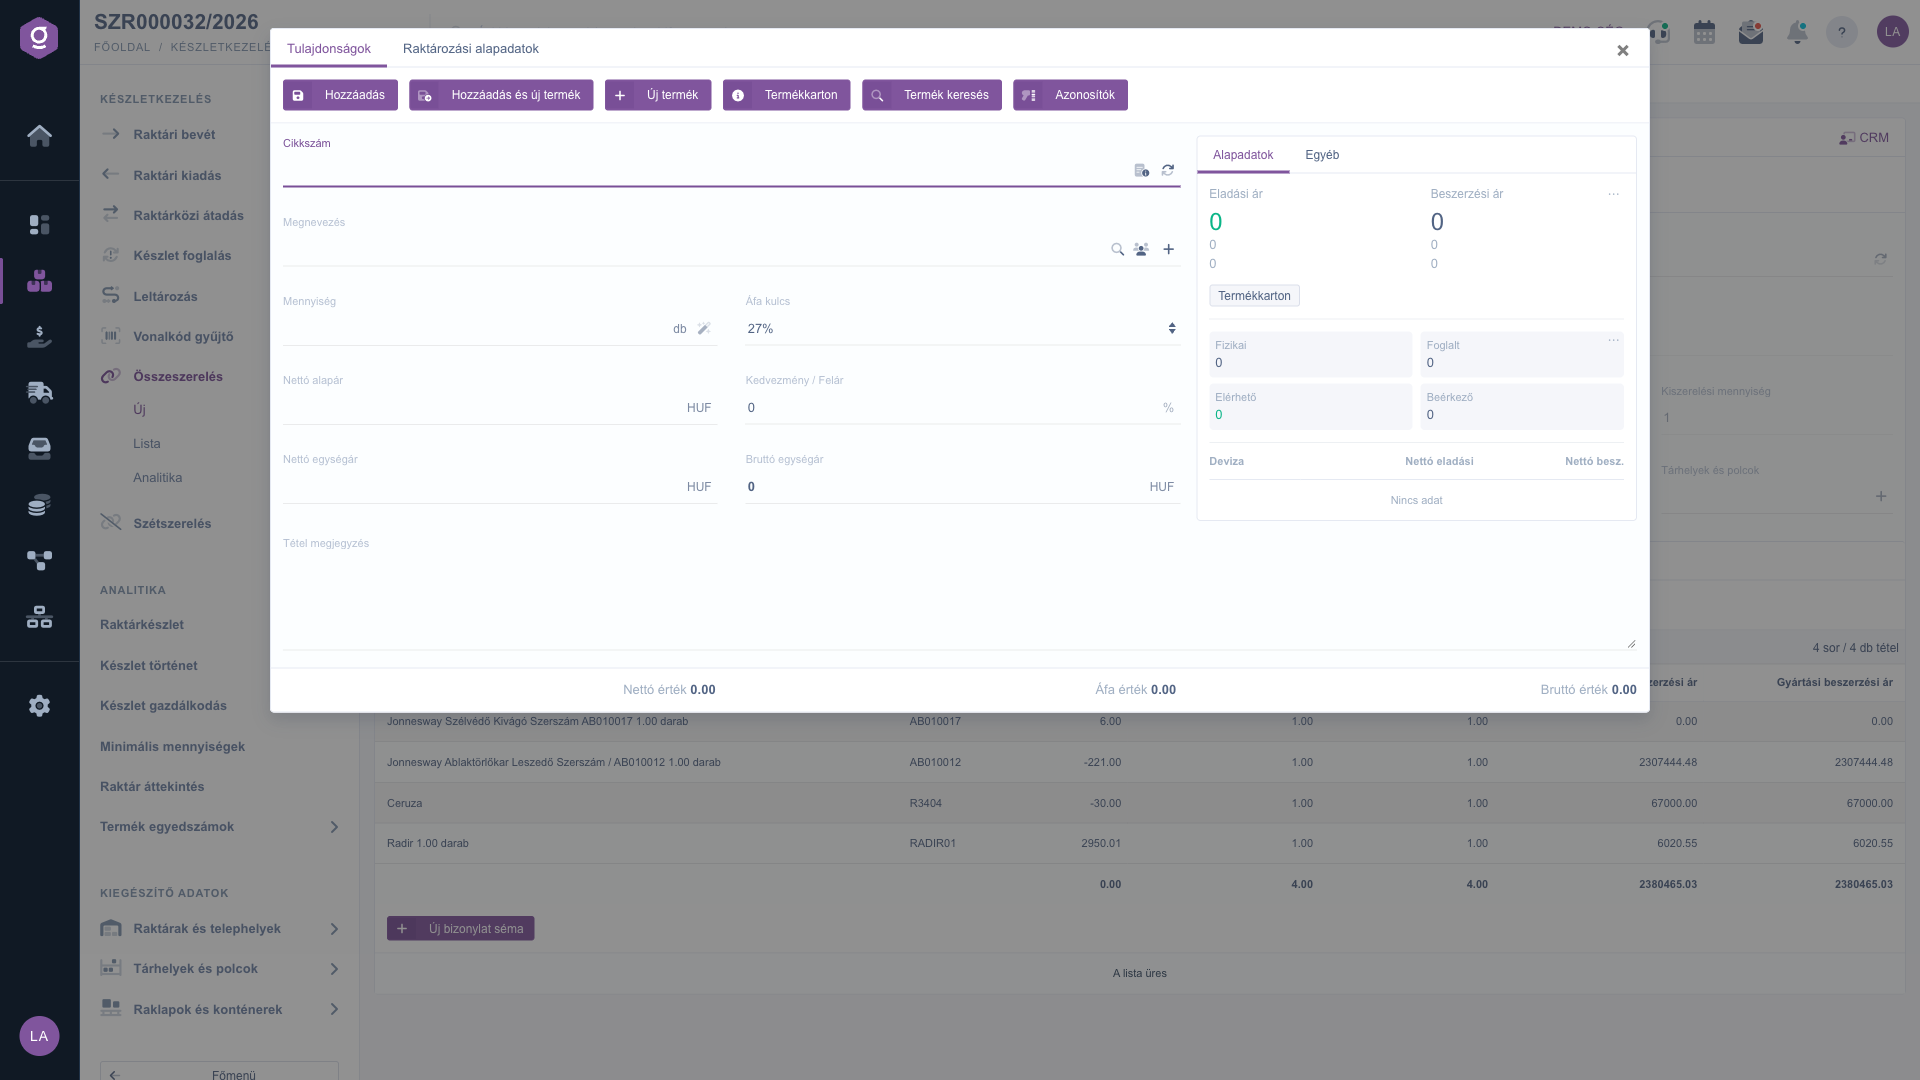
The Add item window
5. The other tabs
- Internal comment: free text visible only to the people in your company.
- Settings: here you enter the Billing address (required, chosen from your own company addresses) and the Employee who did the assembly. The employee also appears in the Assembly Analytics report.
- Serial numbers: a read-only list (Name, Item number, Quantity, Serial number, Expiration date) that shows the serial number created after closing. It is empty before closing.
- Custom fields: your company’s own document fields. While you have not created any, the list is empty (“The list is empty”). You can add a new field with the New document schema button, which opens the document schema settings in a new tab.
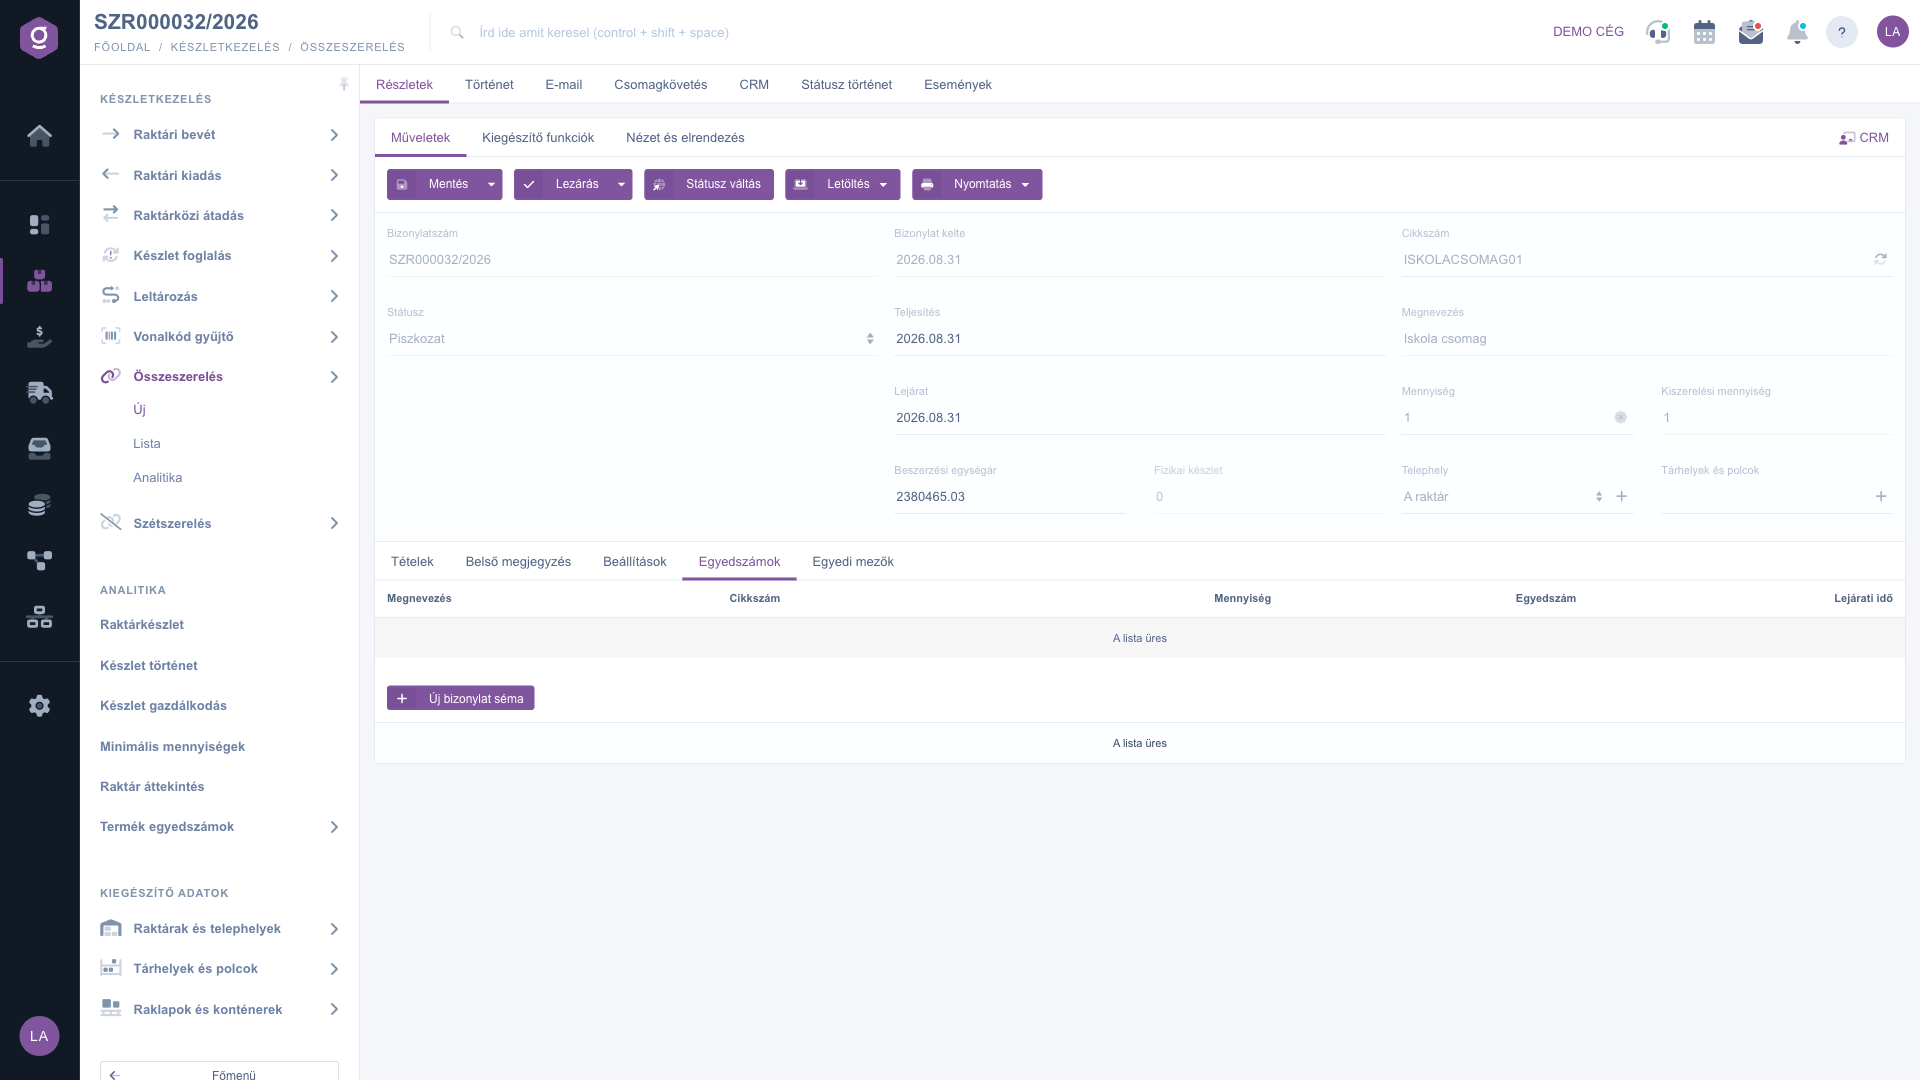
The Serial numbers tab (still empty before closing)
6. Save and Close
The Save button stores the document as a Draft; no stock movement happens yet, and you can continue later. In its drop-down, Save and close saves and closes the document in one step. Saving needs at least one item, otherwise you get the message “you must add at least 1 item to the document!”.
The Close button (drop-down: Close, Close and print, Close and download) finalizes the document – according to its tooltip, the document is finalized and no further modification is possible. In one process the system creates and closes a warehouse issue for the components, creates and closes a warehouse receipt for the finished product (the receipt price is the Purchase unit price of the header), creates a serial number if needed (GEN-YYYYMMDD-id), and finally sets the status to Closed. If any step fails, everything is rolled back and the document stays a Draft.
7. Actions: Download, Print, Status change
- Download: CSV, XLSX, PDF and PDF Preview. PDF and CSV are available for a closed document, the PDF preview and XLSX already from a saved Draft.
- Print: Ingredients (labels of the components), Finished product (label of the finished product) and Document. Printing is available after the document is closed.
- Status change: manual rewriting of the status. It does not move stock, so do not use it to close the document.
After saving, further tabs appear at the top of the document: Details, History, Email, Parcel tracking, CRM, Status history and Events. On the Additional functions tab you can quickly create a New product, a New partner, a New task, or open the Partner card.
Tip
After saving, the Item number, Name, Quantity, Packing quantity, Site and Storage locations and shelves fields can no longer be changed. If you mistyped the product or the quantity, use the Cloning button of the Assembly list and ignore the wrong Draft – this is faster than starting from scratch. The Performance date and Expiration date, the items and the data of the Settings tab remain editable in Draft status.



