On the Project statuses page you manage the states your projects go through (for example Planning, In progress, Completed). You can set the order and colour of the statuses and mark which status counts as closing.
Click Main menu / Settings / System settings / Project statuses. At the top you see the New, Open and Delete buttons, below them the list with the columns Sorrend (order), Name, Color and Closed by. Click a row to select the status. The screenshots were taken in the Hungarian interface.
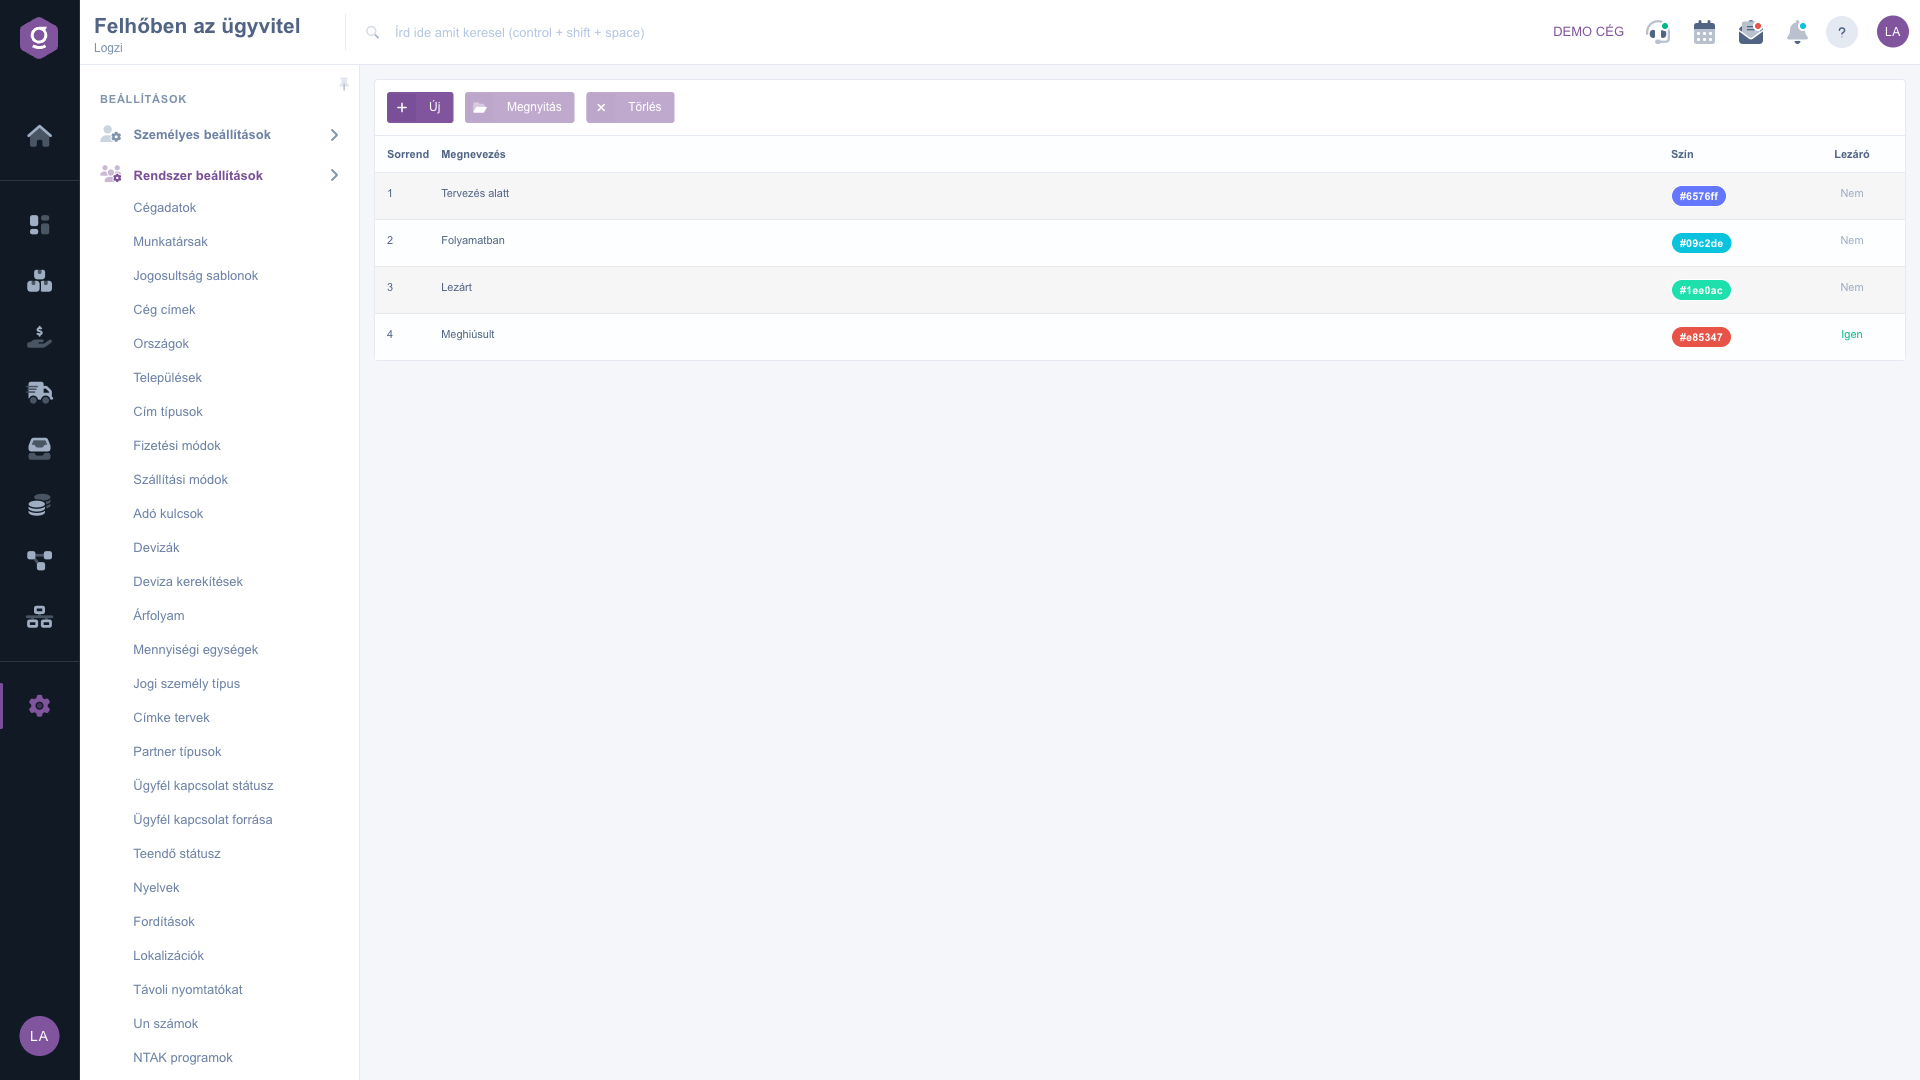
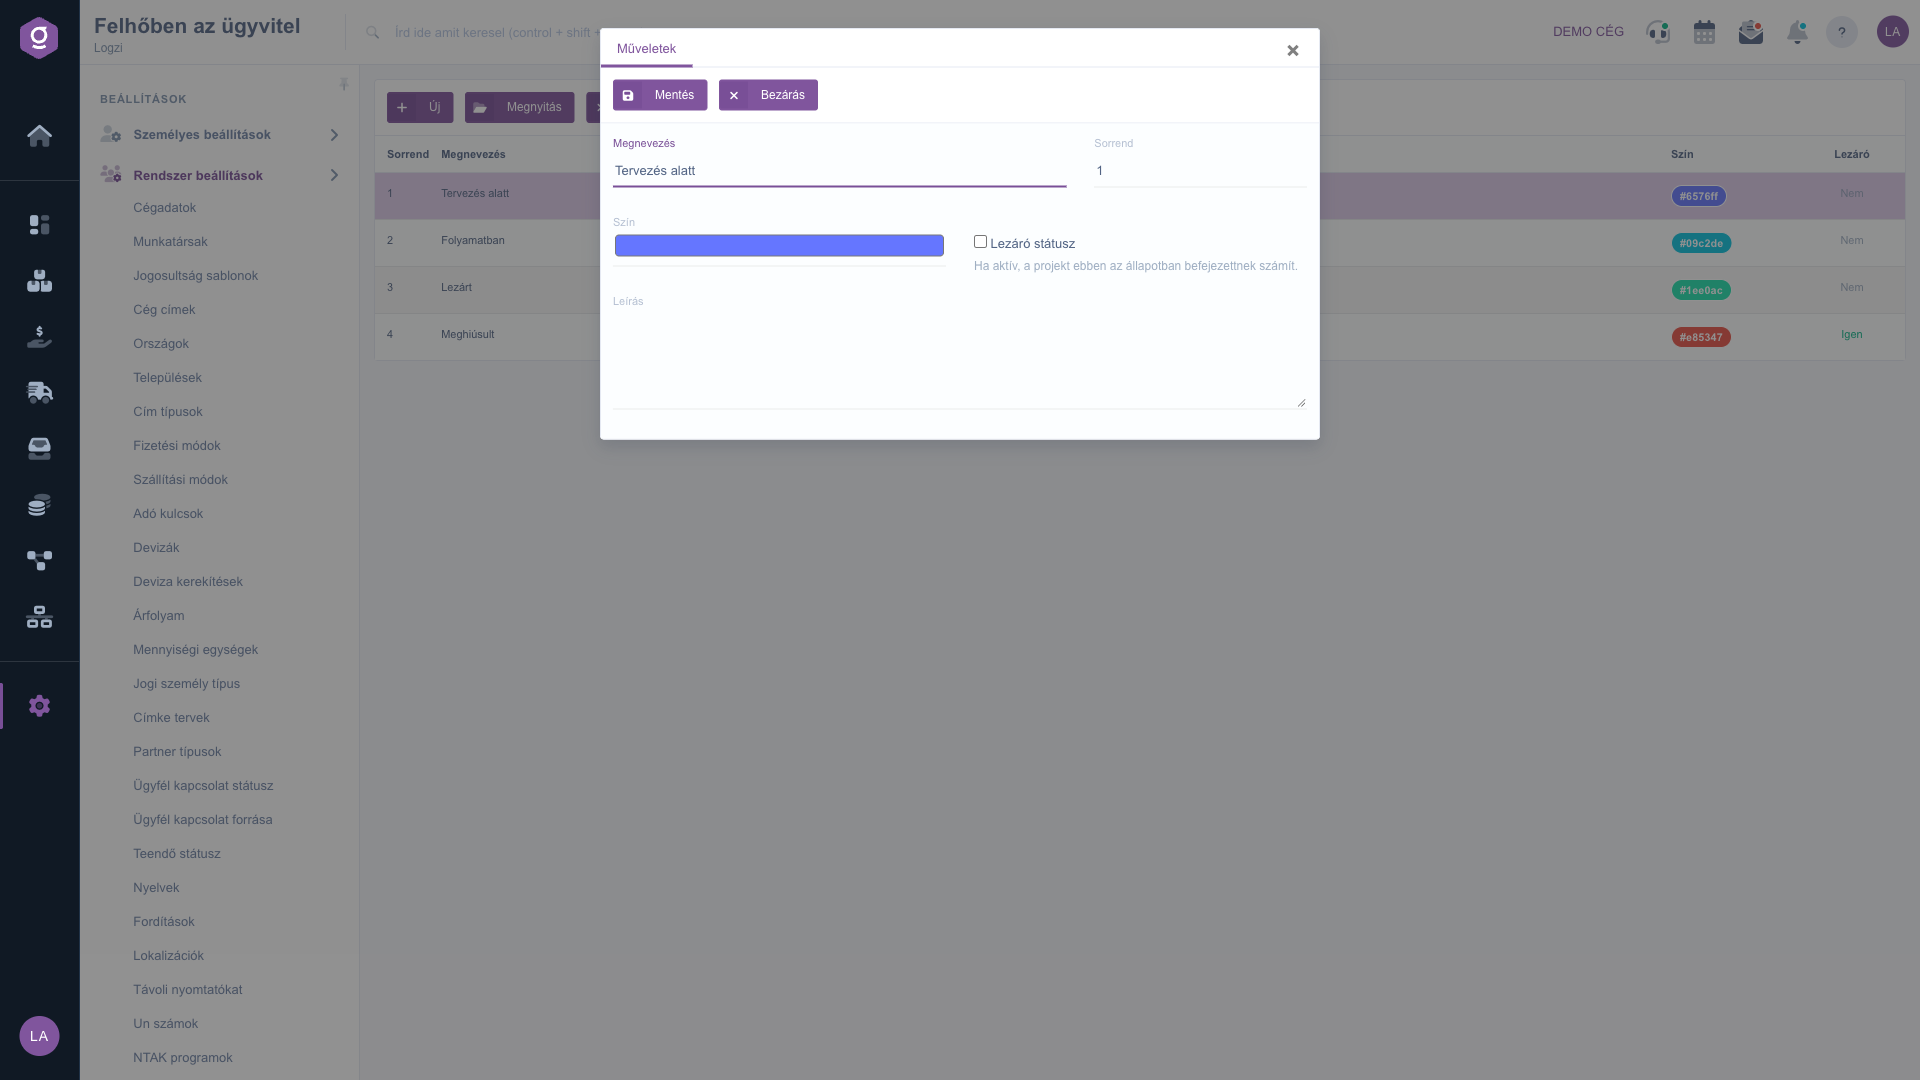
Click New, or select a row and click Open. In the window that opens, fill in the Name field, enter the number in the Sorrend (order) field, choose the colour of the status in the Color field, tick the Closing status box if needed and enter the Description. Click Save to store the status and Close to close the window.
Select the row and click Delete. Before deleting, check whether any project still uses this status.
Mark at least one status as closing (for example Completed) so that the system knows when a project counts as finished, and use the order to arrange the statuses in the natural course of the process.

The fields of the project status form.
| Field | Required | Description |
|---|---|---|
| Name | The name of the status, at most 150 characters. | |
| Sorrend (order) | The position of the status in the list; a non-negative whole number. | |
| Color | The colour of the status, set with a colour picker. | |
| Closing status | If ticked, the project is considered completed in this state. | |
| Description | A free-text explanation, at most 500 characters. |
The Name field is required and can be at most 150 characters long. Fill it in and click Save.
If the checkbox is ticked, the project is considered completed in this state. The Closed by column in the list shows which statuses are like this.
With the order field you set the sequence of the statuses in the list; the smaller number comes first.
You can delete the selected status with the Delete button. Before deleting, check whether any project still uses it.
The menu item is located under Main menu / Settings / System settings. If you do not see it, your user probably does not have the required permission; ask your administrator to check the settings.
Don't want to spend hours searching for a solution? Choose the most efficient way: book a personalized, 45-minute online training session dedicated entirely to you. Whether it's a walkthrough of the basics or a detailed setup of a specific module, our expert colleague will guide you through the whole process, step by step.
Don't waste your time - ask for help!
Our goal is to get you using our system as quickly and efficiently as possible. Whether you're completely new to us or stuck on a specific setting, don't hesitate to ask for help!
Create your account now,
pay later!

