1. Opening the list and the Actions tab
Click Main menu / Procurement / Supplier orders / List to open the list of orders. At the top of the page you find the Actions, Search, View and layout and Additional functions tabs, and on the right the Analytics link and an icon for copying the table to the clipboard. Below the list the Preview window of the selected order is shown. The screenshots in this guide are taken from the Hungarian user interface; the Hungarian label is given in parentheses in the captions.
The buttons of the Actions tab apply to the order you selected by clicking a row of the list:
- New: starts a new supplier order; in the dropdown menu of the button, besides New you also find New based on PDF. Filling in the order is described in the Supplier order document guide.
- Open: opens the selected order for editing or viewing.
- Close: closes a Draft order. In the dropdown menu, Close and print or Close and download also produces the printout right after closing.
- Delete: deletes the order; the Delete and copy option of the dropdown menu also creates a copy next to the deletion, while Permanent deletion removes the order permanently.
- Cloning: starts a new order based on the selected one; it is available for an order in any status.
- History: shows the history related to the selected order.
- Fulfilled: marks a closed order as fulfilled (see the next step).
- Send email: lets you send the order by email.
- Download: in the List operation group the whole list can be downloaded (XLSX list, XLSX item list, XLSX item list grouped), in the Document operation group the selected order (XLSX items, XLSX items grouped, PDF, PDF preview, Download attachments, PDF items grouped).
- Print: Document prints the order, Product label prints the labels of the items.
- Document management: creates a new, related document from the order (see step 3).
- Issue for fulfillment: hands the order over to the supplier (see step 4).
- Transport organization: New parcel label creates a new parcel label, Parcel labels opens the list of the labels already recorded.
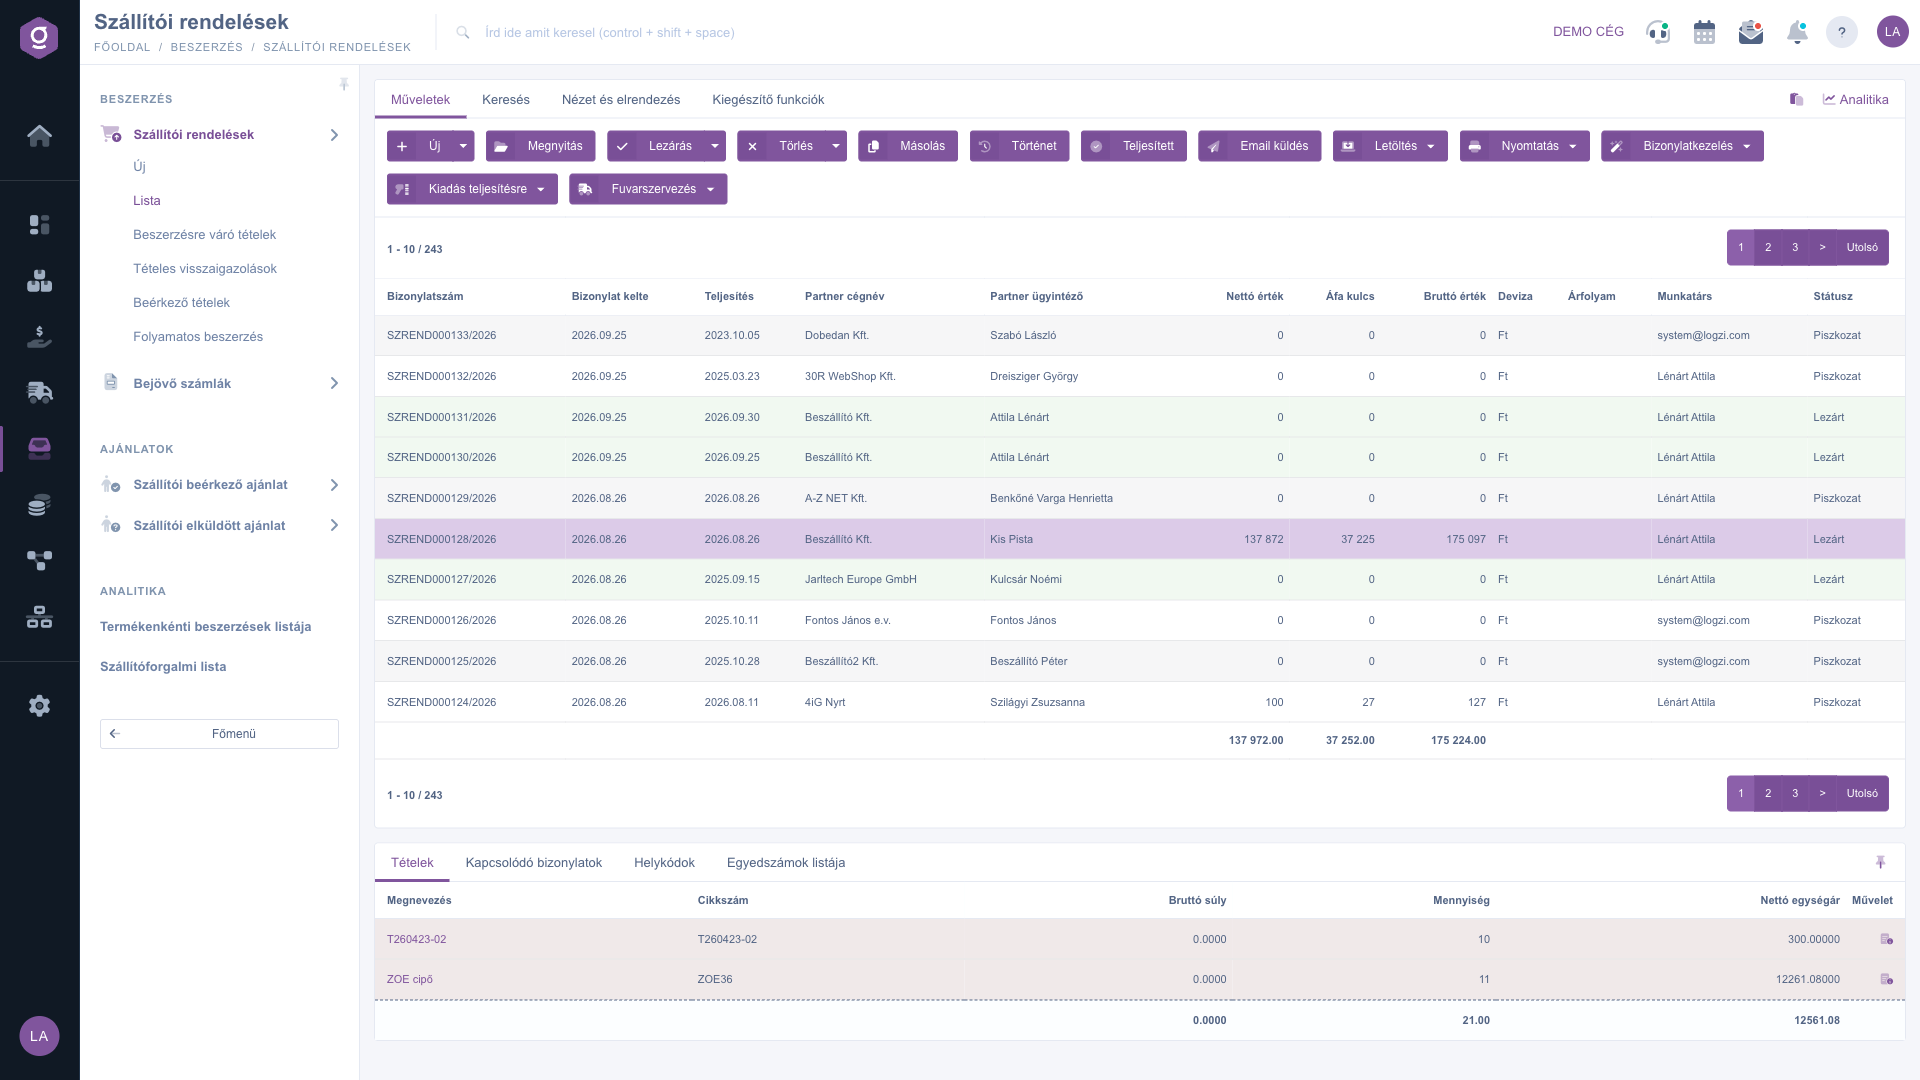
Supplier orders list – Actions tab and Items preview window (Műveletek, Tételek)
2. Closing, fulfilling and deleting
Select an order in the list, then use the buttons of the Actions tab:
- Close: active only for a Draft order. After closing, the order becomes Closed. If a Logzi application ID (APP ID) is available for the partner of the order, the system asks in a pop-up whether it should send the automatic order to the supplier (see step 4); if you choose No, the list is reloaded after the closing.
- Fulfilled: available for a Closed or higher status. After confirmation (the question Biztosan teljesíteni szeretné a bizonylatot?, meaning Are you sure you want to fulfill the document?, is shown in Hungarian in every language) the order and all its items become Fulfilled, the fulfilled quantity equals the ordered quantity, the system processes the fulfillment, and an automatic note is added to the order.
- Delete: possible for an order in Draft, Closed, Fulfilled, Finalized, Approved or Partially fulfilled status.
Between Close and Fulfilled therefore come the documents that record the receipt (warehouse receipt, incoming delivery note): mark the order as fulfilled when the supplier has delivered the whole order.
3. Creating a new document from the order
With the Document management menu you can start a new, related document from the selected order that is closed (or in a higher status). The items of the menu: Warehouse receipt, Incoming invoices, Incoming delivery note, Worksheets, Delivery note, and Cloning. The selected item opens a new, prefilled document; nothing is created until you save it.
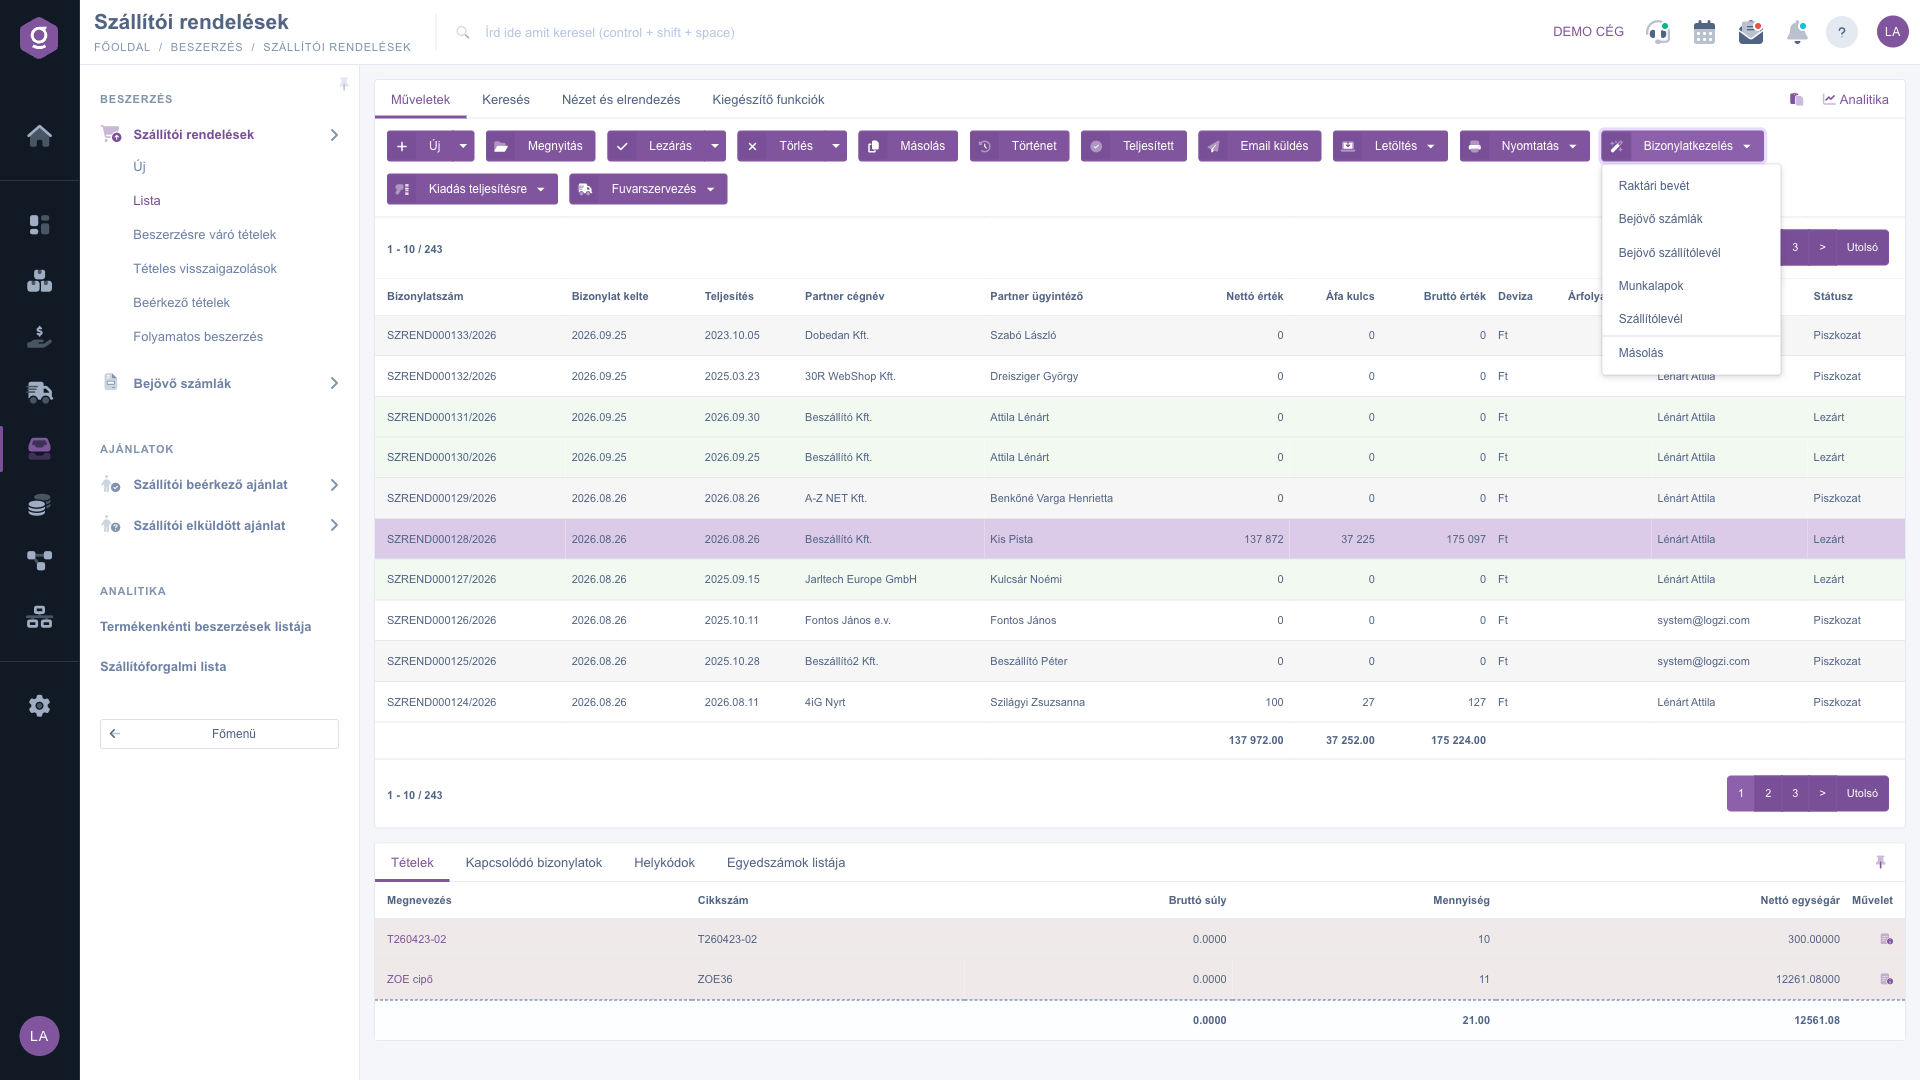
Document management menu (Bizonylatkezelés)
4. Handing over to the supplier
The Issue for fulfillment menu has two items, both available for a closed (or higher status) order:
- Transfer between Logzi systems: if your supplier is also a Logzi user and an APP ID belongs to the partner, the order can be sent to the supplier Logzi system, where it appears as a customer order. The system matches the products by item number; if an item number is not found at the supplier, you get an error message. The same question appears when you close an order: Igen (Yes) sends the order, Igen, lezárással (Yes, with closing) sends it and also closes it on the receiving side, Nem (No) sends nothing. The label Igen, lezárással is shown in Hungarian in every language.
- Fulfillment handover: opens a window where you confirm by saving that the order is handed over to a fulfillment provider.
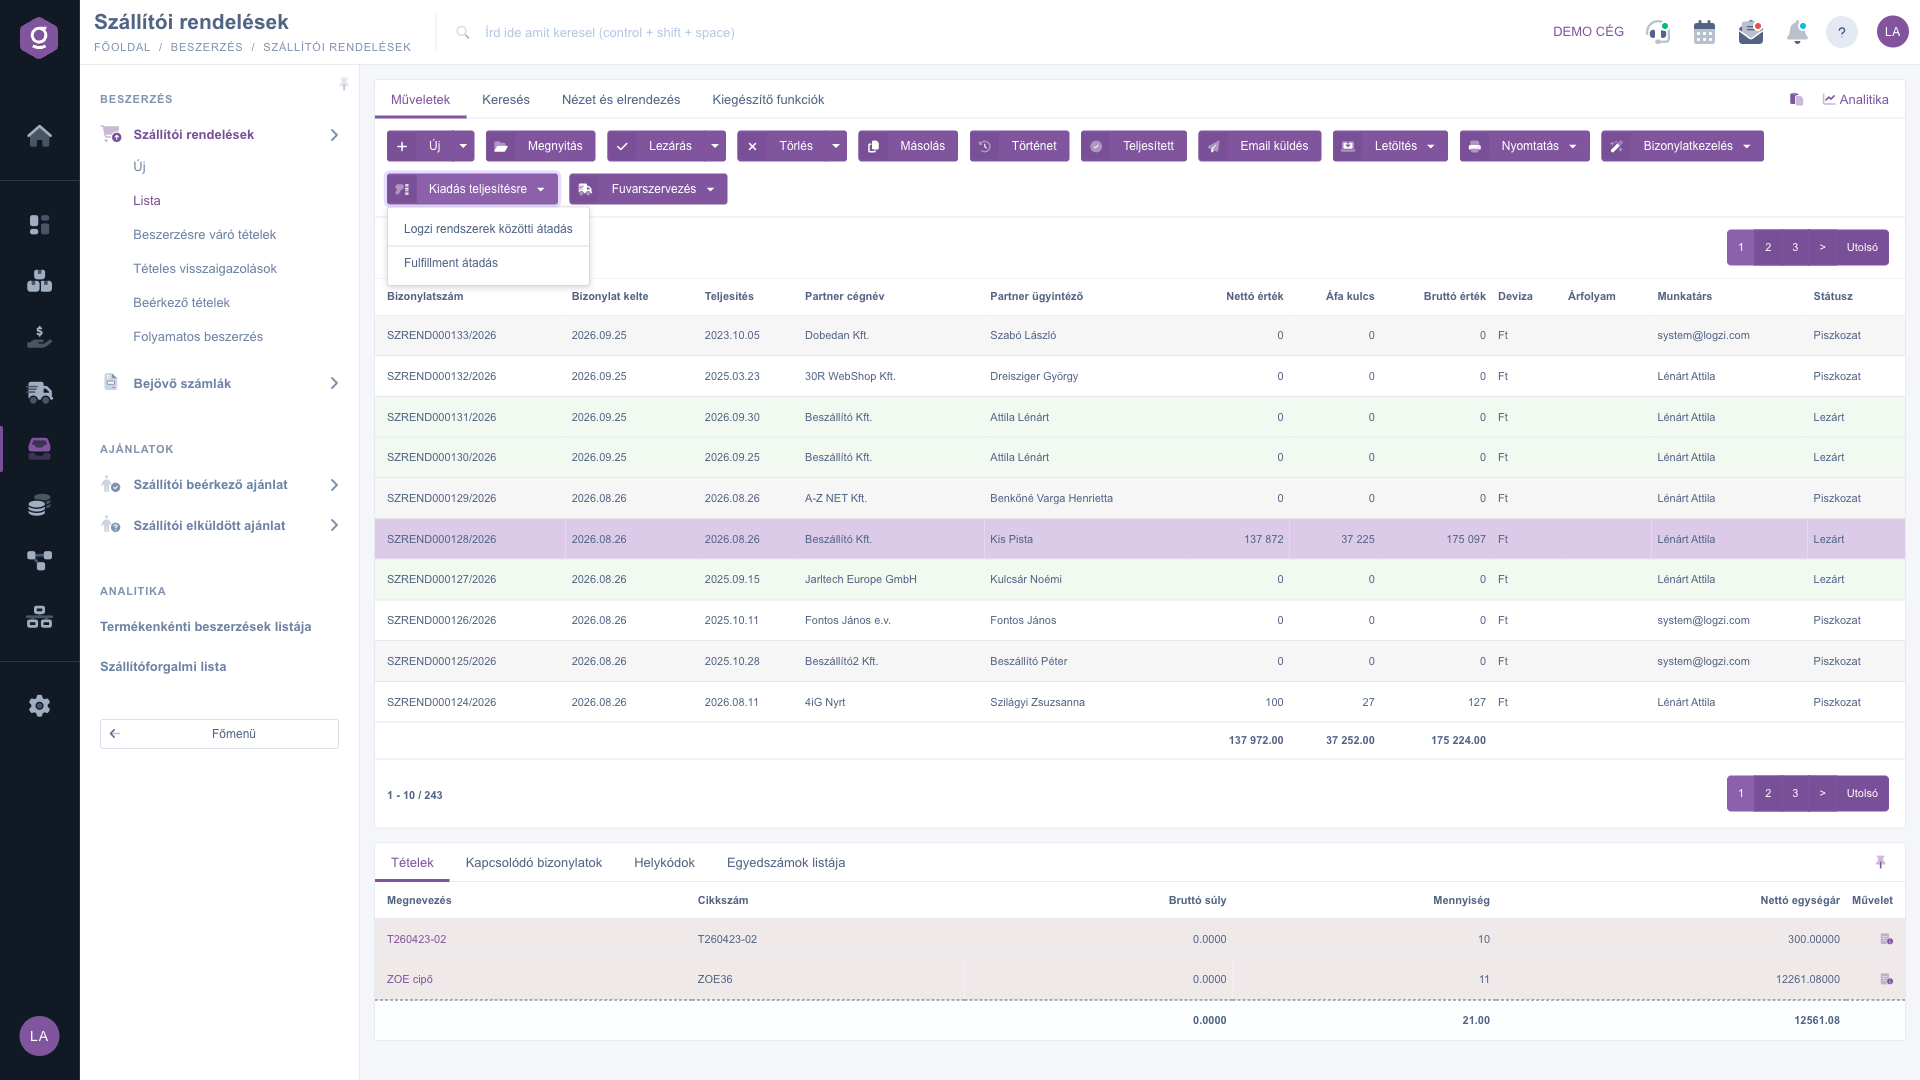
Issue for fulfillment menu (Kiadás teljesítésre)
5. Search and filtering
On the Search tab, fill in the filter fields and refresh the list with the Search button. The Expand button opens further filter fields. Next to the search there are two icons: the save icon saves the current search (after that the list is always loaded according to the saved filter), and the delete icon deletes the saved search and restores the full list. The filters are described in the Field descriptions section.
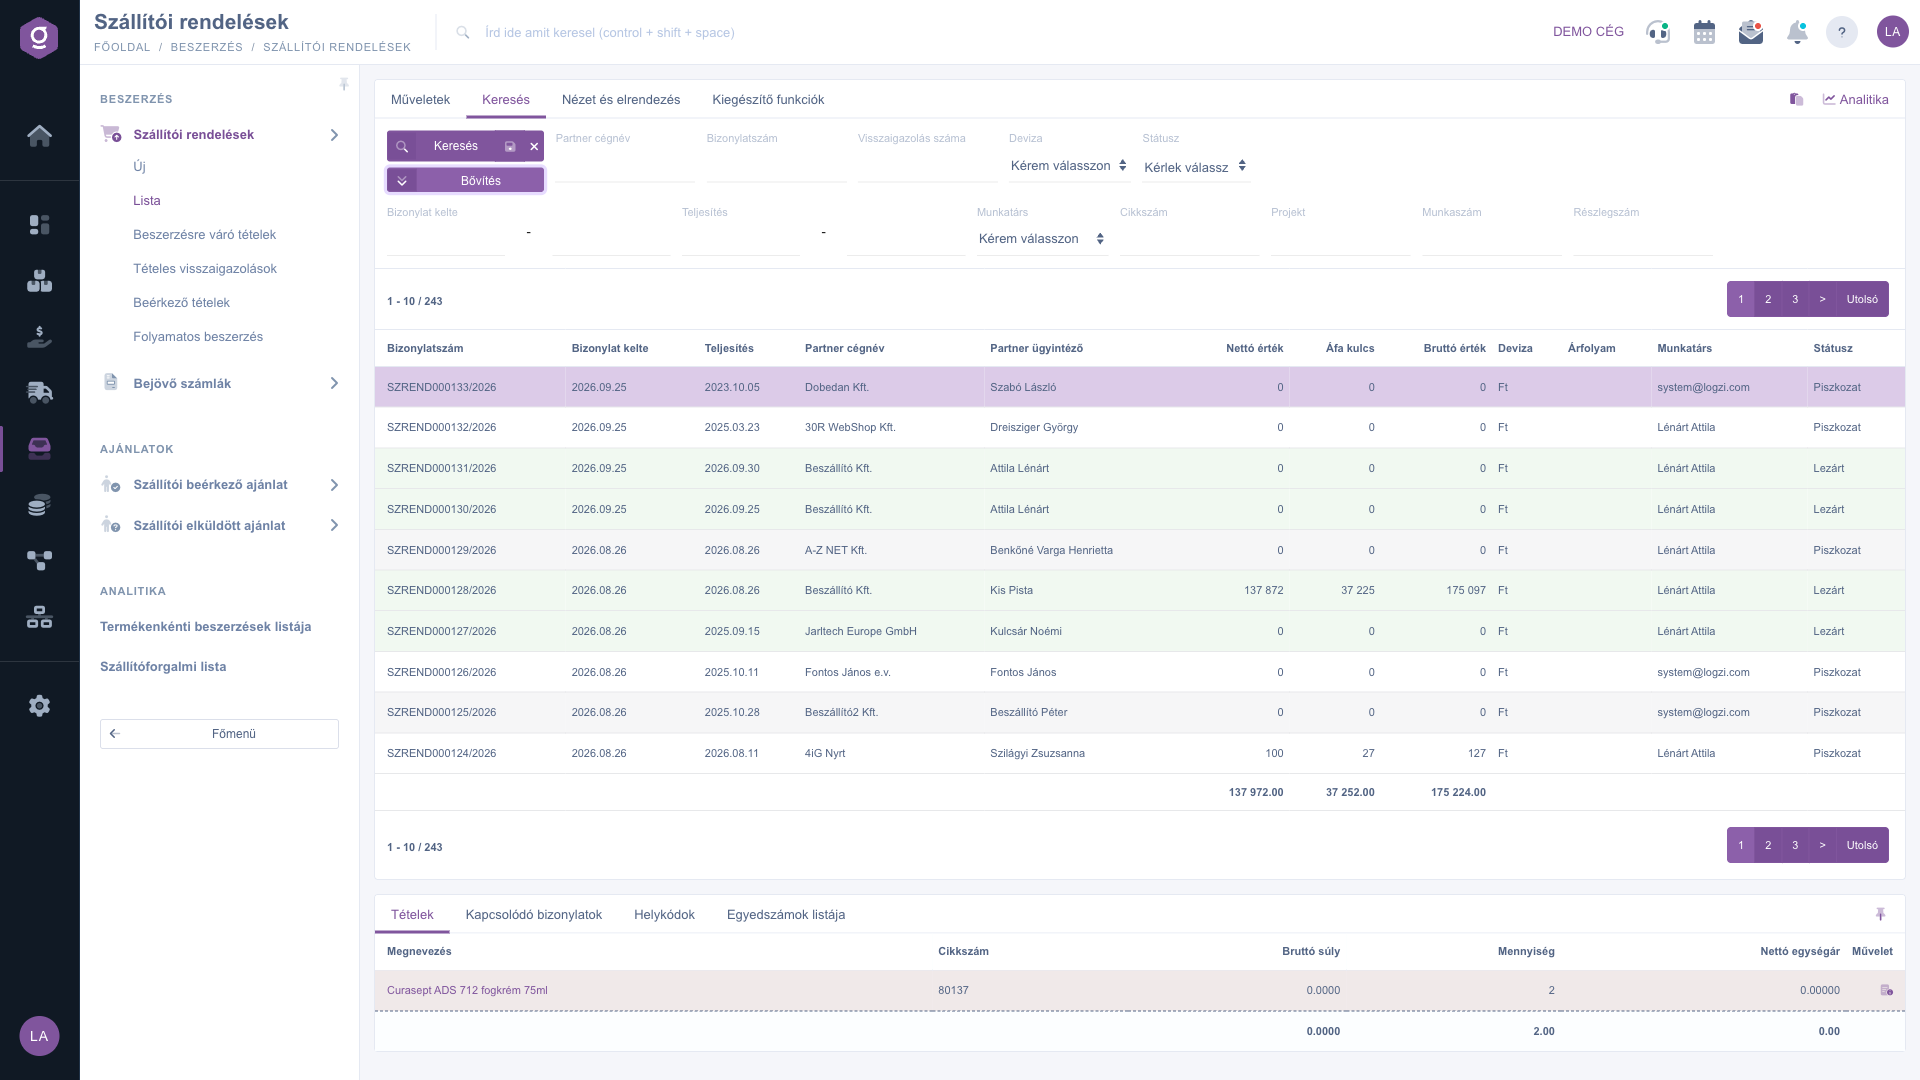
Search tab and Expand (Keresés, Bővítés)
6. Customizing the view
On the View and layout tab you can set the appearance of the list: the Oszlopok (Columns) button sets the displayed columns, the Sorok (Rows) button the number of rows per page, the Sorting button the sorting, the Preview window button the panel below the list, and the Interface and behavior button the behavior of the list. The labels Oszlopok and Sorok are shown in Hungarian in every language. These settings are saved for your user.
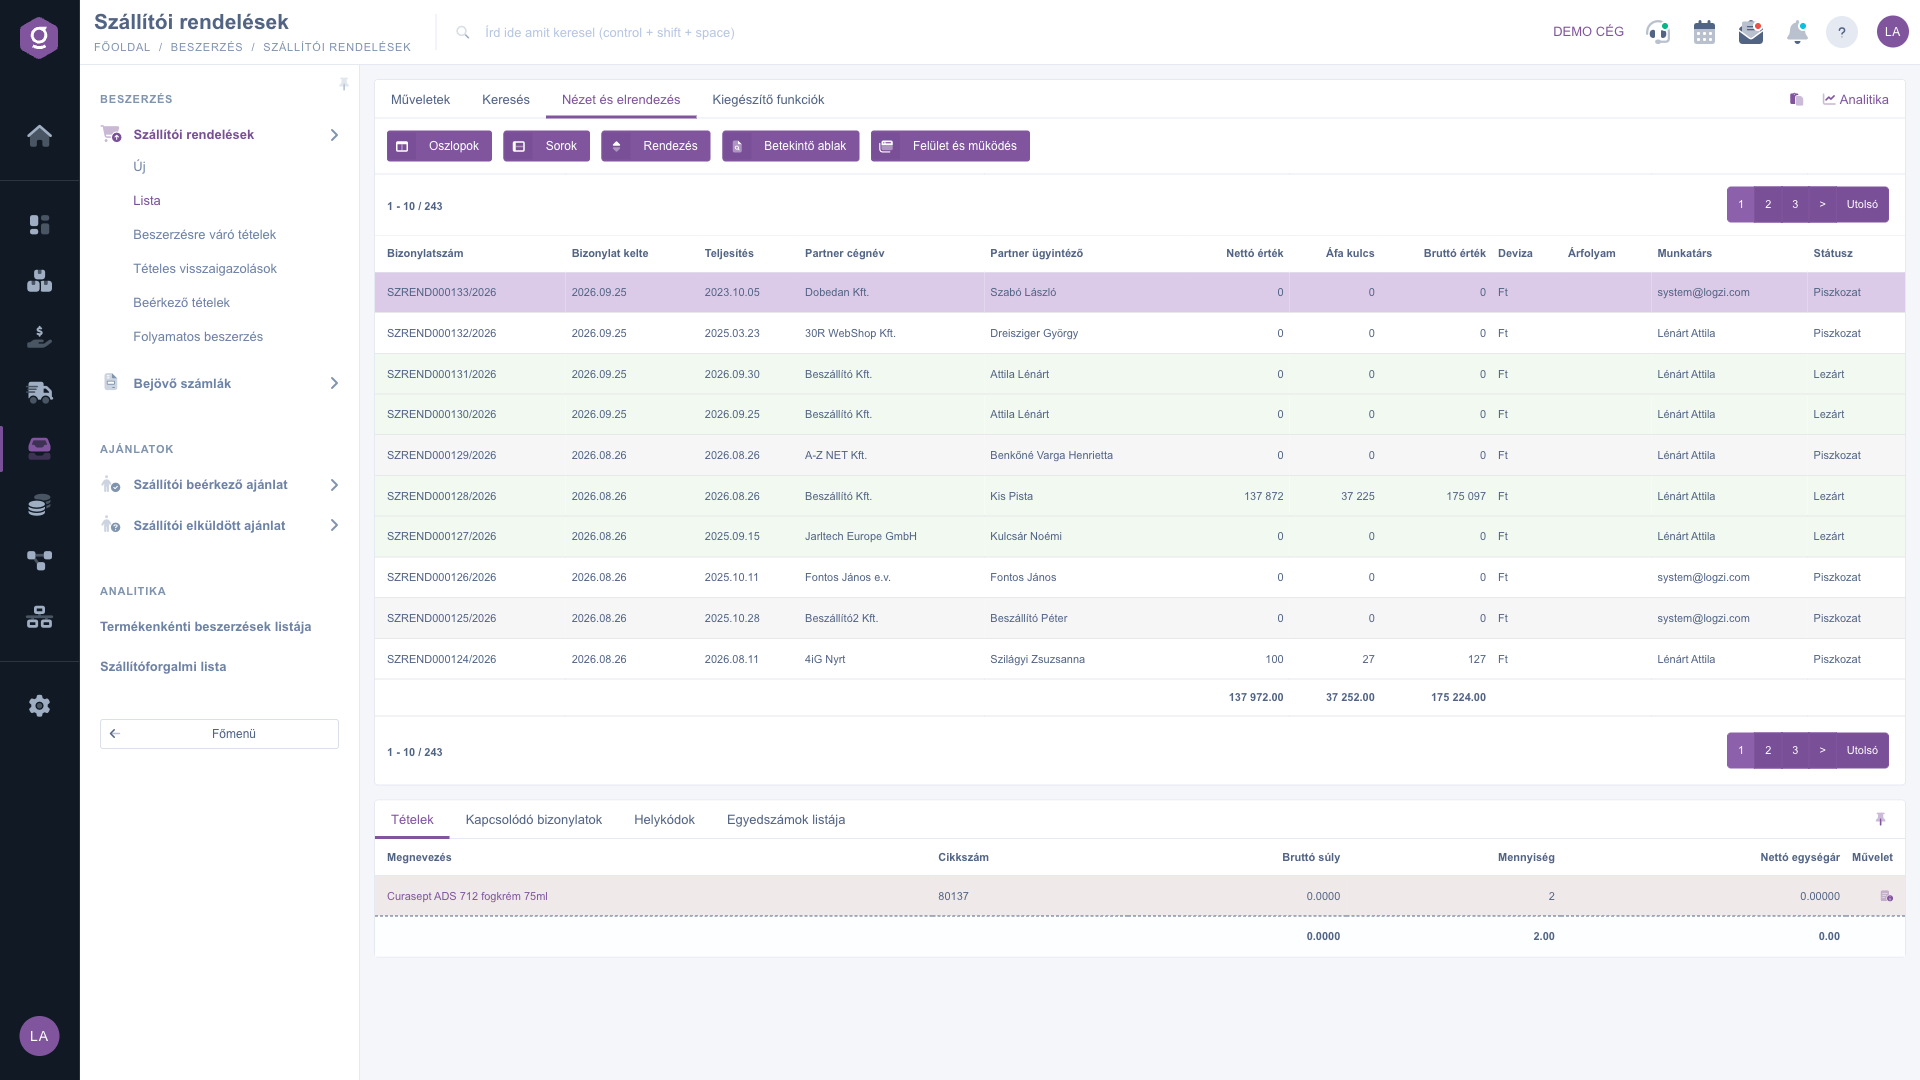
View and layout tab (Nézet és elrendezés)
7. Preview window and Additional functions
The Preview window below the list shows the Items tab of the selected order (depending on the settings, the Related documents, Location codes and List of serial numbers tabs may also appear); with the pin icon you can pin or release the height of the panel. On the Additional functions tab you find the following:
- Sent items: viewing the emails sent for the order.
- New email: opens the External mail client or the Internal mail client for a new email.
- New task: creates a task for the order.
- Partner card: the data sheet of the partner of the order.
- Confirmation: opens a window with a single date field in which you can enter the date of the supplier confirmation. Save records the date on all items of the order and also sets the Performance date of the order to it; Close closes the window without saving. The label of the field in the interface is Payment status date. It is available for an order in Closed or a higher status.
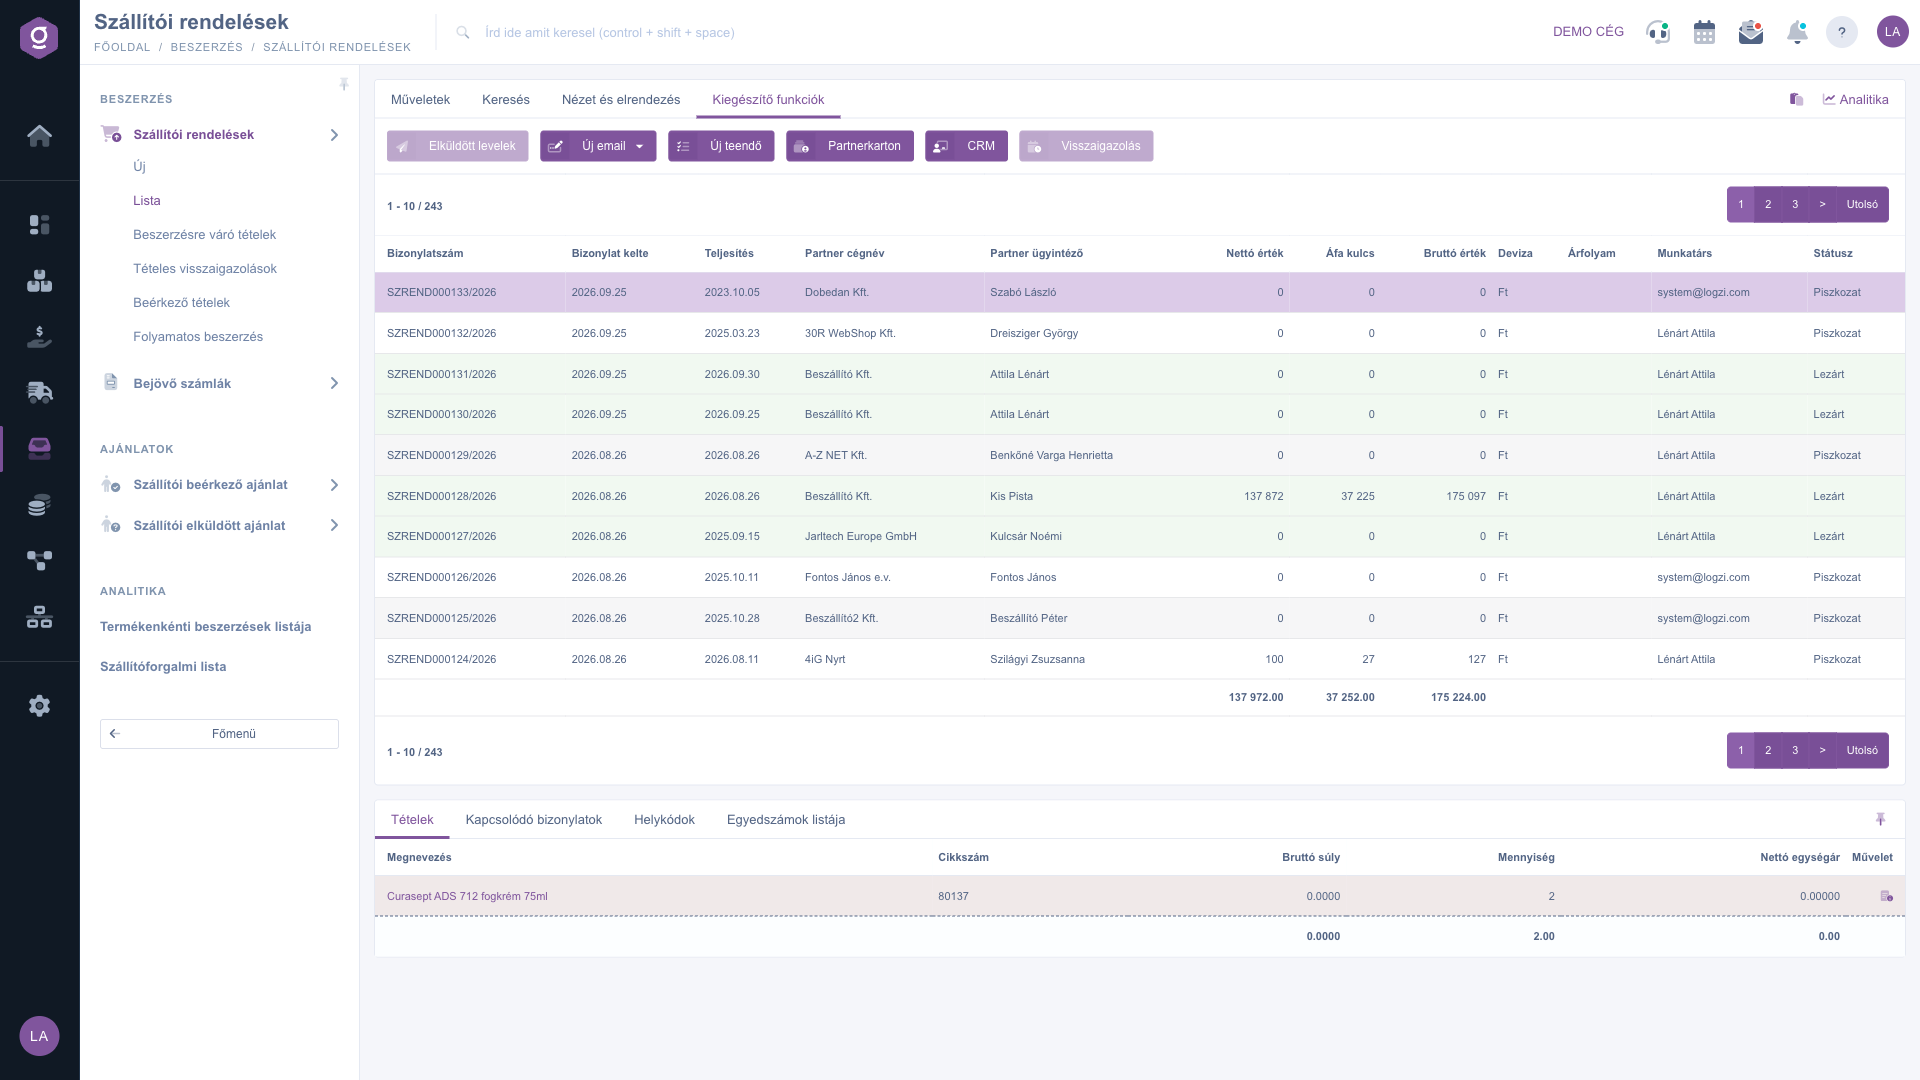
Additional functions tab (Kiegészítő funkciók)
Tip
If you regularly look at the same orders (for example only the Draft ones), set the filters and save the search with the save icon: the list will then always load with this filter. The Expand button hides the less frequently used filters.



